Are you looking to create high-quality audio recordings? Whether you’re a musician, podcaster, or simply looking to capture clear audio for personal use, there are several key tips to keep in mind. In this article, we’ll provide you with 10 expert tips for achieving high-quality audio recordings. From selecting the right equipment to optimizing your recording environment, we’ll cover everything you need to know to make your audio recordings sound their best. So, whether you’re a seasoned pro or just starting out, read on for tips and tricks to take your audio recordings to the next level.
Setting Up Your Recording Environment
1. Choose a quiet location
Choosing the right location for your recording is crucial to achieving high-quality audio. The first step is to identify the best room in your space. This is the room that has the least amount of outside noise and is free from any distractions. It is also important to consider the layout of the room and the placement of any furniture or equipment.
Once you have identified the best room, the next step is to determine the best placement for your equipment. This is important because the placement of your equipment can greatly affect the quality of your recording. For example, if you are using a microphone, you will want to place it in a location where it will pick up the most accurate sound. This may mean moving the microphone around the room until you find the sweet spot.
It is also important to consider the type of equipment you are using. If you are using a digital audio workstation (DAW), you will want to make sure that your computer is in a location where it will not be affected by any outside noise. Additionally, you will want to make sure that your computer is connected to your recording equipment properly.
In conclusion, choosing a quiet location is crucial to achieving high-quality audio recordings. It is important to identify the best room in your space and determine the best placement for your equipment. Additionally, the type of equipment you are using should be taken into consideration when choosing a location for your recording.
2. Minimize background noise
Reducing background noise is crucial for achieving high-quality audio recordings. Here are some tips to help you minimize background noise:
- Turn off appliances and electronic devices: Before you start recording, turn off any appliances or electronic devices that may be producing noise. This includes things like air conditioners, refrigerators, and computer fans.
- Use noise-canceling headphones: If you’re recording in a noisy environment, consider using noise-canceling headphones. These headphones use microphones to pick up ambient noise and then emit a sound wave that cancels out the noise, leaving you with a quieter recording environment.
- Record in a quiet room: If possible, record in a quiet room with minimal outside noise. This could be a closet, a room with soundproofing materials, or even a room with thick carpeting that can help absorb sound.
- Avoid recording during peak noise hours: If you’re recording during the day, try to avoid recording during peak noise hours, such as during rush hour traffic or when construction is taking place.
- Use a foam windscreen for your microphone: A foam windscreen can help reduce wind noise and pop sounds when recording outdoors or in a noisy environment.
By following these tips, you can help minimize background noise and create high-quality audio recordings.
3. Use acoustic panels or soundproofing materials
When it comes to recording high-quality audio, one of the most important factors is controlling the acoustics of your recording environment. One of the best ways to do this is by using acoustic panels or soundproofing materials. Here are some tips for using these materials to improve the quality of your recordings:
- Cover windows and doors: Windows and doors are two of the biggest sources of noise in a room. By covering them with blankets or other soft materials, you can help to reduce the amount of sound that enters the room.
- Use acoustic panels or foam to absorb sound: Acoustic panels and foam are designed to absorb sound waves, which can help to reduce echo and reverberation in the room. These materials can be placed on walls, ceilings, and floors to help improve the overall acoustics of the room.
When using acoustic panels or soundproofing materials, it’s important to remember that not all materials are created equal. Some materials may be more effective at absorbing sound than others, so it’s important to do your research and choose the right materials for your recording environment. Additionally, it’s important to place the materials in the right locations to maximize their effectiveness. With the right materials and placement, you can greatly improve the quality of your audio recordings.
Selecting and Using Equipment
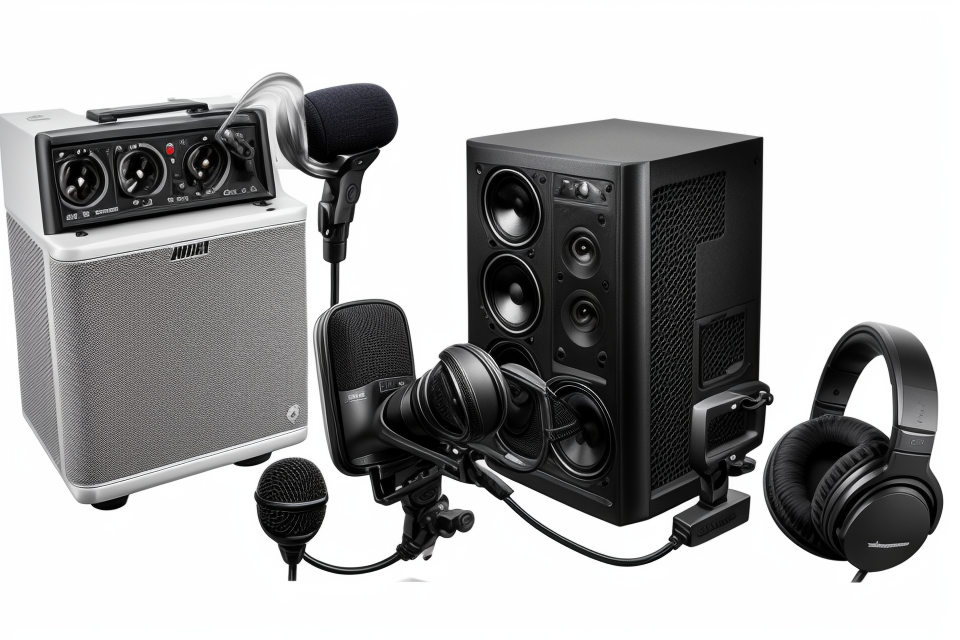
4. Invest in quality equipment
Investing in quality equipment is essential for achieving high-quality audio recordings. Here are some factors to consider when selecting the right equipment:
- Microphone: The microphone is one of the most critical components of your recording setup. It is essential to choose a microphone that suits your needs and budget. Consider the type of microphone, such as a dynamic or condenser microphone, and the features it offers, such as a built-in preamp or frequency response.
- Audio interface: An audio interface is a device that connects your microphone or other audio sources to your computer. It is crucial to choose an audio interface that has a high-quality preamp, low latency, and a high sampling rate.
- Recording software: Recording software is used to capture and edit your audio recordings. Choose software that offers features such as multitrack recording, editing tools, and effects.
By investing in quality equipment, you can ensure that your audio recordings are of the highest quality and meet your specific needs.
5. Understand the basics of microphone selection
Choosing the right microphone is crucial to achieving high-quality audio recordings. To make an informed decision, it is important to understand the basics of microphone selection. Here are some factors to consider when selecting a microphone:
- Recording environment: The type of microphone you choose should be suitable for your recording environment. For example, if you are recording in a noisy environment, you may want to choose a microphone with a higher noise level.
- Polar patterns: Polar patterns determine the directionality of the microphone. There are three main polar patterns: omnidirectional, unidirectional, and bidirectional. Omnidirectional microphones capture sound from all directions, while unidirectional and bidirectional microphones are more directional.
- Sensitivity: Sensitivity refers to the microphone’s ability to convert sound into electrical signals. A higher sensitivity microphone will pick up quieter sounds, but may also be more prone to picking up background noise.
- Frequency response: Frequency response refers to the range of frequencies that the microphone can pick up. Some microphones are better suited for specific frequency ranges, so it is important to choose a microphone that is appropriate for your recording environment.
By considering these factors, you can select a microphone that is well-suited for your recording needs and achieve high-quality audio recordings.
6. Learn how to use your equipment properly
Proper usage of your audio equipment is crucial in achieving high-quality audio recordings. Here are some tips to help you learn how to use your equipment properly:
- Familiarize yourself with the settings and controls: Take the time to study the manual of your equipment and learn about the different settings and controls. Familiarize yourself with the layout and the purpose of each control. This will help you to make informed decisions when it comes to adjusting the settings for optimal sound quality.
- Experiment with different settings to find the best sound quality: Once you have familiarized yourself with the settings and controls, experiment with different configurations to find the best sound quality. This may involve adjusting the gain, equalization, compression, and other settings to achieve the desired results. Take note of the settings you use and make adjustments as needed for future recordings.
By taking the time to learn how to use your equipment properly, you can ensure that you are getting the most out of your audio recordings and achieving high-quality sound.
Recording Techniques
7. Monitor your audio levels
Monitoring your audio levels is a crucial step in achieving high-quality audio recordings. During the recording process, it is important to constantly check the volume levels to ensure that they are not too loud or too soft. This can help prevent distortion or clipping, which can negatively affect the overall quality of the recording.
Here are some tips for monitoring your audio levels:
- Use a audio meter or waveform display to visually monitor the volume levels.
- Listen to the recording through good quality speakers or headphones to get an accurate representation of the sound.
- Avoid recording at a volume that is too high, as this can cause distortion and make it difficult to adjust the levels later.
- Make sure to adjust the levels as needed during the recording process to ensure that the volume is consistent throughout the recording.
By following these tips, you can help ensure that your audio recordings are of the highest quality possible.
8. Use compression and EQ to enhance your sound
When it comes to recording high-quality audio, compression and EQ are two powerful tools that can greatly enhance the sound of your recordings. Here’s how you can use them effectively:
Apply compression to even out volume levels
Compression is a process that reduces the dynamic range of an audio signal, making loud sounds quieter and quiet sounds louder. This can be useful for a number of reasons. For example, if you have a recording with a lot of variations in volume, compression can help to even out the levels and make the audio sound more consistent.
There are different types of compression, but the most common are dynamic compression and optical compression. Dynamic compression works by measuring the volume of the audio signal and then adjusting it to a consistent level. Optical compression, on the other hand, uses a light-sensitive cell to measure the volume of the audio signal and then adjusts it accordingly.
It’s important to use compression carefully, as too much compression can result in a “squashed” or unnatural sounding audio signal. When using compression, it’s important to listen to the audio signal and adjust the settings until you achieve the desired result.
Use EQ to enhance or cut specific frequencies
EQ, or equalization, is a process that allows you to enhance or cut specific frequencies in an audio signal. This can be useful for a number of reasons. For example, if you have a recording that is too bass-heavy, you can use EQ to cut the low frequencies and make the audio sound more balanced. Conversely, if you have a recording that is lacking in the low-end, you can use EQ to enhance the bass frequencies and make the audio sound fuller.
There are different types of EQ, but the most common are parametric EQ, graphic EQ, and semi-parametric EQ. Parametric EQ allows you to adjust the frequency, gain, and Q of the audio signal, while graphic EQ provides a visual representation of the frequency response and allows you to adjust the frequency, gain, and Q of the audio signal. Semi-parametric EQ is similar to parametric EQ, but with fewer controls.
When using EQ, it’s important to listen to the audio signal and adjust the settings until you achieve the desired result. It’s also important to use EQ sparingly, as too much EQ can result in an unnatural or “hyped” sounding audio signal.
9. Experiment with different microphone techniques
When it comes to achieving high-quality audio recordings, experimenting with different microphone techniques is a must. By trying out different microphone positions and distances, as well as experimenting with stereo recording techniques, you can unlock new levels of sonic depth and clarity.
Try different microphone positions and distances
One of the most important factors in achieving high-quality audio recordings is selecting the right microphone position and distance. The position of the microphone in relation to the sound source can have a significant impact on the final sound. For example, placing a microphone too close to a sound source can result in a boomy, unnatural sound, while placing it too far away can result in a thin, lackluster sound.
To find the ideal microphone position and distance, start by moving the microphone around and listening to the sound. You may find that the sweet spot is just a few inches away from the sound source, or you may need to place the microphone several feet away to achieve the desired sound. Experiment with different distances until you find the optimal position for the sound you’re trying to capture.
Experiment with stereo recording techniques
Another technique to try is stereo recording. Stereo recording involves capturing sound from multiple microphones placed at different positions, and then mixing the recordings together to create a more immersive sound. This technique can be especially useful for capturing the sound of live performances or recording musical ensembles.
There are many different stereo recording techniques to try, from simple X-Y stereo recording to more complex multi-track recording setups. Experiment with different techniques to find the one that works best for your needs.
In conclusion, experimenting with different microphone techniques is an essential part of achieving high-quality audio recordings. By trying out different microphone positions and distances, as well as experimenting with stereo recording techniques, you can unlock new levels of sonic depth and clarity.
10. Pay attention to post-production editing
Importance of Post-Production Editing
Post-production editing is a crucial step in the audio recording process. It involves reviewing and manipulating the recorded audio to enhance its quality and make it ready for release. By paying attention to post-production editing, you can remove unwanted noise or sounds, adjust levels and EQ, and create a polished final product that will impress your listeners.
Tips for Effective Post-Production Editing
- Remove unwanted noise or sounds: During post-production editing, you should review the recorded audio and remove any unwanted noise or sounds that may have been captured. This could include hissing, popping, or humming sounds, as well as any unwanted background noise. To remove these sounds, you can use audio editing software to isolate and remove the offending noise.
- Adjust levels and EQ: In addition to removing unwanted noise, post-production editing also involves adjusting the levels and EQ of the recorded audio. This helps to create a more balanced and polished final product. When adjusting levels, you should ensure that all elements of the audio are at the appropriate volume. EQ adjustments can help to enhance certain frequencies and remove others, resulting in a more balanced overall sound.
- Use compression: Compression is another technique that can be used during post-production editing. It involves reducing the dynamic range of the audio, which can help to create a more consistent volume level. Compression can also help to remove unwanted noise and improve the overall clarity of the audio.
- Add effects: Finally, post-production editing can also involve adding effects to the recorded audio. This could include reverb, delay, or other effects that can help to enhance the overall sound of the audio. However, it’s important to use effects sparingly and only when appropriate, as too many effects can detract from the quality of the audio.
By following these tips, you can pay attention to post-production editing and achieve high-quality audio recordings that will impress your listeners.
FAQs
1. What are the essential components for a good audio recording?
A good audio recording requires a clear and concise message, high-quality audio equipment, and a well-designed acoustic environment. To ensure a clear message, it is important to have a clear understanding of the intended audience and purpose of the recording. High-quality audio equipment includes a good microphone, audio interface, and recording software. A well-designed acoustic environment can be achieved by using soundproofing materials, acoustic panels, and proper placement of the recording equipment.
2. How can I improve the sound quality of my audio recordings?
Improving the sound quality of your audio recordings involves using high-quality audio equipment, proper placement of the microphone, and optimizing the acoustic environment. High-quality audio equipment such as a good microphone, audio interface, and recording software can significantly improve the sound quality of your recordings. Proper placement of the microphone can capture the best sound quality, and optimizing the acoustic environment can reduce unwanted noise and reverberation.
3. What is the best microphone for recording audio?
The best microphone for recording audio depends on the type of recording you are doing and the intended use of the recording. For example, a condenser microphone is best for recording vocals, while a dynamic microphone is best for recording instruments. A USB microphone is a good option for those who are just starting out, as it is easy to use and requires no external equipment. However, for more professional recordings, a high-quality condenser microphone or a combination of microphones may be necessary.
4. How can I reduce background noise in my audio recordings?
Reducing background noise in your audio recordings involves optimizing the acoustic environment and using high-quality audio equipment. Proper placement of the microphone can help to reduce background noise, and soundproofing materials can be used to minimize unwanted noise from outside sources. High-quality audio equipment such as a good microphone and audio interface can also help to reduce background noise by capturing clear and crisp audio.
5. What is the best software for recording audio?
The best software for recording audio depends on your personal preferences and the type of recording you are doing. Some popular options include Audacity, GarageBand, and Pro Tools. These software programs offer a range of features, including editing, mixing, and mastering. It is important to choose software that is compatible with your audio equipment and meets your specific needs.
6. How can I improve the clarity of my audio recordings?
Improving the clarity of your audio recordings involves using high-quality audio equipment, proper placement of the microphone, and optimizing the acoustic environment. High-quality audio equipment such as a good microphone and audio interface can help to capture clear and crisp audio. Proper placement of the microphone can ensure that the intended sound source is captured clearly, and optimizing the acoustic environment can reduce unwanted noise and reverberation.
7. What is the best way to edit my audio recordings?
The best way to edit your audio recordings depends on your personal preferences and the type of recording you are doing. Some popular options include Audacity, GarageBand, and Pro Tools. These software programs offer a range of features, including cutting, copying, pasting, and fading. It is important to choose software that is compatible with your audio equipment and meets your specific needs.
8. How can I improve the volume of my audio recordings?
Improving the volume of your audio recordings involves using high-quality audio equipment and optimizing the acoustic environment. High-quality audio equipment such as a good microphone and audio interface can help to capture clear and crisp audio. Optimizing the acoustic environment can also help to reduce unwanted noise and reverberation, which can improve the overall volume of your recordings.
9. What is the best way to mix my audio recordings?
The best way to mix your audio recordings depends on your personal preferences and the type of recording you are doing. Some popular options include Audacity, GarageBand, and Pro Tools. These software programs offer a range of features, including adjusting levels, panning, and


