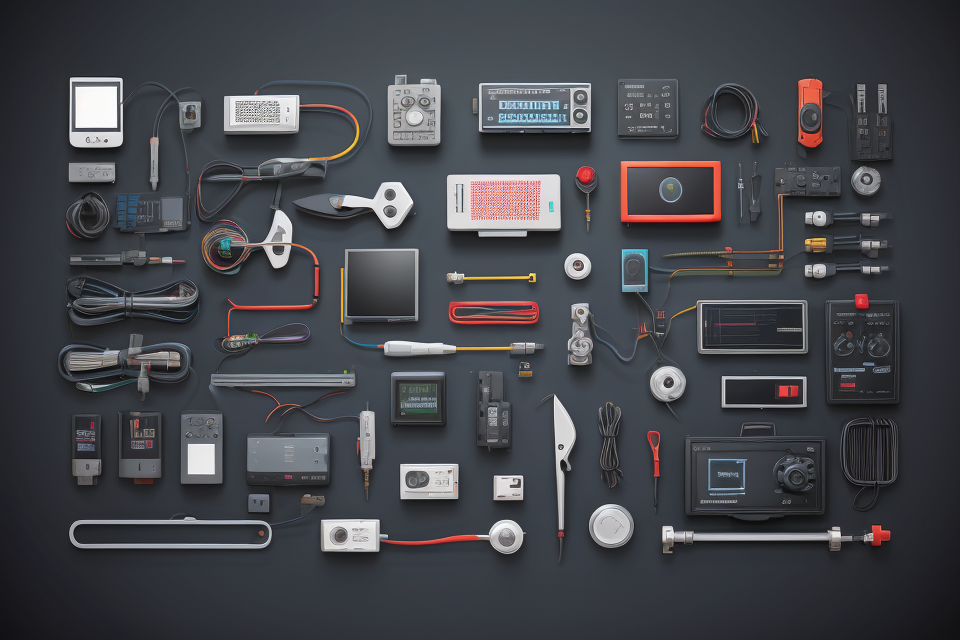
DIY electronics, short for “do-it-yourself” electronics, refers to the practice of building electronic devices or circuits from scratch, without the aid of a professional or manufacturer. This hobby has gained immense popularity in recent years, as technology has become more accessible and affordable. From simple LED blinkers to complex robots, the possibilities are endless for those with a passion for electronics. However, it’s important to note that DIY electronics requires a certain level of technical knowledge and skills, as well as a willingness to experiment and troubleshoot. In this article, we’ll dive into the world of DIY electronics and explore what you need to know to get started. Whether you’re a seasoned electronics enthusiast or a beginner just starting out, read on to discover the joys and challenges of building your own electronic creations.
What is DIY Electronics?
Definition and Explanation
DIY electronics, or “do-it-yourself” electronics, refers to the practice of building electronic devices or circuits from scratch, using a combination of off-the-shelf components and homemade parts. This hobby has gained popularity in recent years due to the rise of affordable technology and the availability of online resources for learning.
In essence, DIY electronics allows individuals to tinker with electronics and create their own projects from the ground up. This can range from simple LED blinkers to complex robots or even home automation systems. By doing so, enthusiasts can gain a deeper understanding of how electronics work and develop valuable skills in engineering, programming, and problem-solving.
The beauty of DIY electronics is that it is accessible to people of all skill levels, from beginners to experienced engineers. There are numerous online forums, blogs, and YouTube channels dedicated to providing tutorials, project ideas, and advice for those just starting out. Additionally, many stores offer kits and pre-made components specifically designed for DIY electronics, making it easier for novices to get started.
Overall, DIY electronics is a fun and engaging hobby that allows individuals to experiment with electronics, learn new skills, and create unique projects that they can showcase or even use in their daily lives.
Types of DIY Electronics Projects
There are countless types of DIY electronics projects that hobbyists and enthusiasts can explore. From simple projects like building a battery-powered LED circuit to more complex projects like designing and building a radio from scratch, the possibilities are endless. Here are some of the most popular types of DIY electronics projects:
- Arduino Projects: Arduino is an open-source electronics platform that is widely used by hobbyists and professionals alike. It consists of both a hardware and software component, and is ideal for building a wide range of projects, from simple LED blinkers to more complex robots and automation systems.
- Raspberry Pi Projects: Raspberry Pi is a single-board computer that can be used for a variety of DIY electronics projects. It is ideal for building home automation systems, media centers, and even robotic projects. Raspberry Pi is also widely used in education and is a great way to learn programming and electronics.
- Robotics Projects: Robotics is a popular area of DIY electronics, and there are many different types of robots that can be built, from line-following robots to autonomous drones. Robotics projects often involve using sensors, motors, and other electronic components to create a functional robot that can perform various tasks.
- Solar Projects: Solar projects involve using solar panels to power electronic devices and circuits. These projects can range from simple solar-powered LED circuits to more complex systems like solar-powered homes and businesses.
- Radio Projects: Building a radio from scratch is a popular DIY electronics project that involves designing and building a radio receiver from scratch. This project typically involves using a kit or schematic to build the radio, and may also involve designing and building a telescopic antenna.
- Clock Projects: Clock projects are a popular type of DIY electronics project that involve building a clock using various electronic components. These projects can range from simple LED clocks to more complex digital clocks that display the time in different formats.
- LED Projects: LED projects involve building circuits that use light-emitting diodes (LEDs) to produce light. These projects can range from simple LED blinkers to more complex circuits that use multiple LEDs to create patterns and designs.
Overall, the world of DIY electronics is vast and diverse, and there are countless types of projects that hobbyists and enthusiasts can explore. Whether you are interested in building robots, designing radio receivers, or simply experimenting with LEDs, there is something for everyone in the world of DIY electronics.
Why DIY Electronics?
Benefits of DIY Electronics
- Personalized learning experience
- Gain hands-on experience
- Learn at your own pace
- Enhance problem-solving skills
- Cost-effective
- Save money on equipment and materials
- Utilize second-hand components
- Reuse old electronics
- Flexibility and creativity
- Design and build your own projects
- Customize existing designs
- Experiment with different ideas
- Community and support
- Access to online forums and communities
- Share knowledge and resources
- Collaborate with other DIY enthusiasts
- Career advancement
- Gain skills and knowledge for future employment
- Showcase your projects and skills to potential employers
- Develop entrepreneurial skills by selling your creations
Cost Savings
When it comes to building electronic projects, the cost of materials can quickly add up. However, by taking on DIY electronics, you can save a significant amount of money.
Here are some of the ways that DIY electronics can help you save money:
- Buying in bulk: When you purchase electronic components in bulk, you can often get a lower price per unit. This is especially true for common components like resistors, capacitors, and ICs.
- Avoiding markups: When you buy electronic components from a retail store, you are often paying for the store’s overhead costs, such as rent, utilities, and employee salaries. By buying directly from a supplier or online, you can avoid these markups and get a better price.
- Reusing components: If you have an existing project that uses a particular component, you can often reuse that component in future projects, saving you the cost of buying a new one.
- Using free or low-cost software: There are many free or low-cost software tools available for designing and simulating electronic circuits, such as Eagle, LTSpice, and Multisim. These tools can save you a significant amount of money compared to paid software like Altium Designer or CircuitMaker.
Overall, by taking on DIY electronics, you can save a significant amount of money on materials and equipment, making it a great option for hobbyists, students, and professionals alike.
Personal Satisfaction
- Gaining a sense of accomplishment through creation
- Learning new skills and expanding knowledge
- Tailoring electronic devices to personal preferences and needs
- Building problem-solving and critical thinking abilities
- Engaging in a hands-on hobby that fosters creativity and innovation
- Developing a deeper understanding of the technology behind everyday devices
- Saving money by creating your own electronics instead of purchasing pre-made ones
- Joining a community of like-minded individuals who share a passion for DIY electronics
- Potential career opportunities in engineering, product design, or entrepreneurship
Tools and Equipment for DIY Electronics
Essential Tools for Beginners
To begin your journey into the world of DIY electronics, there are a few essential tools that you will need. These tools will not only help you build your projects, but they will also help you measure and test different components.
Multimeter
A multimeter is a handheld device that is used to measure different electrical values, such as voltage, current, and resistance. It is an essential tool for any electronics hobbyist or professional. With a multimeter, you can test the continuity of a circuit, check the voltage of a battery, or measure the resistance of a component.
Breadboard
A breadboard is a device that allows you to build and test electronic circuits without the need for soldering. It is a great tool for prototyping and experimenting with different designs. A breadboard consists of a grid of interconnected metal points that allow you to connect components together using jumper wires.
Jumper Wires
Jumper wires are used to connect components together on a breadboard. They come in a variety of colors and sizes, and they are essential for building and testing electronic circuits. Jumper wires allow you to create temporary connections between components, making it easy to prototype and test different designs.
Soldering Iron and Solder
While a breadboard is a great tool for prototyping, at some point, you will need to start soldering components together. A soldering iron and solder are essential for this process. A soldering iron is a tool that heats up metal components, allowing you to melt solder and connect them together. Solder is a metal alloy that melts at a low temperature, allowing you to connect components together permanently.
These are just a few of the essential tools that you will need to get started with DIY electronics. With these tools, you can start building and testing your own electronic projects, opening up a whole new world of creativity and innovation.
Advanced Equipment for Advanced Projects
As you progress in your DIY electronics journey, you may find yourself drawn to more complex projects that require advanced equipment. While some of the basic tools and equipment needed for DIY electronics are relatively inexpensive, more advanced equipment can be expensive and may require a significant investment. Here are some examples of advanced equipment that you may need for more complex projects:
Digital Calipers
Digital calipers are precision measuring tools that are essential for precise measurements. They are particularly useful when working with small components or when measuring distances between two points. Digital calipers provide accurate measurements in a variety of units, including millimeters, inches, and fractions.
Multimeters
Multimeters are another essential tool for DIY electronics. They are used to measure electrical current, voltage, and resistance. Multimeters are particularly useful when troubleshooting circuits or when checking the performance of electronic components. There are many different types of multimeters available, including auto-ranging multimeters, digital multimeters, and analog multimeters.
Soldering Iron/Station
Soldering is an essential skill for any DIY electronics enthusiast. A soldering iron or station is used to melt solder and join electronic components together. There are many different types of soldering irons available, including temperature-controlled soldering irons, pencil-style soldering irons, and hot air soldering irons.
Voltage/Current Power Supply
A voltage or current power supply is used to provide power to electronic circuits. These power supplies are essential for testing and prototyping electronic circuits. They come in a variety of sizes and voltages, and are particularly useful when working with microcontrollers or other electronic components that require a specific voltage.
Digital Oscilloscope
A digital oscilloscope is a powerful tool for analyzing electronic signals. It is particularly useful when troubleshooting circuits or when analyzing the performance of electronic components. Oscilloscopes can display signals in real-time and provide detailed information about the frequency, amplitude, and waveform of electronic signals.
Overall, advanced equipment can greatly enhance your DIY electronics experience and help you to complete more complex projects. However, it is important to carefully consider the cost and value of each piece of equipment before making a purchase.
Safety Precautions in DIY Electronics
Electrical Safety
Electrical safety is a critical aspect of DIY electronics that cannot be overlooked. When working with electrical components, it is important to take the necessary precautions to avoid electric shock, fires, and other hazards. Here are some essential guidelines to follow:
- Inspect Your Workspace: Before starting any electrical project, make sure your workspace is free from clutter and flammable materials. Ensure that your work area is well-ventilated and has adequate lighting.
- Use the Right Tools: Always use the right tools for the job. Insulated tools such as insulated wrenches, pliers, and screwdrivers are essential when working with electrical components to avoid electric shock.
- Ground Yourself: When working with electrical components, it is important to ground yourself to protect against electric shock. This can be done by touching a grounded object such as a metal frame or a grounded electrical outlet.
- Follow Wiring Guidelines: When wiring your electronics, follow the manufacturer’s guidelines carefully. Ensure that wires are not pinched, twisted, or kinked, and that they are not placed in areas where they may be damaged.
- Avoid Overloading Outlets: Overloading outlets can cause electrical fires and damage to your electronics. Ensure that you do not plug too many devices into one outlet, and use a circuit breaker or fuse to protect your electrical system.
- Test Your Circuit: Before powering up your circuit, test it using a multimeter to ensure that it is functioning correctly. This will help you identify any faults or errors before they become more significant problems.
- Stay Alert: Finally, stay alert and aware of your surroundings when working with electrical components. Be aware of any potential hazards and take the necessary precautions to avoid them.
By following these electrical safety guidelines, you can minimize the risks associated with DIY electronics and create a safe and enjoyable workspace.
Fire Safety
When working with electronics, it is important to take safety precautions to prevent accidents and injuries. One of the most serious risks associated with DIY electronics is the potential for fire. To ensure your safety, it is crucial to understand the fire safety risks and take appropriate measures to prevent them.
One of the main causes of fire in DIY electronics is the use of faulty or poorly designed components. When working with electronic circuits, it is important to use high-quality components from reputable manufacturers. Additionally, it is important to carefully check and test all components before using them in a circuit.
Another cause of fire in DIY electronics is the use of inadequate wiring. When connecting components, it is important to use the correct gauge of wire and to properly insulate all connections. Additionally, it is important to avoid overloading circuits, as this can cause wiring to overheat and potentially ignite.
To prevent fires in your DIY electronics projects, it is also important to have a fire extinguisher on hand. It is recommended to have a multi-purpose extinguisher that is rated for use on electrical fires. Additionally, it is important to have a clear escape plan in case of a fire and to practice it regularly.
In summary, fire safety is a critical aspect of DIY electronics. By using high-quality components, properly insulating wiring, and having a fire extinguisher on hand, you can greatly reduce the risk of fire in your electronics projects. Remember to always be aware of the potential for fire and to take appropriate measures to prevent it.
Chemical Safety
When it comes to DIY electronics, chemical safety is an important aspect that should not be overlooked. Many electronic components and tools require the use of chemicals, and it is essential to handle them safely to avoid any accidents or health hazards. Here are some guidelines to keep in mind when dealing with chemicals in DIY electronics:
- Wear proper protective gear: When working with chemicals, it is important to wear the appropriate protective gear. This includes gloves, goggles, and a lab coat. The type of gear needed will depend on the specific chemical being used.
- Follow instructions carefully: It is important to read and follow the instructions on chemical labels carefully. This includes information on how to handle, store, and dispose of the chemical safely.
- Avoid inhaling fumes: Many chemicals used in DIY electronics can release harmful fumes. It is important to work in a well-ventilated area and avoid inhaling these fumes.
- Dispose of chemicals properly: Once a chemical has been used, it is important to dispose of it properly. This may involve following local regulations or guidelines for hazardous waste disposal.
- Keep chemicals away from food and drink: It is important to keep chemicals away from food and drink to avoid accidental ingestion. This includes storing chemicals in labeled containers and washing hands before eating or drinking.
By following these guidelines, you can ensure that you are handling chemicals safely in your DIY electronics projects.
Popular DIY Electronics Projects
Simple Circuits
Simple circuits are a great way to start exploring the world of DIY electronics. They are easy to build and can be a lot of fun to experiment with. Some popular simple circuit projects include:
- LED Circuits: These circuits are used to light up LEDs. They are simple to build and can be used to create a variety of different lighting effects.
- Resistor Circuits: These circuits are used to test the resistance of different materials. They are simple to build and can be used to explore the properties of different materials.
- Capacitor Circuits: These circuits are used to test the capacitance of different materials. They are simple to build and can be used to explore the properties of different materials.
- Transistor Circuits: These circuits are used to amplify signals. They are simple to build and can be used to create a variety of different audio effects.
These are just a few examples of the many simple circuit projects that are available. With a little creativity and imagination, there are endless possibilities for what you can create with simple circuits. Whether you are a beginner or an experienced electronics hobbyist, simple circuits are a great way to get started exploring the world of DIY electronics.
Arduino Projects
Arduino is an open-source electronics platform that is widely used by hobbyists and professionals alike. It is a popular choice for DIY electronics projects due to its ease of use and versatility.
Here are some popular Arduino projects:
- Robotics: Arduino is often used in robotics projects, such as building a line-following robot or a robotic arm.
- Home Automation: Arduino can be used to automate various aspects of your home, such as turning lights on and off or controlling a smart thermostat.
- Musical Instruments: Arduino can be used to build various musical instruments, such as a theremin or a synthesizer.
- Science Projects: Arduino can be used in science projects, such as building a weather station or a soil moisture sensor.
- Art Installations: Arduino can be used to create interactive art installations, such as a responsive light display or a sound-reactive sculpture.
These are just a few examples of the many possibilities with Arduino. Whether you’re a beginner or an experienced electronics enthusiast, there’s always something new to explore with Arduino.
Raspberry Pi Projects
Raspberry Pi is a popular platform for DIY electronics projects due to its affordability, versatility, and ease of use. With Raspberry Pi, you can build a wide range of projects, from simple DIY gadgets to complex robots and even home automation systems.
Some popular Raspberry Pi projects include:
- Media Centers: You can turn Raspberry Pi into a media center by connecting it to a TV or monitor and running Kodi or Plex software. This allows you to stream videos, music, and images from your computer or other devices.
- Retro Gaming: Raspberry Pi can also be used as a retro gaming console by installing retro gaming emulators and games. You can connect it to a TV or monitor and use classic game controllers to play your favorite retro games.
- Home Automation: Raspberry Pi can be used to build home automation systems that allow you to control lights, heating, and other appliances using a smartphone app or voice commands.
- Robotics: Raspberry Pi is also popular among robotics enthusiasts who use it to build robots for various applications, such as autonomous vehicles, drones, and robots for industrial automation.
- Digital Signage: Raspberry Pi can be used to build digital signage systems for businesses, schools, and other organizations. This involves creating custom messages or videos that are displayed on screens using a Raspberry Pi-based media player.
Overall, Raspberry Pi is a powerful platform for DIY electronics projects, and there are countless possibilities for what you can build with it. Whether you’re a beginner or an experienced electronics hobbyist, Raspberry Pi offers a lot of potential for creativity and innovation.
Tips and Tricks for DIY Electronics
Designing Your Own Circuit
When it comes to DIY electronics, designing your own circuit is one of the most exciting and rewarding experiences. However, it can also be a daunting task, especially for beginners. Here are some tips and tricks to help you get started:
- Start with a Simple Project
If you’re new to DIY electronics, it’s best to start with a simple project that won’t overwhelm you. For example, you can start with a basic LED circuit or a simple audio amplifier. These projects will help you get familiar with the tools and techniques used in electronics design. - Use a Breadboard
A breadboard is a tool that allows you to prototype your circuit without having to solder anything. It’s a great way to test out different ideas and see how they work before committing to a final design. Breadboards come in different sizes, so choose one that’s appropriate for your project. - Use a Multimeter
A multimeter is a tool that measures electrical currents and voltages. It’s essential for testing and troubleshooting your circuit. You can use it to check the voltage of your power supply, the resistance of your components, and the continuity of your wires. - Follow a Schematic
A schematic is a diagram that shows how your circuit is wired together. It’s like a blueprint for your project. Before you start building your circuit, make sure you have a schematic that shows how everything is connected. This will help you avoid mistakes and ensure that your circuit works correctly. - Choose the Right Components
Choosing the right components is crucial to the success of your project. Make sure you choose components that are compatible with each other and that meet the specifications of your project. You should also consider the cost, availability, and reliability of the components you choose. - Document Your Work
As you design your circuit, make sure you document your work. Take pictures of your breadboard setup, make notes of your calculations, and keep track of your component inventory. This will help you keep track of your progress and avoid mistakes in the future.
By following these tips and tricks, you’ll be well on your way to designing your own circuit and enjoying the exciting world of DIY electronics.
Sourcing Materials
When it comes to DIY electronics, sourcing the right materials is crucial to the success of your project. Here are some tips to help you find the materials you need:
Online Retailers
One of the easiest ways to source materials for your DIY electronics project is through online retailers. Websites like Amazon, Digi-Key, and Mouser offer a wide range of electronic components and tools that can be delivered right to your doorstep. These retailers often have user reviews and ratings, which can help you make informed purchasing decisions.
Local Electronics Stores
If you prefer to shop in person, local electronics stores may have the materials you need. However, keep in mind that the selection may be limited, and the prices may be higher than online retailers.
Surplus Electronics Stores
Surplus electronics stores often carry a wide range of obsolete or discontinued electronic components that can be used in DIY electronics projects. These stores may offer good deals on materials, but the selection may be limited, and the quality of the components may be unknown.
Scavenging
For those on a tight budget, scavenging for materials can be a great way to source the necessary components for your DIY electronics project. You can search for discarded electronics on websites like Craigslist or Freecycle, or you can search for scrapped electronics at local junkyards or recycling centers. Just be sure to test any used components before using them in your project.
In conclusion, there are many ways to source materials for your DIY electronics project. Whether you choose to shop online, at local electronics stores, surplus stores, or scavenge for materials, be sure to do your research and choose the best option for your project.
Troubleshooting Common Issues
When it comes to DIY electronics, troubleshooting common issues is an essential skill to have. Here are some tips to help you get started:
- Check Your Circuit: The first step in troubleshooting any issue with your circuit is to check the entire circuit to ensure that there are no loose connections or components that may be causing the problem. Make sure that all wires are properly connected and that there are no loose components on the breadboard.
- Verify Your Code: If you’re working with a microcontroller, make sure that your code is correct and that it’s uploaded correctly to the device. Double-check your syntax and make sure that you’re using the correct libraries and functions.
- Use a Multimeter: A multimeter is an essential tool for troubleshooting electronic circuits. It can help you check for continuity, voltage, and current, which can help you identify issues with your circuit.
- Check Your Components: Make sure that all components are properly installed and functioning correctly. Check the resistors, capacitors, and other components to ensure that they are working correctly.
- Soldering Issues: If you’re experiencing issues with your soldering, make sure that you’re using the correct temperature and that you’re using the right type of solder for the job. Also, double-check that your iron is clean and free of any rust or corrosion.
- Check Your Power Supply: If you’re using a power supply, make sure that it’s functioning correctly and that it’s providing the correct voltage and current. If you’re using a battery, make sure that it’s fully charged and that it’s the correct type for your circuit.
- Check Your Circuit Ground: Make sure that your circuit ground is connected correctly. If your circuit ground is not connected correctly, it can cause a variety of issues with your circuit.
- Consult the Documentation: If you’re still having trouble, consult the documentation for your components and circuits. The manufacturer’s website or the datasheet for your components can provide valuable information on how to troubleshoot common issues.
By following these tips, you can troubleshoot common issues with your DIY electronics projects and get back to creating awesome projects.
Recap of Key Points
- Gather necessary tools and equipment before starting a project.
- Multimeter
- Wire strippers
- Soldering iron/desoldering pump
- Breadboard/soldering iron
- Jumper wires
- Screwdriver
- Vise or clamp
- Solder
- Arduino board or microcontroller
- Sensors or components for the project
- Understand the project’s requirements and goals.
- Determine the required components and their functions
- Choose appropriate sensors and actuators for the project
- Decide on the microcontroller or development board to use
- Consider power supply requirements
- Set up a circuit diagram and list of materials
- Familiarize yourself with the chosen components and their functions.
- Research and understand the functionality of sensors, actuators, and other components
- Study datasheets and reference guides for the chosen microcontroller or development board
- Experiment with code and circuit configurations to gain a better understanding
- Plan and execute the project step-by-step.
- Break down the project into smaller tasks and set milestones
- Start with the simplest tasks, such as soldering wires and components to the breadboard
- Move on to more complex tasks, such as programming the microcontroller and integrating sensors
- Test and debug the project thoroughly
- Share and collaborate with other DIY enthusiasts.
- Join online communities and forums to share projects and seek help
- Attend meetups and workshops to network and learn from others
- Contribute to open-source projects and share your own creations with the community
- Stay safe and practice proper techniques.
- Always follow safety guidelines when working with electrical components
- Be cautious when using tools and equipment
- Learn proper soldering techniques to avoid damaging components
- Use insulated wires and components to prevent short circuits
- Ground yourself before handling metal parts to prevent static electricity buildup
Final Thoughts on DIY Electronics
When it comes to DIY electronics, there are a few key things to keep in mind to ensure a successful project. Here are some final thoughts on DIY electronics:
- Be Prepared to Learn: DIY electronics can be a steep learning curve, but it’s also a rewarding journey. You’ll need to learn about circuit design, component selection, and soldering techniques. Be prepared to invest time in learning these skills, and don’t be afraid to ask for help when you need it.
- Choose the Right Project: It’s important to choose a project that’s within your skill level and interests. Start with simple projects and gradually work your way up to more complex ones. This will help you build your skills and confidence without getting overwhelmed.
- Use High-Quality Components: Using high-quality components is essential for the success of your project. Cheap components can lead to poor performance, and may even be dangerous. Take the time to research and select high-quality components for your project.
- Follow Safety Guidelines: DIY electronics can be dangerous if not done properly. Make sure to follow safety guidelines, such as wearing gloves and goggles, and using a soldering iron with proper ventilation.
- Document Your Work: Documenting your work is important for future reference and to share with others. Take photos, make notes, and document your process as you go along. This will help you remember what you did and make it easier to replicate your project in the future.
- Have Fun: Above all, have fun with your DIY electronics project. This is a hobby that allows you to be creative and build something with your own hands. Enjoy the process and the satisfaction of completing a project.
FAQs
1. What is DIY electronics?
DIY electronics refers to the practice of building electronic devices or circuits without the help of professional electronic engineers or technicians. It involves designing, assembling, and testing electronic components and circuits using readily available materials and tools.
2. What are some common examples of DIY electronics projects?
Some common examples of DIY electronics projects include building a simple audio amplifier, a radio receiver, a digital clock, a simple robot, or a solar panel charger. The possibilities are endless, and many people enjoy experimenting with different projects to learn more about electronics and to create unique gadgets.
3. What kind of skills do I need to have to start with DIY electronics?
To start with DIY electronics, you need to have a basic understanding of electricity and electronics. It’s helpful to have some experience with soldering and using basic electronic tools, but these skills can be learned as you go along. It’s also important to have patience, attention to detail, and a willingness to experiment and learn from mistakes.
4. What tools do I need to get started with DIY electronics?
To get started with DIY electronics, you will need some basic tools such as a soldering iron, wire strippers, a multimeter, a breadboard, and some electronic components such as resistors, capacitors, and LEDs. As you become more experienced, you may want to invest in more advanced tools and equipment.
5. Where can I find instructions and tutorials for DIY electronics projects?
There are many resources available online for DIY electronics projects, including instructional videos, schematics, and project plans. Websites such as Instructables, Hackster, and Adafruit offer a wealth of information and tutorials for beginners and experienced DIY electronics enthusiasts alike.
6. Are DIY electronics projects safe to build?
Like any project that involves working with electricity, there is always some risk involved. However, if you take proper precautions and follow safety guidelines, you can minimize the risk of injury or damage. Always make sure to use the correct tools and equipment, follow the instructions carefully, and double-check your work before powering up your project.


