Are you tired of sounding like a robot on your recordings? Want to know the secrets to getting a great voice for recording? Look no further! In this article, we’ll dive into the tips and tricks you need to improve your voice for recording. From warm-up exercises to proper microphone technique, we’ll cover everything you need to know to sound your best on your next recording. So grab a cup of coffee, sit back, and let’s get started on your journey to a great voice for recording!
Improving your voice for recording can be achieved through various techniques, including proper breathing, vocal warm-up exercises, and hydration. It’s important to find a comfortable and quiet space to record, with good acoustics and minimal background noise. Using a microphone can also help to enhance the quality of your recordings. Additionally, paying attention to your posture and using proper articulation can improve the clarity and overall sound of your voice. Practice and repetition are key to developing a better recording voice, so don’t be afraid to experiment and try new techniques.
Understanding vocal anatomy and physics
The importance of proper breathing techniques
Proper breathing techniques are crucial for improving your voice for recording. When you breathe correctly, you can maintain better control over your voice and avoid straining your vocal cords. Here are some tips to help you improve your breathing for recording:
- Breathe from your diaphragm: Instead of shallow chest breathing, focus on deep breaths that engage your diaphragm. Place one hand on your chest and the other on your belly, and take a deep breath. Your belly should rise while your chest remains still. This is the correct way to breathe.
- Practice diaphragmatic breathing: Diaphragmatic breathing, also known as “belly breathing,” is a technique that can help you control your breathing and relax your body. To practice diaphragmatic breathing, sit or lie down in a comfortable position, place one hand on your belly and the other on your chest, and breathe deeply. Your belly should rise as you inhale and fall as you exhale.
- Inhale before speaking: Before you start speaking, take a deep breath in through your nose and exhale through your mouth. This will help you speak with more confidence and control.
- Speak at a comfortable pace: Speak at a pace that feels comfortable to you. If you speak too quickly, you may tend to take shallow breaths and strain your voice. If you speak too slowly, you may sound monotone and boring. Find a pace that works for you and stick to it.
- Take breaks between recordings: Taking breaks between recordings can help you recover your voice and avoid fatigue. Take a few deep breaths, sip some water, and give your vocal cords a rest before resuming your recording session.
By incorporating these breathing techniques into your daily routine, you can improve your voice for recording and avoid straining your vocal cords. Remember, proper breathing is the foundation of good vocal technique, so take the time to practice and master these techniques.
Vocal warm-up exercises for recording
Vocal warm-up exercises are essential for improving the quality of your voice when recording. Here are some exercises that you can try:
- Gulps and swallows: These exercises help to loosen up the muscles in your throat and voice box. Take a deep breath and gulp a mouthful of water, then swallow it slowly. Repeat this several times.
- Tongue trills: This exercise involves moving your tongue up and down the roof of your mouth. Place the tip of your tongue behind your front teeth and make a hissing sound. You should hear a rushing sound as the air passes over your tongue.
- Lip trills: To do this exercise, place the tip of your tongue behind your front teeth and blow air out to produce a hissing sound. You should hear a rushing sound as the air passes over your lips.
- Vowel sounds: Start by making the vowel sound “ah” and gradually move through the different vowel sounds (e.g., “ee,” “ih,” “uh”). Focus on the sensation of the sound in your mouth and throat.
- Breathing exercises: Take deep breaths and exhale slowly, paying attention to the sensation of the air moving in and out of your lungs. Try counting your breaths or holding your breath for a few seconds before exhaling.
Remember to warm up your voice before you start recording, and take breaks between takes to give your voice time to rest. Regular practice of these exercises can help you develop a stronger, more flexible voice for recording.
Setting up a good recording environment
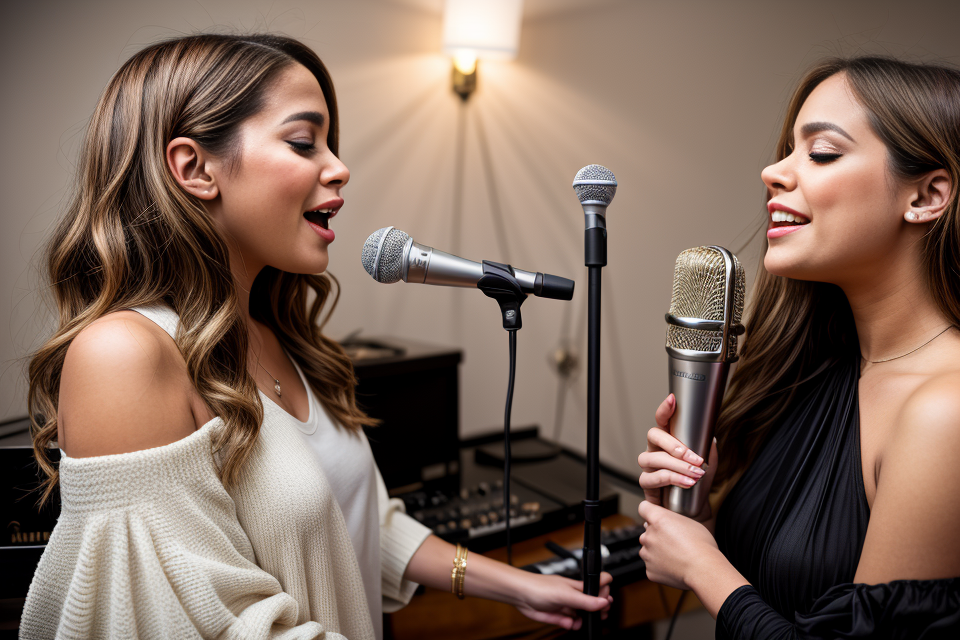
Choosing the right microphone for your voice
When it comes to recording your voice, one of the most important factors is choosing the right microphone. There are many different types of microphones available, each with their own unique characteristics and features. When choosing a microphone, it’s important to consider the type of voice you have, the environment you’ll be recording in, and the type of recording you’ll be doing.
One of the most important factors to consider when choosing a microphone is the type of microphone capsule it uses. Condenser microphones are the most popular choice for recording voices because they are highly sensitive and can capture even the subtlest nuances of your voice. They work by using a diaphragm that is charged by an electrical current, which makes them more sensitive to sound than other types of microphones.
Another important factor to consider is the polar pattern of the microphone. A polar pattern refers to the way the microphone responds to sound from different directions. Some microphones are more sensitive to sound from the front, while others are more sensitive to sound from the sides or rear. If you’re recording in a noisy environment, you may want to choose a microphone with a cardioid polar pattern, which is highly directional and will pick up sound from the front of the microphone while rejecting sound from the sides and rear.
You should also consider the sensitivity of the microphone. Sensitivity refers to the amount of sound pressure level (SPL) that the microphone can handle before distorting the sound. If you have a loud voice, you’ll want to choose a microphone with a higher sensitivity rating. However, if you have a soft voice, you may want to choose a microphone with a lower sensitivity rating to avoid overloading the microphone and causing distortion.
Finally, you should consider the price of the microphone. Microphones can range from a few hundred dollars to several thousand dollars, depending on the brand, features, and quality. If you’re on a tight budget, you may want to consider a USB microphone, which connects directly to your computer and is typically less expensive than a traditional microphone. However, if you’re looking for the highest quality sound, you may want to invest in a more expensive microphone.
Selecting the best recording software
Choosing the right recording software is crucial to achieving high-quality sound recordings. There are several factors to consider when selecting the best recording software, including:
- Compatibility: Ensure that the software is compatible with your operating system and recording hardware.
- Features: Consider the features offered by the software, such as noise reduction, equalization, and compression.
- Ease of use: Look for software that is user-friendly and easy to navigate, even for those with limited technical experience.
- Price: Determine your budget and look for software that fits within your price range.
- Reputation: Research the reputation of the software and read reviews from other users to gauge its reliability and effectiveness.
By taking these factors into account, you can select the best recording software for your needs and improve the quality of your voice recordings.
Tips for improving acoustics in your recording space
Maintaining a good acoustic environment is crucial when it comes to recording your voice. A good recording space can help to minimize unwanted background noise and ensure that your voice is captured clearly and accurately. Here are some tips for improving the acoustics in your recording space:
- Eliminate echoes: Echoes can be a major problem in recording spaces, especially if the room is large or has high ceilings. To eliminate echoes, you can add sound-absorbing materials such as acoustic panels, rugs, or curtains to the walls and ceilings. This will help to reduce the amount of sound reflections and create a more balanced and natural sound.
- Manage reverberation: Reverberation refers to the persistence of sound in a room after the sound source has been stopped. To manage reverberation, you can use sound-absorbing materials, as well as sound-reflecting surfaces, such as bass traps or diffusers. These will help to control the amount of sound reflections and create a more balanced and natural sound.
- Control background noise: Background noise can be a major problem in recording spaces, especially if the room is located near a busy street or other noise sources. To control background noise, you can use soundproofing materials such as soundproofing foam or acoustic caulk to seal any gaps or cracks in the walls or windows. This will help to reduce the amount of sound reflections and create a more balanced and natural sound.
- Optimize the room’s dimensions: The size and shape of the room can also affect the acoustics. A room that is too small can create an unnatural sound, while a room that is too large can create echoes. To optimize the room’s dimensions, you can use sound-absorbing materials to create a more balanced and natural sound.
By following these tips, you can create a recording environment that is optimized for your voice. A good recording environment will help to ensure that your voice is captured clearly and accurately, which is essential for producing high-quality recordings.
Developing a consistent and effective recording routine
Establishing a regular practice schedule
To improve your voice for recording, it is essential to establish a regular practice schedule. Here are some tips to help you develop a consistent routine:
- Set aside a specific time and place for practice: Decide on a time and place where you can practice consistently without distractions. This will help you create a habit and make it easier to stick to your practice schedule.
- Warm up your voice before practice: Warming up your voice before practice will help you avoid strain and prepare your voice for recording. You can start with simple exercises like humming, lip trills, or vocal scales.
- Practice regularly: Consistency is key when it comes to improving your voice for recording. Aim to practice at least three to five times a week, even if it’s just for a few minutes each session.
- Record yourself: Recording yourself while practicing can help you identify areas that need improvement and track your progress over time. Listen to your recordings and make adjustments to your technique as needed.
- Focus on specific skills: Focus on specific skills you want to improve, such as breath control, articulation, or pronunciation. You can find exercises online or consult with a vocal coach to help you target specific areas of improvement.
By establishing a regular practice schedule and focusing on specific skills, you can improve your voice for recording and achieve your desired sound.
Utilizing technology to enhance your recording experience
Technology has revolutionized the way we record our voices, offering a plethora of tools and techniques to enhance the quality of our recordings. By utilizing these technologies, you can improve your voice for recording and achieve a professional sound.
Here are some ways in which you can use technology to enhance your recording experience:
- Microphone selection: One of the most critical factors in achieving a good recording sound is selecting the right microphone. There are various types of microphones available, each with its own unique characteristics. For instance, condenser microphones are known for their sensitivity and ability to capture a wide range of frequencies, making them ideal for recording vocals. On the other hand, dynamic microphones are less sensitive but offer greater durability and resistance to feedback. By selecting the right microphone for your recording needs, you can significantly improve the quality of your recordings.
- Recording software: Recording software plays a crucial role in the quality of your recordings. There are many different recording software options available, each with its own unique features and capabilities. Some of the most popular recording software includes Audacity, Adobe Audition, and Pro Tools. These software programs offer a range of features such as EQ, compression, and reverb, which can be used to enhance the quality of your recordings.
- Headphones: Using a good pair of headphones is essential when recording your voice. Headphones allow you to monitor your recordings in real-time, enabling you to make adjustments to your voice and performance. Additionally, high-quality headphones can help you to hear the nuances of your recording, allowing you to make more precise adjustments to your voice.
- Audio interface: An audio interface is a device that connects your microphone and headphones to your computer. An audio interface can significantly improve the quality of your recordings by providing a clean and stable connection between your microphone and computer. Additionally, many audio interfaces come with built-in features such as pre-amps and equalizers, which can be used to enhance the quality of your recordings.
By utilizing these technologies, you can enhance your recording experience and improve the quality of your recordings. With the right microphone, recording software, headphones, and audio interface, you can achieve a professional sound and take your recordings to the next level.
Overcoming common challenges faced during recording sessions
As a voice artist, one of the most crucial aspects of recording is to develop a consistent and effective recording routine. However, during the recording sessions, various challenges may arise that can hinder the quality of your voice recordings. In this section, we will discuss some of the common challenges faced during recording sessions and how to overcome them.
One of the most common challenges faced during recording sessions is distractions. Distractions can come in many forms, such as noise from outside, interruptions from family members or pets, or even the sound of your own breathing. To overcome distractions, it is essential to create a comfortable and quiet environment for recording. This can be achieved by setting up a home recording studio or finding a quiet space within your home where you can record without any interruptions.
Another challenge that voice artists often face during recording sessions is fatigue. Prolonged periods of recording can cause your voice to become strained and tired, leading to a decline in the quality of your recordings. To overcome fatigue, it is essential to take regular breaks during recording sessions. Taking short breaks can help to refresh your voice and prevent fatigue from setting in. Additionally, staying hydrated and taking care of your overall health can also help to prevent fatigue.
Technical difficulties can also be a common challenge faced during recording sessions. Technical difficulties can range from issues with your recording equipment to problems with your software or computer. To overcome technical difficulties, it is essential to have a backup plan in place. This can include having an alternative recording setup or knowing how to troubleshoot common issues with your equipment. Additionally, investing in high-quality equipment and software can help to minimize technical difficulties and ensure that your recordings are of the highest quality.
Finally, another challenge that voice artists may face during recording sessions is a lack of motivation or inspiration. To overcome this challenge, it is essential to find ways to stay motivated and inspired throughout the recording process. This can include setting goals for your recordings, experimenting with different styles or techniques, or even seeking inspiration from other voice artists or professionals in the industry.
In conclusion, overcoming common challenges faced during recording sessions is an essential aspect of developing a consistent and effective recording routine. By creating a comfortable and quiet environment, taking regular breaks, having a backup plan in place, and staying motivated and inspired, you can overcome these challenges and produce high-quality voice recordings.
Enhancing your vocal performance for recording
Developing good habits for maintaining vocal health
To achieve a great vocal performance in your recordings, it is crucial to develop good habits that promote vocal health. Here are some essential practices to incorporate into your daily routine:
Proper hydration
Staying adequately hydrated is vital for maintaining a healthy voice. Drinking plenty of water throughout the day can help keep your vocal cords lubricated and prevent dehydration-related issues such as hoarseness or loss of voice.
Warm-up exercises
Before you begin your recording session, it’s important to warm up your voice to prepare your vocal cords for the strain of singing or speaking. Engage in gentle warm-up exercises such as humming, lip trills, or scales to stretch and lubricate your vocal cords, helping to prevent strain and maintain a healthy tone.
Good posture and breathing techniques
Maintaining proper posture while singing or speaking can help support your vocal cords and reduce tension. Keep your head up, shoulders relaxed, and your torso upright to allow for efficient breathing. Additionally, employ deep, diaphragmatic breathing techniques to supply your lungs with ample oxygen, which can help improve the quality of your voice.
Proper use of the microphone
To ensure the best possible sound quality in your recordings, it’s essential to use your microphone effectively. Position the microphone close to your mouth to capture your voice clearly, and avoid speaking or singing too loudly, as this can lead to distortion and poor sound quality.
Rest and avoidance of irritants
Lastly, it’s crucial to give your voice time to rest and recover. Avoid engaging in excessive talking or singing for extended periods, and give yourself breaks to allow your vocal cords to recuperate. Additionally, steer clear of irritants such as smoke, pollution, or allergens, which can aggravate your vocal cords and affect your voice’s quality.
By incorporating these good habits into your daily routine, you can help maintain a healthy voice for recording and ensure a great vocal performance in your productions.
Mastering pitch and tone control
To enhance your vocal performance for recording, it is crucial to master pitch and tone control. Here are some tips to help you achieve this:
- Develop your sense of musicality: Start by listening to music and paying attention to the pitch and tone of the singers. This will help you develop your sense of musicality and allow you to better understand how to control your pitch and tone.
- Practice singing scales: Singing scales is an excellent way to develop your pitch control. Start with a simple scale and gradually increase the difficulty level. As you progress, you will find that your pitch control improves.
- Warm up your voice: Before you start recording, take some time to warm up your voice. This will help you to produce sound more easily and with better control. Warm-up exercises can include humming, lip trills, and vocal runs.
- Record yourself: Recording yourself while you practice can help you to identify areas where you need to improve your pitch and tone control. Listen to the recordings and make adjustments as necessary.
- Work on your breath control: Breath control is essential for maintaining good pitch and tone. Practice taking deep breaths and exhaling slowly as you sing. This will help you to control your breath and produce a better sound.
- Consider seeking professional help: If you find that you are struggling to improve your pitch and tone control, consider seeking professional help. A vocal coach can help you to identify areas where you need to improve and provide you with personalized guidance on how to do so.
Experimenting with different microphone techniques for a unique sound
Experimenting with different microphone techniques is a great way to achieve a unique sound for your voice recordings. By exploring various microphone techniques, you can find the one that best suits your voice and enhances your overall performance. Here are some microphone techniques to consider:
- Polar patterns:
- Omnidirectional: Captures sound from all directions, making it ideal for recording solo performances in noisy environments.
- Cardioid: Captures sound from the front, minimizing background noise and isolating the main sound source.
- Figure-8: Creates a bi-directional pattern, picking up sound from the front and back, while rejecting sound from the sides. This technique is useful for isolating specific sound sources.
- Microphone placement:
- Close: Placing the microphone close to the sound source can create a more focused and intense sound.
- Far: Placing the microphone farther away from the sound source can create a more ambient and spacious sound.
- Room: Placing the microphone in the room to capture the natural ambiance and reflections of the space.
- Distance:
- Close: Placing the microphone close to the sound source can create a more intimate and personal sound.
- Far: Placing the microphone farther away from the sound source can create a more objective and detached sound.
- Direction:
- On-axis: Pointing the microphone directly at the sound source can create a focused and direct sound.
- Off-axis: Pointing the microphone slightly away from the sound source can create a more natural and ambient sound.
Experimenting with these microphone techniques can help you achieve a unique sound for your voice recordings. By trying out different techniques, you can find the ones that work best for your voice and enhance your overall performance.
Refining your recording skills
Basic editing techniques for a polished sound
Proper editing is essential to achieve a polished sound in your recordings. Here are some basic editing techniques that you can use:
- Remove unwanted noises: One of the most common editing tasks is to remove unwanted noises such as clicks, pops, and hisses. You can use a noise reduction tool to eliminate these unwanted sounds.
- EQ adjustments: EQ adjustments can help to improve the clarity and tone of your voice. You can boost the mid-range frequencies to add warmth to your voice or cut the low frequencies to remove rumble.
- Compression: Compression can help to even out the volume of your voice, making it sound more consistent. This is especially useful when recording speeches or presentations.
- Noise reduction: If you’re recording in a noisy environment, you may need to use noise reduction techniques to remove background noise. This can be done using a noise reduction tool or by manually removing unwanted sounds.
- Volume leveling: Make sure to adjust the volume levels of your recording so that they are consistent throughout. This will make your recording sound more professional.
- Adding effects: Adding effects such as reverb or delay can help to enhance the overall sound of your recording. However, be careful not to overdo it, as too many effects can make your recording sound unnatural.
By using these basic editing techniques, you can improve the quality of your recordings and achieve a polished sound.
Collaborating with other musicians or producers
Collaborating with other musicians or producers can be a great way to improve your voice for recording. By working with experienced professionals, you can gain valuable insights into the recording process and learn new techniques to enhance your vocal performances. Here are some ways to collaborate with other musicians or producers:
- Join a music community or online forum: There are many online communities and forums where musicians and producers gather to share ideas and collaborate on projects. By joining one of these communities, you can connect with other like-minded individuals and find potential collaborators.
- Attend music events and workshops: Attending music events and workshops is a great way to network with other musicians and producers. You can attend events such as music festivals, conferences, and workshops to meet other professionals and learn about new recording techniques.
- Reach out to other musicians or producers: If you have a specific musician or producer in mind that you would like to collaborate with, don’t be afraid to reach out to them. You can contact them through social media or email and express your interest in working together.
- Collaborate on cover songs: Collaborating on cover songs is a great way to improve your voice for recording. You can work with other musicians or producers to record cover versions of popular songs and learn new recording techniques along the way.
By collaborating with other musicians or producers, you can gain valuable insights into the recording process and learn new techniques to enhance your vocal performances.
Staying up-to-date with the latest recording trends and technology
One of the most effective ways to improve your voice for recording is to stay up-to-date with the latest recording trends and technology. Here are some ways to do so:
- Attend workshops and seminars: Attend workshops and seminars to learn about the latest recording trends and technology. These events provide an opportunity to learn from industry experts and gain valuable insights into the latest techniques and tools.
- Read industry publications: Read industry publications to stay informed about the latest recording trends and technology. These publications provide in-depth analysis and reviews of the latest equipment and software, as well as interviews with industry experts.
- Join online forums and communities: Join online forums and communities to connect with other recording professionals and learn about the latest trends and technology. These communities provide a platform to ask questions, share knowledge, and learn from others in the industry.
- Follow industry influencers and experts: Follow industry influencers and experts on social media to stay up-to-date with the latest recording trends and technology. These individuals often share valuable insights and knowledge on their platforms, which can help you stay informed and improve your recording skills.
- Experiment with new equipment and software: Experiment with new equipment and software to learn about the latest trends and technology. This hands-on approach can help you gain a deeper understanding of the latest tools and techniques, and enable you to improve your recording skills.
By staying up-to-date with the latest recording trends and technology, you can improve your voice for recording and produce high-quality audio recordings.
Sharing your recordings with the world
Platforms for sharing your music online
There are a plethora of platforms available for sharing your music online. These platforms provide you with the opportunity to reach a wider audience and showcase your talent. Here are some popular platforms for sharing your music online:
- SoundCloud: SoundCloud is a popular platform for sharing music online. It allows you to upload your music, connect with other artists, and gain exposure. You can set your tracks to be public or private, and you can also share your music on other social media platforms.
- Spotify: Spotify is a streaming platform that allows you to share your music with a massive audience. You can upload your music to Spotify and make it available to millions of users worldwide. You can also use Spotify’s playlists to get your music noticed by a larger audience.
- YouTube: YouTube is a video-sharing platform that allows you to share your music videos with a global audience. You can upload your music videos to YouTube and use tags and descriptions to make them more discoverable. You can also use YouTube’s live streaming feature to perform live concerts and connect with your fans.
- Bandcamp: Bandcamp is a platform that allows you to sell your music directly to fans. You can upload your music to Bandcamp and set your own prices. Bandcamp also allows you to connect with other artists and promote your music through social media.
- ReverbNation: ReverbNation is a platform that helps you promote your music and connect with industry professionals. You can upload your music to ReverbNation and get feedback from industry experts. ReverbNation also provides you with tools to promote your music on social media and get your music noticed by industry professionals.
These platforms offer various features and benefits, so it’s essential to research and choose the one that best suits your needs. By sharing your music on these platforms, you can reach a wider audience, gain exposure, and showcase your talent.
Tips for building a fanbase and growing as an artist
To build a fanbase and grow as an artist, it’s important to have a strategic plan in place. Here are some tips to help you get started:
- Identify your target audience: Who are you trying to reach with your music? Knowing your target audience will help you tailor your marketing efforts and reach the right people.
- Use social media to your advantage: Social media platforms like Instagram, Twitter, and Facebook are great places to connect with fans and promote your music. Share your recordings, interact with your followers, and post updates about your music career.
- Play live shows: Playing live shows is a great way to connect with fans and build your fanbase. Look for opportunities to play at local venues, music festivals, and other events.
- Collaborate with other artists: Collaborating with other artists can help you reach new audiences and build your fanbase. Look for opportunities to collaborate on recordings or play shows together.
- Build a website: Having a website is essential for any artist looking to build their fanbase. Use your website to share your music, merchandise, and updates about your career.
- Engage with your fans: Make sure to engage with your fans and respond to their comments and messages. Building a relationship with your fans is key to building a strong fanbase.
By following these tips, you can start building your fanbase and growing as an artist. Remember to stay consistent with your efforts and be patient – building a fanbase takes time and hard work.
Overcoming self-doubt and criticism to pursue your passion
Self-doubt and criticism can be major obstacles for those who want to share their voice recordings with the world. Here are some strategies for overcoming these challenges and pursuing your passion:
- Recognize your strengths: Focus on your unique talents and abilities, and use them to your advantage. Don’t be afraid to showcase your strengths and let them shine through in your recordings.
- Practice self-compassion: Be kind to yourself and recognize that everyone makes mistakes. Instead of beating yourself up over small errors or imperfections, use them as opportunities to learn and grow.
- Seek out constructive feedback: While it’s important to be kind to yourself, it’s also valuable to seek out constructive feedback from others. This can help you identify areas for improvement and give you a better understanding of how to improve your voice for recording.
- Surround yourself with supportive people: Having a supportive community can make a huge difference in your ability to overcome self-doubt and criticism. Seek out people who will encourage and support you on your journey, whether it’s friends, family, or online communities.
- Remember why you started: Finally, it can be helpful to remind yourself why you started pursuing your passion in the first place. Whether it’s for personal fulfillment, to share your message with the world, or to make a living doing what you love, keep your goals in mind and let them motivate you to overcome any obstacles that come your way.
FAQs
1. What are some tips for improving my voice for recording?
Improving your voice for recording requires practice and patience. Here are some tips to help you improve your voice:
* Warm up your voice before recording. You can do this by humming, singing, or doing some vocal exercises.
* Drink plenty of water to keep your vocal cords hydrated.
* Avoid smoking and excessive alcohol consumption, as these can damage your vocal cords.
* Speak clearly and enunciate your words.
* Take breaks during recording sessions to rest your voice.
2. What type of microphone should I use for recording my voice?
The type of microphone you use for recording your voice depends on your budget and the quality of sound you want to achieve. Here are some options to consider:
* USB microphones: These are affordable and easy to use, making them a good option for beginners.
* Condenser microphones: These microphones are more expensive but offer high-quality sound. They are ideal for recording in a studio or home recording setup.
* Dynamic microphones: These microphones are less sensitive than condenser microphones and are ideal for recording in noisy environments.
3. How can I improve my pronunciation for recording?
Improving your pronunciation for recording requires practice and patience. Here are some tips to help you improve your pronunciation:
* Listen to native speakers and pay attention to their pronunciation.
* Practice repeating words and phrases out loud.
* Record yourself and listen to the playback to identify areas where you need to improve.
* Use a pronunciation dictionary or app to help you learn the correct pronunciation of words.
* Practice with a tutor or language exchange partner to get feedback on your pronunciation.
4. What is the best way to avoid nasality when recording my voice?
Avoiding nasality when recording your voice requires some practice and attention to your breathing. Here are some tips to help you avoid nasality:
* Speak from your diaphragm rather than your throat.
* Take a deep breath before speaking and exhale as you speak.
* Avoid speaking through your nose.
* Practice speaking with different pitches and intonations to find a voice that sounds natural and not nasal.
* Record yourself and listen to the playback to identify areas where you need to improve your pronunciation.
5. How can I improve my tone of voice for recording?
Improving your tone of voice for recording requires practice and attention to your breathing and posture. Here are some tips to help you improve your tone of voice:
* Warm up your voice before recording.
* Speak with confidence and conviction.
* Avoid mumbling or speaking too quickly.
* Pay attention to your posture and breathe deeply to project a strong and confident tone.
* Record yourself and listen to the playback to identify areas where you need to improve your tone of voice.


