Are you looking to record your voice like a pro in a studio? Look no further! In this comprehensive guide, we will explore the tips and tricks to help you achieve studio-quality voice recordings from the comfort of your own home. From understanding the right equipment to using proper techniques, we will cover everything you need to know to make your voice sound its best. So, let’s get started and unleash your inner audio engineer!
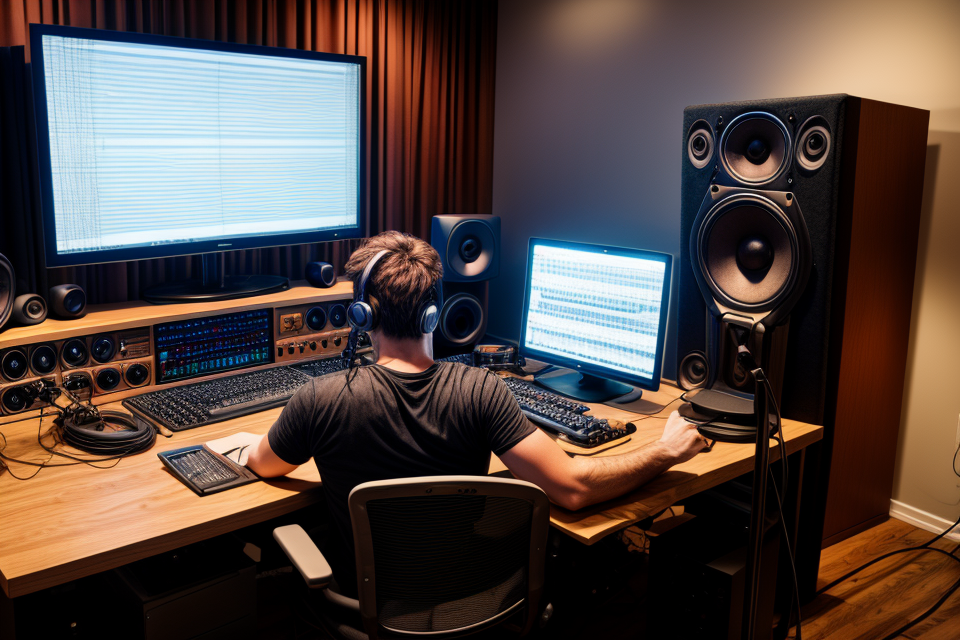
Setting Up Your Recording Environment
Choosing the Right Room
Choosing the right room is crucial in achieving studio-quality voice recordings. There are several factors to consider when selecting the room where you will record your voice.
Factors to Consider
The acoustic treatment of the room is an essential factor to consider. The room should have proper soundproofing to minimize external noise and prevent sound from escaping. Additionally, the room should have proper insulation to prevent echoes and reverberation.
Background noise is another crucial factor to consider. The room should be free from any distracting noise that can interfere with the recording. This includes noise from traffic, neighbors, or even appliances.
The size and shape of the room also play a significant role in achieving studio-quality voice recordings. A room that is too small can cause echoes and reverberation, while a room that is too large can cause sound to dissipate and lose quality. The ideal room size depends on the type of recording you want to achieve.
Equipment placement is also crucial in achieving studio-quality voice recordings. The equipment should be placed in a way that minimizes external noise and prevents echoes and reverberation. The placement of the microphone is also crucial in capturing the best sound quality.
In summary, choosing the right room is critical in achieving studio-quality voice recordings. You should consider factors such as acoustic treatment, background noise, room size and shape, and equipment placement to ensure that you get the best sound quality possible.
Selecting the Proper Microphone and Audio Interface
Microphone Types
Choosing the right microphone is crucial for achieving studio-quality voice recordings. There are three main types of microphones to consider: condenser microphones, dynamic microphones, and ribbon microphones.
Condenser Microphones
Condenser microphones are known for their ability to capture detailed and accurate sound. They are sensitive to changes in air pressure, making them ideal for recording vocals and instruments. However, they require phantom power to operate, which is provided by an audio interface.
Dynamic Microphones
Dynamic microphones are less sensitive than condenser microphones and are more durable. They are suitable for recording in noisy environments or when dealing with high sound levels. Dynamic microphones are often used for live performances and recording instruments like guitars and drums.
Ribbon Microphones
Ribbon microphones are known for their warm and natural sound. They are less sensitive than condenser microphones and have a limited frequency range. Ribbon microphones are ideal for recording vocals, guitars, and other acoustic instruments.
Choosing the Right Microphone for Your Voice
When choosing a microphone, it’s essential to consider your voice type. For example, dynamic microphones are better suited for deeper voices, while condenser microphones are better for higher voices.
Budget Considerations
Microphones can vary widely in price, and it’s essential to consider your budget when selecting a microphone. While high-end microphones can provide better sound quality, they may not be necessary for all recording situations.
Audio Interface Basics
An audio interface is a device that connects your microphone to your computer and converts analog audio signals into digital signals. It’s essential to invest in a high-quality audio interface to ensure the best possible sound quality.
Types of Audio Interfaces
There are several types of audio interfaces, including USB, Firewire, and Thunderbolt. USB audio interfaces are the most common and provide a simple and easy-to-use connection.
Importance of a High-Quality Audio Interface
A high-quality audio interface can significantly improve the sound quality of your recordings. It can also provide additional features such as gain control, EQ, and compression, which can help you achieve professional-sounding recordings.
Connecting Your Microphone to the Audio Interface
Connecting your microphone to your audio interface is a straightforward process. Most microphones connect to audio interfaces using an XLR or 1/4-inch jack. Once connected, you can use your audio interface’s software to configure your microphone settings and adjust the sound quality.
Setting Up Your Recording Software
When it comes to achieving high-quality voice recordings, the software you use plays a crucial role. There are various options available, each with its own set of features and capabilities. Here are some popular recording software options to consider:
Digital Audio Workstations (DAWs)
Digital Audio Workstations (DAWs) are comprehensive software suites designed for music production and audio recording. They offer a wide range of tools and features for editing, mixing, and mastering audio. Some popular DAWs for voice recording include:
- Pro Tools
- Logic Pro
- Ableton Live
- Cubase
- FL Studio
Recording Software for Voice-Over and Podcasting
There are also specialized recording software programs that cater specifically to voice-over and podcasting. These programs often include features tailored to these types of recordings, such as automatic leveling, noise reduction, and built-in effects. Some popular options include:
- Audacity
- Adobe Audition
- GarageBand
- REAPER
- TwistedWave
Features to Look for in Recording Software
When selecting recording software, consider the following features to ensure you get the best results:
- Multitrack recording: The ability to record multiple audio tracks simultaneously.
- Audio editing tools: Features like cut, copy, paste, and fades for precise editing.
- Effects and processing: Built-in effects like EQ, compression, and reverb to enhance your recordings.
- Noise reduction: Tools to remove unwanted background noise and hiss.
- Export options: The ability to export your recordings in various formats for different purposes.
Recording Settings
Properly configuring your recording software is crucial for achieving high-quality voice recordings. Here are some key settings to consider:
- Sample Rate and Bit Depth: These settings determine the resolution and accuracy of your recordings. A higher sample rate and bit depth result in better sound quality but also require more storage space. Common settings include 44.1 kHz and 16-bit resolution.
- Monitoring Levels: Make sure to monitor your recordings at a comfortable volume to avoid clipping or distortion. Adjust your monitoring levels accordingly.
- Adjusting for Quality and File Size: Balancing quality and file size is essential for efficient storage and sharing of your recordings. Experiment with different settings to find the optimal balance for your needs.
Recording Techniques for Professional Voice Recordings
Proper Microphone Technique
Polar Patterns
The polar pattern of a microphone determines the direction in which it picks up sound. The four main polar patterns are omnidirectional, cardioid, figure-8, and supercardioid.
Omnidirectional
An omnidirectional microphone picks up sound from all directions equally. It is ideal for recording solo vocals or a group of instruments in a studio setting.
Cardioid
A cardioid microphone is more directional than omnidirectional, picking up sound mainly from the front and sides, while rejecting sound from the rear. This makes it ideal for recording vocals or instruments in a live or studio setting, where unwanted background noise may be present.
Figure-8
A figure-8 microphone has a polar pattern that resembles the shape of the figure 8. It picks up sound from the front and back of the microphone, while rejecting sound from the sides. This makes it ideal for recording two sources simultaneously, such as a solo vocalist and an instrument, or for creating a stereo image when recording in pairs.
Supercardioid
A supercardioid microphone is even more directional than a cardioid microphone, picking up sound mainly from the front and top of the microphone, while rejecting sound from the sides and rear. This makes it ideal for recording vocals or instruments in a live or studio setting, where unwanted background noise may be present.
Shadowing and Popping
Shadowing and popping are techniques used to reduce unwanted sounds when recording. Shadowing involves placing the microphone close to the sound source, while popping involves positioning the microphone so that the sound source is directly in front of it.
Microphone Distance and Positioning
The distance and positioning of the microphone can have a significant impact on the quality of the recording.
Proximity Effect
Proximity effect is a phenomenon that occurs when a microphone is placed too close to a sound source. It can result in a boost in low-frequency sounds, such as bass and rumble, which can distort the sound and make it sound unnatural.
Recording Vocals: The Three-Foot Rule
The three-foot rule is a guideline for positioning a microphone when recording vocals. It states that the microphone should be placed at a distance from the sound source that is three times the diagonal length of the microphone. For example, if you are using a large-diaphragm condenser microphone with a diagonal length of 6 inches, the microphone should be placed at a distance of approximately 3 feet (36 inches) from the sound source.
Mic Techniques for Different Vocal Styles
Different vocal styles require different microphone techniques. For example, a dynamic microphone may be used for recording a singer with a strong voice, while a condenser microphone may be used for recording a more delicate vocalist. The microphone technique used will depend on the desired sound and the specific recording environment.
Using a Pop Filter and Shield
Purpose of a Pop Filter
A pop filter is an essential tool in achieving professional-quality voice recordings. Its primary purpose is to reduce the occurrence of plosives and sibilance in recorded voices. Plosives are the explosive sounds produced in words that contain consonants such as “p,” “b,” “t,” and “d.” Sibilance, on the other hand, refers to the hissing sounds produced in words that contain “s,” “z,” “ch,” and “j” sounds. These sounds can create an unpleasant, harsh quality in recorded voices and may even cause distortion if they are not properly addressed.
Reducing Plosives and Sibilance
Pop filters work by using a thin, cylindrical mesh screen that is placed between the microphone and the speaker’s mouth. When the speaker pronounces words that contain plosives or sibilance, the pop filter helps to diffuse or absorb the sounds, reducing their impact on the microphone and resulting in a smoother, more professional-sounding recording.
Types of Pop Filters
There are two main types of pop filters: permanent and collapsible. Permanent pop filters are typically screwed onto the microphone stand and are designed to be a permanent fixture in the recording setup. Collapsible pop filters, on the other hand, are more portable and can be easily packed away when not in use. Both types of pop filters serve the same purpose but offer different levels of convenience and flexibility.
Choosing the Right Pop Filter
When choosing a pop filter, it is important to consider the type of microphone being used. Some pop filters are designed to fit specific microphone models, while others are more universal and can be used with a variety of microphones. It is also important to consider the size and weight of the pop filter, as well as its overall durability.
Placing the Pop Filter
Proper placement of the pop filter is crucial to achieving the best results. The pop filter should be positioned so that it is approximately 6 to 8 inches away from the microphone. This distance will help to ensure that the pop filter can effectively diffuse or absorb plosives and sibilance without causing any unwanted distortion or muffling of the recorded voice. Additionally, the pop filter should be positioned at a slight angle, rather than directly in line with the microphone. This angle will help to further reduce the impact of plosives and sibilance on the recorded voice.
Improving Your Voice for Better Recordings
Warm-Up Exercises
Warm-up exercises are essential for preparing your voice for recording. They help to increase blood flow to the vocal cords, reduce tension, and improve your vocal range and tone quality. Some warm-up exercises include:
- Breathing Exercises: Deep breathing exercises can help to relax your vocal cords and increase oxygen flow to your body. Try taking slow, deep breaths and exhaling slowly, focusing on expanding your diaphragm and filling your lungs with air.
- Vocal Range Exercises: Vocal range exercises can help to improve your vocal range and strengthen your vocal cords. Try humming or singing on different vowel sounds to find your lowest and highest notes, and then try singing scales or arpeggios to warm up your voice.
- Articulation and Diction Exercises: Articulation and diction exercises can help to improve your enunciation and pronunciation. Try repeating phrases with different consonant and vowel sounds, and focus on speaking clearly and accurately.
Vocal Health and Hydration
Taking care of your voice is crucial for achieving studio-quality recordings. Proper hydration is essential for maintaining a healthy vocal cords, so make sure to drink plenty of water throughout the day. Additionally, avoid smoking, alcohol, and caffeine, as these can all negatively affect your vocal health.
Tips for Taking Care of Your Voice
Here are some additional tips for taking care of your voice:
- Avoid speaking or singing for long periods of time without taking breaks.
- Practice good posture and avoid slouching or speaking in a strained manner.
- Avoid singing or speaking in environments with poor acoustics or excessive noise.
- If you experience any discomfort or pain while singing or speaking, stop immediately and seek medical attention if necessary.
Overall, improving your voice for better recordings requires consistent practice and attention to your vocal health. By incorporating warm-up exercises, staying hydrated, and taking care of your voice, you can achieve studio-quality voice recordings.
Best Practices for Recording and Editing
Monitoring Your Recording Session
Monitoring your recording session is crucial to achieving high-quality voice recordings. Here are some best practices to follow:
Listening Critically
Listen to your recordings critically to identify any issues such as background noise, poor enunciation, or other imperfections. Pay attention to the tone, pitch, and overall quality of your voice.
Taking Breaks and Avoiding Fatigue
Taking breaks during your recording session can help you avoid fatigue and maintain your vocal quality. Take short breaks every 30 minutes to an hour to stretch, hydrate, and rest your voice.
Recording Multiple Takes
Recording multiple takes is a common practice in professional voice recording. It allows you to capture different versions of your performance and select the best take for your final recording. Here are some tips for recording multiple takes:
The Importance of Multiple Takes
Recording multiple takes gives you the flexibility to experiment with different styles, techniques, and approaches. It also helps you identify any mistakes or inconsistencies in your performance.
Selecting the Best Take
After recording multiple takes, listen to each version critically and select the best take based on the quality of your voice, the accuracy of your performance, and the overall sound of the recording.
Editing Techniques
Editing is an essential part of the voice recording process. Here are some editing techniques to consider:
Basic Editing Tools
Basic editing tools include trimming, fading, and crossfading. Trimming involves removing unwanted parts of a recording, while fading involves gradually increasing or decreasing the volume of a recording. Crossfading involves overlapping two recordings to create a seamless transition between them.
Removing Mistakes and Breaths
Removing mistakes and breaths is a common editing technique used in professional voice recordings. Use a noise reduction tool to remove unwanted background noise, and a breath reduction tool to remove unwanted breaths from your recordings.
Adjusting Volume and EQ
Adjusting the volume and EQ of your recordings can help you achieve a more professional sound. Use a volume meter to ensure that your recordings are at the correct level, and an EQ tool to adjust the frequency response of your voice.
Adding Effects and Processing
Adding effects and processing to your recordings can enhance their overall sound quality. Experiment with different effects such as reverb, delay, and compression to achieve the desired sound. However, be careful not to overdo it, as too many effects can detract from the quality of your voice.
Finalizing and Exporting Your Recording
Saving Your Project
Once you have finished recording, it is important to save your project properly to ensure that your recording is not lost. Here are some tips for saving your project:
- File Formats and Quality Settings: When saving your recording, it is important to choose the right file format and quality settings. Common file formats for voice recordings include WAV, MP3, and AIFF. WAV is a high-quality format that is widely used in the audio industry, while MP3 is a more compressed format that is suitable for online distribution. AIFF is a high-quality format that is commonly used for audio editing. When choosing a file format, it is important to consider the intended use of your recording and choose a format that is appropriate for that use. Additionally, you should choose a high-quality setting to ensure that your recording sounds its best.
- Organizing Your Files: It is important to keep your files organized to make it easy to find and use your recordings. One way to do this is to create a folder for each project and save all of the related files in that folder. You can also add descriptive names to your files to make it easier to identify them.
- Backing Up Your Recordings: It is always a good idea to back up your recordings to prevent loss of data. You can back up your recordings to an external hard drive or cloud storage service. This will ensure that your recordings are safe even if your computer or hard drive fails.
- Sharing Your Recordings: Once you have finished recording and finalizing your project, you may want to share your recordings with others. You can do this by uploading your recordings to a cloud storage service or sending them as email attachments. When sharing your recordings, it is important to ensure that you have the necessary permissions and that you are complying with any relevant laws or regulations.
Key Takeaways
- Choose the right microphone: A high-quality microphone is essential for capturing clear and accurate sound. Consider factors such as sensitivity, frequency response, and noise reduction when selecting a microphone.
- Proper placement of the microphone: The position of the microphone can greatly affect the quality of the recording. Place the microphone at a distance from the speaker that is at least three times the diagonal length of the microphone. This will help to minimize the effect of room ambiance and produce a more focused sound.
- Use a pop filter: A pop filter is a small screen that is placed in front of the microphone to reduce the effects of popping and breath sounds. This will help to produce a smoother and more professional sound.
- Use a good quality audio interface: An audio interface is a device that connects the microphone to the computer. It helps to improve the quality of the recording by providing a cleaner signal and reducing noise.
- Record in a quiet environment: Background noise can be distracting and detract from the quality of the recording. Record in a quiet room with minimal background noise to ensure the best possible sound quality.
- Monitor your recordings: It’s important to listen to your recordings as you go to ensure that they meet your standards. Use headphones to monitor your recordings and make any necessary adjustments to the microphone placement or audio settings.
Next Steps for Improving Your Voice Recordings
- Master the Art of Proper Microphone Technique:
- Ensure that you are using a high-quality microphone that is designed for voice recording.
- Position the microphone at a distance from your mouth that is at least three times the diagonal length of the microphone.
- Use a pop filter to reduce plosives and harsh consonants.
- Always speak into the center of the microphone capsule to achieve the best results.
- Optimize Your Recording Environment:
- Choose a quiet room with minimal background noise.
- Dampen any hard surfaces that may cause unwanted reflections and reverberation.
- Invest in acoustic panels or soundproofing materials to minimize ambient noise.
- Use high-quality monitor speakers to listen back to your recordings and ensure that they sound professional.
- Utilize the Latest Technology:
- Use digital audio workstations (DAWs) that offer advanced recording features, such as auto-leveling and noise reduction.
- Experiment with various software plugins and effects to enhance your recordings.
- Invest in a good pair of noise-canceling headphones to monitor your recordings without any external noise interference.
- Practice, Practice, Practice:
- Record regularly to develop your voice and technical skills.
- Listen back to your recordings and analyze areas for improvement.
- Seek feedback from professionals or peers to identify areas where you can enhance your voice recordings.
- Experiment with Different Recording Styles:
- Try out different microphone techniques, such as the stereo technique or the X-Y technique, to see which works best for your voice.
- Experiment with different recording angles and perspectives to achieve unique sounds and effects.
- Don’t be afraid to try out new recording equipment or software to see how it can enhance your recordings.
- Learn from the Pros:
- Study the techniques used by professional voice actors, musicians, and broadcasters.
- Analyze their recordings to identify what makes them sound professional and engaging.
- Apply their techniques to your own recordings to enhance your sound and style.
- Stay Up-to-Date with the Latest Trends:
- Keep up with the latest technology and trends in voice recording.
- Attend industry events, workshops, and conferences to learn from experts and network with other professionals.
- Stay informed about new equipment, software, and techniques that can help you achieve even better voice recordings.
Encouragement to Keep Learning and Experimenting
As a voice actor, it’s important to constantly improve your skills and knowledge in order to achieve the best possible recordings. One of the key ways to do this is by continuing to learn and experiment with different recording techniques.
Here are a few tips for staying on top of your game:
- Read up on the latest recording technologies and techniques. There are always new tools and methods being developed, and staying informed can help you make the most of your recordings.
- Experiment with different microphones and recording environments. Every voice actor has their own preferences when it comes to equipment and setting, and finding what works best for you can help you get the most out of your recordings.
- Try out different recording software and editing tools. With so many options available, it’s worth exploring different programs to find the ones that work best for you.
- Attend workshops and training sessions to hone your skills. Whether it’s learning about recording techniques or improving your delivery, there are always opportunities to improve your craft.
By staying curious and open to learning, you’ll be well on your way to achieving studio-quality voice recordings.
FAQs
1. What equipment do I need to record my voice like a studio?
To achieve studio-quality voice recordings, you will need a few essential pieces of equipment. First, you will need a good quality microphone that is designed for vocal recording. This can be a large-diaphragm condenser microphone or a dynamic microphone, depending on your budget and recording environment. You will also need a digital audio workstation (DAW) software on your computer to record and edit your voice recordings. Additionally, you may want to invest in a microphone stand, pop filter, and headphones to help you achieve the best possible sound quality.
2. How do I choose the right microphone for my voice recordings?
Choosing the right microphone for your voice recordings is crucial to achieving a professional sound. When selecting a microphone, consider your budget, the type of recording environment you will be in, and the type of microphone that will work best for your voice. Large-diaphragm condenser microphones are often preferred for vocal recording because they provide a warm and natural sound. However, dynamic microphones can also be a good choice if you are recording in a noisy environment or need a more durable microphone.
3. How do I set up my microphone for optimal sound quality?
To achieve the best possible sound quality when recording your voice, it is important to set up your microphone correctly. First, make sure to choose a quiet recording environment with minimal background noise. Next, position your microphone about six inches away from your mouth, and angled slightly upward to help reduce popping sounds. You may also want to use a pop filter to further reduce popping sounds. Finally, make sure to adjust your microphone’s gain settings to ensure that your voice is being recorded at the correct volume.
4. How can I improve the sound quality of my voice recordings?
There are several ways to improve the sound quality of your voice recordings. First, make sure to record in a quiet environment with minimal background noise. You can also try using a microphone with a higher quality diaphragm or a more advanced noise-cancellation feature. Additionally, consider using a high-quality audio interface or sound card to improve the clarity and fidelity of your recordings. Finally, be sure to use a good quality microphone stand and headphones to help you achieve the best possible sound quality.
5. How can I edit my voice recordings to improve their quality?
Editing your voice recordings can help you improve their overall quality and make them sound more professional. When editing your recordings, you can remove unwanted noise or background sounds, adjust the volume or pitch of your voice, and add effects such as reverb or compression. Most digital audio workstations (DAWs) come with a variety of editing tools that you can use to enhance your recordings. Experiment with different editing techniques to find the ones that work best for your voice and recording style.


