Are you looking to record your voice professionally? Whether it’s for a podcast, a video, or a presentation, your audio quality can make or break your reputation. The good news is that with the right tips and techniques, you can sound like a pro in no time. In this article, we’ll cover everything you need to know to sound professional when recording. From selecting the right equipment to setting up your environment, we’ll guide you through the process step-by-step. So, whether you’re a beginner or an experienced recorder, read on to discover how to take your recordings to the next level.
Preparing for the Recording Session
Setting up the recording environment
When it comes to setting up the recording environment, there are several key factors to consider in order to ensure that you sound professional. Here are some tips and techniques to help you get started:
Choosing the right location
The location of your recording environment can have a significant impact on the quality of your recordings. When choosing a location, consider the following factors:
- Noise level: Look for a location that is as quiet as possible, with minimal background noise. This will help to ensure that your recordings are clear and free from distractions.
- Acoustics: The acoustics of the room can also have an impact on the quality of your recordings. Look for a room with good natural acoustics, or consider adding acoustic treatments such as soundproofing or sound-absorbing materials to improve the sound quality.
Managing background noise
Background noise can be a major distraction and can make it difficult to hear what you are saying. Here are some tips for managing background noise:
- Choose a quiet location: As mentioned above, choose a location with minimal background noise.
- Use noise-cancelling headphones: Noise-cancelling headphones can help to block out background noise and improve the quality of your recordings.
- Record in a different location: If the background noise is too distracting, consider recording in a different location where the noise level is lower.
Selecting the appropriate equipment
In addition to choosing the right location and managing background noise, selecting the appropriate equipment is also important for sounding professional when recording. Here are some tips for selecting the right equipment:
- Invest in quality microphones: Microphones are a crucial component of any recording setup. Look for high-quality microphones that are designed for professional use.
- Consider additional equipment: Depending on your recording needs, you may also want to consider additional equipment such as audio interfaces, digital audio workstations (DAWs), or other accessories.
By following these tips and techniques, you can set up a recording environment that will help you sound professional and produce high-quality recordings.
Planning your recording process
- Deciding on the desired sound quality
When planning your recording process, it is important to decide on the desired sound quality for your project. This will help you determine the appropriate recording software and hardware needed for the job. Some factors to consider when choosing the sound quality include the type of music or audio you are recording, the intended audience, and the purpose of the recording. For example, if you are recording a podcast, you may want to aim for a higher quality sound than if you were recording a spoken word poem.
- Identifying the necessary recording software and hardware
Once you have decided on the desired sound quality, you will need to identify the necessary recording software and hardware. This will depend on the type of project you are working on and the resources you have available. For example, if you are recording a band, you will need to invest in high-quality microphones and audio interfaces. If you are recording a podcast, you may be able to get by with a lower-end microphone and a laptop or smartphone.
- Establishing a clear timeline and goals
In addition to choosing the right recording software and hardware, it is important to establish a clear timeline and goals for your recording session. This will help you stay on track and ensure that you are able to complete your project on time. Some things to consider when setting your timeline and goals include the length of your project, the number of tracks you need to record, and any deadlines you need to meet. It is also important to establish clear goals for your recording session, such as capturing a specific sound or emotion, or achieving a certain level of technical proficiency.
Warming up and preparing your voice
Before starting a recording session, it is important to warm up and prepare your voice to ensure that you sound your best. Here are some tips for warming up and preparing your voice:
- Practice proper breathing techniques: Proper breathing is essential for singing or speaking clearly and confidently. Take deep breaths and exhale slowly to help you control your breathing and maintain your voice.
- Exercise your vocal range: To warm up your voice, try singing or speaking in different ranges. This will help you stretch your vocal cords and increase your vocal flexibility.
- Familiarize yourself with the material to be recorded: Before starting the recording session, take some time to familiarize yourself with the material you will be recording. This will help you feel more confident and comfortable when you start recording.
In addition to these tips, it is also important to stay hydrated and avoid alcohol and cigarettes before the recording session. These substances can dry out your vocal cords and impair your ability to sing or speak clearly.
Recording Techniques for Professional Sound Quality
Proper microphone usage
Selecting the right microphone for your voice and recording environment is crucial in achieving professional sound quality. There are various types of microphones available, each designed to capture specific frequencies and sound characteristics. It is important to choose a microphone that complements your voice and the environment in which you will be recording.
Once you have selected the right microphone, the next step is to position it correctly. The placement of the microphone can greatly affect the quality of the recorded sound. Generally, it is recommended to position the microphone slightly off-axis, pointing towards the diaphragm, and at a distance from the mouth that is approximately three times the diagonal length of the microphone. This positioning technique helps to reduce popping sounds and proximity effect, resulting in a smoother and more natural sound.
In addition to proper placement, adjusting microphone settings for optimal sound quality is also essential. Most microphones have adjustable settings such as gain, sensitivity, and polar patterns. It is important to understand how these settings affect the recorded sound and to adjust them accordingly. Gain should be set at a level that provides sufficient signal without causing distortion, while sensitivity and polar patterns can be adjusted to optimize the capture of sound frequencies.
By following these proper microphone usage techniques, you can achieve professional sound quality in your recordings.
Using high-quality audio software
Using high-quality audio software is crucial to achieving professional sound quality when recording. Here are some tips on how to use audio editing software effectively:
- Understanding the features and functions of audio editing software
Before using audio editing software, it is important to understand its features and functions. This includes familiarizing yourself with the user interface, understanding the different tools and effects available, and learning how to navigate the software.
- Applying EQ, compression, and other effects to enhance sound quality
EQ (equalization) and compression are two of the most commonly used effects in audio editing software. EQ is used to adjust the frequency of sound, while compression is used to control the dynamic range of a recording. Other effects such as reverb, delay, and chorus can also be used to enhance sound quality.
When applying these effects, it is important to use them sparingly and with intention. Overuse of effects can lead to a muddy, unprofessional sound. Instead, use them to enhance the natural sound of the recording and to bring out specific elements of the mix.
- Using noise reduction tools to minimize background noise
Background noise can be a major issue when recording, especially if you are recording in a noisy environment or using low-quality equipment. To minimize background noise, you can use noise reduction tools available in audio editing software.
Noise reduction tools work by analyzing the audio signal and removing unwanted noise. There are different types of noise reduction tools, including spectral noise reduction and hiss reduction. It is important to use these tools carefully, as overuse can lead to a loss of fidelity and a decrease in sound quality.
In summary, using high-quality audio software is an essential part of achieving professional sound quality when recording. By understanding the features and functions of the software, applying effects with intention, and using noise reduction tools effectively, you can enhance the sound quality of your recordings and achieve a professional sound.
Maintaining consistency and accuracy during the recording process
Maintaining consistency and accuracy during the recording process is crucial for producing professional-sounding audio. Here are some tips to help you achieve this:
Following a clear and well-organized script
Before you start recording, it’s important to have a clear and well-organized script. This will help you stay on track and ensure that you cover all the necessary points. Your script should be concise, easy to understand, and follow a logical flow. If possible, have someone else review your script to catch any errors or inconsistencies.
Avoiding distractions and interruptions
During the recording process, it’s important to minimize distractions and interruptions. Find a quiet, comfortable location to record, and try to schedule your recording sessions during times when you’re least likely to be interrupted. If you do get interrupted, take a short break and come back to the recording when you’re fully focused and ready to continue.
Ensuring proper timing and pacing
Proper timing and pacing are essential for maintaining consistency and accuracy during the recording process. Make sure you’re speaking at a consistent pace throughout the recording, and try to avoid rushing through certain sections or lingering too long on others. If you’re recording a conversation or interview, make sure to give your interviewee plenty of time to respond, and avoid interrupting or talking over them.
Post-Recording Editing and Enhancement
Editing out mistakes and improving sound quality
One of the most important aspects of sound recording is the ability to edit out mistakes and improve the overall sound quality. Here are some tips and techniques for editing out mistakes and improving sound quality:
- Reviewing the recording for errors and inconsistencies
- Before beginning the editing process, it’s important to listen to the entire recording and take note of any errors or inconsistencies. This could include things like missed notes, off-pitch singing, or poor timing.
- Use a digital audio workstation (DAW) to review the recording and make notes on areas that need to be edited.
- Removing unwanted noise and artifacts
- Noise and artifacts can come from a variety of sources, including electronic equipment, environmental factors, and human error.
- Use a noise reduction tool or plugin to remove unwanted noise and artifacts from the recording.
- Be careful not to remove too much noise, as this can also remove parts of the desired sound.
- Fine-tuning the sound balance and stereo imaging
- The sound balance refers to the distribution of different sound elements within the mix.
- Use a mixing tool or plugin to fine-tune the sound balance and adjust the stereo imaging.
- This will help create a more balanced and polished sound, which is important for a professional recording.
Overall, editing out mistakes and improving sound quality is a crucial step in the recording process. By taking the time to review the recording, remove unwanted noise and artifacts, and fine-tune the sound balance and stereo imaging, you can create a professional-sounding recording that is sure to impress.
Adding special effects and enhancements
One of the most effective ways to improve the sound quality of your recordings is by adding special effects and enhancements. These effects can help create a more professional sound and add depth and texture to your recordings. Here are some tips for adding special effects and enhancements to your recordings:
- Applying reverb, delay, and other effects: Reverb, delay, and other effects can be used to create a more professional sound. Reverb can add depth and space to your recordings, while delay can add echo and create a sense of movement. Experiment with different effects to find the ones that work best for your recordings.
- Experimenting with different sound textures and tones: Experimenting with different sound textures and tones can help create a more unique and professional sound. Try adding different types of instruments or sounds to your recordings to create a more interesting and dynamic sound.
- Ensuring that the effects complement the content and tone of the recording: It’s important to ensure that the effects you add complement the content and tone of your recordings. For example, adding a heavy reverb effect to a vocal recording might be appropriate for a song with a dreamy or ethereal tone, but it might not be appropriate for a more upbeat or energetic song. Take the time to listen to your recordings and adjust the effects until you find the right balance.
Overall, adding special effects and enhancements can be a powerful way to improve the sound quality of your recordings. Experiment with different effects and textures to find the ones that work best for your recordings, and be sure to listen carefully to ensure that the effects complement the content and tone of your recordings.
Sharing and Distributing Your Recorded Content
Optimizing your recordings for different platforms
To ensure that your recorded content sounds professional across various platforms, it’s crucial to optimize your recordings for each distribution channel. Here are some tips to help you achieve this:
- Adjusting the audio format and bit rate for different distribution channels: Different platforms have different requirements for audio formats and bit rates. For instance, MP3 is a widely-used audio format for podcasts, while WAV or AIFF formats are typically used for high-quality audio. To ensure compatibility, it’s essential to adjust the audio format and bit rate according to the platform’s specifications. A higher bit rate usually results in better sound quality but increases the file size, which may affect streaming or downloading times.
- Compressing files for efficient sharing and streaming: Compression reduces the file size of your recordings without compromising the sound quality. Lossless compression techniques, such as the Advanced Audio Coding (AAC) format, can help reduce file sizes while maintaining high-quality audio. This is particularly useful when sharing or streaming content over the internet, as it helps to minimize buffering times and improve streaming performance.
- Preparing your recordings for podcasts, videos, or other media: Depending on the intended use of your recorded content, you may need to prepare it differently. For example, if you’re creating a podcast, you’ll need to ensure that your audio content is properly edited, formatted, and delivered in a compatible format for podcasting platforms. Similarly, if you’re creating a video, you’ll need to synchronize your audio with the visual content and ensure that the audio levels are appropriate for the medium.
By following these tips, you can optimize your recordings for different platforms and ensure that your content sounds professional regardless of where it’s being shared or distributed.
Promoting your content and building your audience
- Utilizing social media and other online platforms to share your recordings
- Creating a presence on popular platforms such as YouTube, SoundCloud, and Twitter
- Optimizing your profile and uploading engaging content
- Engaging with your audience through comments and direct messages
- Engaging with listeners and encouraging feedback
- Encouraging feedback through calls to action and requests for reviews
- Responding to comments and messages in a timely and professional manner
- Addressing any concerns or negative feedback constructively
- Collaborating with other creators and influencers in your niche
- Reaching out to potential collaborators through direct messaging or email
- Offering unique value and ideas for collaboration
- Building relationships with other creators to expand your reach and audience
FAQs
1. What equipment do I need to sound professional when recording?
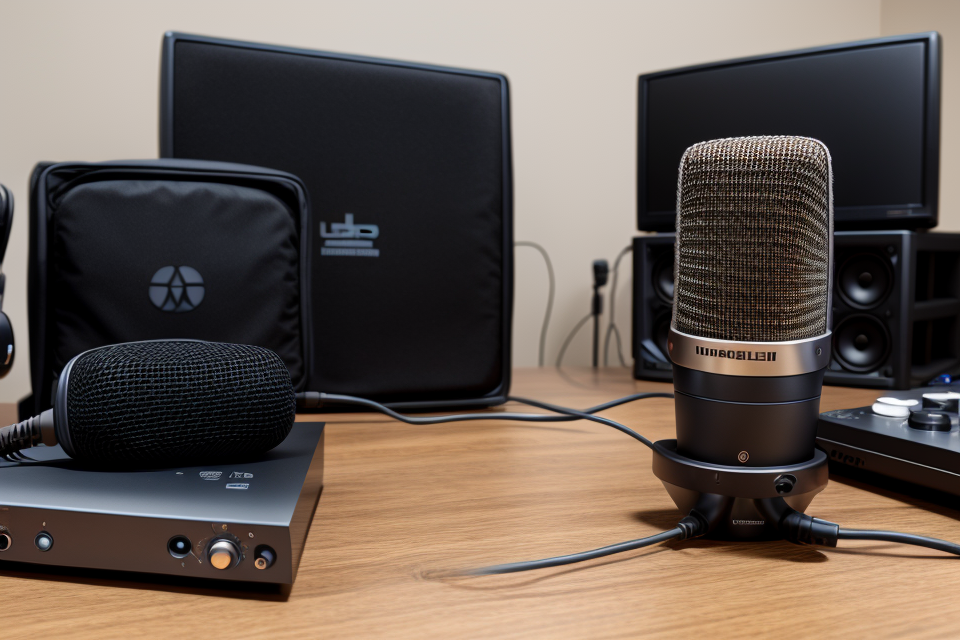
To sound professional when recording, you will need a few essential pieces of equipment. Firstly, you will need a good quality microphone, preferably a condenser microphone, as it is designed to capture a wide range of frequencies and sounds. You will also need a microphone stand to position the microphone correctly and prevent any unwanted noise or vibrations. A pop filter is also recommended to reduce popping sounds caused by wind or plosives. Finally, a high-quality audio interface or sound card is necessary to ensure clear and accurate audio recording.
2. How should I set up my microphone for recording?
To set up your microphone for recording, you should first ensure that it is positioned correctly. Place the microphone at a distance from your mouth that is about two to three times the diagonal length of the microphone. This will help to reduce any unwanted background noise and provide a clear, focused sound. You should also position the microphone so that it is facing your mouth and not pointing at any other objects or surfaces that may cause unwanted reflections or echoes. Finally, adjust the microphone sensitivity and gain settings to ensure that the audio level is within the acceptable range.
3. What is the best software for recording and editing audio?
There are many software options available for recording and editing audio, but some of the most popular ones include Audacity, Adobe Audition, and Pro Tools. Audacity is a free, open-source software that is great for basic recording and editing tasks. Adobe Audition is a more advanced software that offers a wide range of features for editing and mixing audio. Pro Tools is a professional-grade software used by many audio engineers and producers for its high-quality sound and advanced editing capabilities. Ultimately, the best software for you will depend on your specific needs and preferences.
4. How can I reduce background noise and unwanted sounds in my recordings?
To reduce background noise and unwanted sounds in your recordings, you should take steps to minimize them before recording. This may include finding a quiet location to record, closing windows and doors to prevent external noise, and using acoustic foam or other soundproofing materials to absorb unwanted reflections and echoes. During recording, you can use a noise-cancelling microphone or a noise gate to reduce background noise. After recording, you can use software tools such as noise reduction plugins or spectral noise reduction to further reduce unwanted sounds and improve the overall quality of your recordings.
5. How can I improve the quality of my vocal recordings?
To improve the quality of your vocal recordings, you should focus on a few key factors. Firstly, ensure that you are using a good quality microphone that is designed for vocal recording. This will help to capture the nuances and details of your voice and reduce any unwanted noise or distortion. Next, find a quiet and comfortable location to record, and position the microphone correctly to capture your voice from the optimal angle. Finally, use proper breathing and vocal techniques to ensure that your voice sounds clear, warm, and engaging. You can also use software tools such as equalization and compression to enhance the quality of your vocal recordings and improve their overall clarity and impact.


