Are you tired of hearing yourself sound like a robot on recordings? Want to enhance your vocal quality and make your recordings sound more polished? Look no further! In this article, we’ll provide you with tips and techniques to improve your recording quality and make yourself sound better than ever before. From proper microphone technique to vocal warm-ups, we’ve got you covered. So grab a cup of coffee, sit back, and let’s dive into the world of recording like a pro!
Preparing for Recording
Setting up your recording environment
When it comes to recording quality, the environment you choose to record in can have a significant impact. Here are some tips for setting up your recording environment:
Choosing the right location
The location you choose to record in can greatly affect the quality of your recording. Some factors to consider when choosing a location include:
- Reverberation: The amount of time it takes for sound to decay in the room. A room with too much reverberation can create a muddy sound, while a room with too little reverberation can create a dry sound.
- Background noise: The level of noise in the room, including external noise and the noise produced by the room itself. A room with too much background noise can be distracting and reduce the quality of your recording.
- Sound isolation: The degree to which the room blocks outside noise and reflects sound back into the room. A room with good sound isolation can help prevent outside noise from interfering with your recording.
It’s important to choose a location that minimizes these factors as much as possible to ensure the best possible recording quality.
Minimizing background noise
Background noise can be a major issue when recording, as it can be distracting and reduce the quality of your recording. Here are some tips for minimizing background noise:
- Record during quiet times: Try to record during times when there is less noise in the room, such as early in the morning or late at night.
- Use earplugs: If you’re recording in a noisy environment, try using earplugs to block out external noise.
- Use white noise: White noise is a constant, low-level noise that can help drown out other noise in the room. You can use a white noise machine or an app on your phone to create white noise.
- Move furniture and rugs: Furniture and rugs can absorb sound and create unwanted reverberation. Try moving them to different parts of the room to see if it improves the sound quality.
Acoustic treatment of the room
Acoustic treatment refers to the use of materials and techniques to control the sound in a room. Here are some tips for acoustic treatment:
- Add absorption: Absorption materials, such as foam or fabric, can help reduce reverberation and improve sound quality. You can place them on walls, ceilings, and floors.
- Add diffusion: Diffusion materials, such as fabric or wooden panels, can help scatter sound waves and reduce the amount of reverberation in the room.
- Create a vocal booth: A vocal booth is a small, enclosed space that can help isolate your voice and reduce background noise. You can create a vocal booth by using materials such as plywood or foam to block off a small area of the room.
By following these tips, you can set up your recording environment to improve the quality of your recordings.
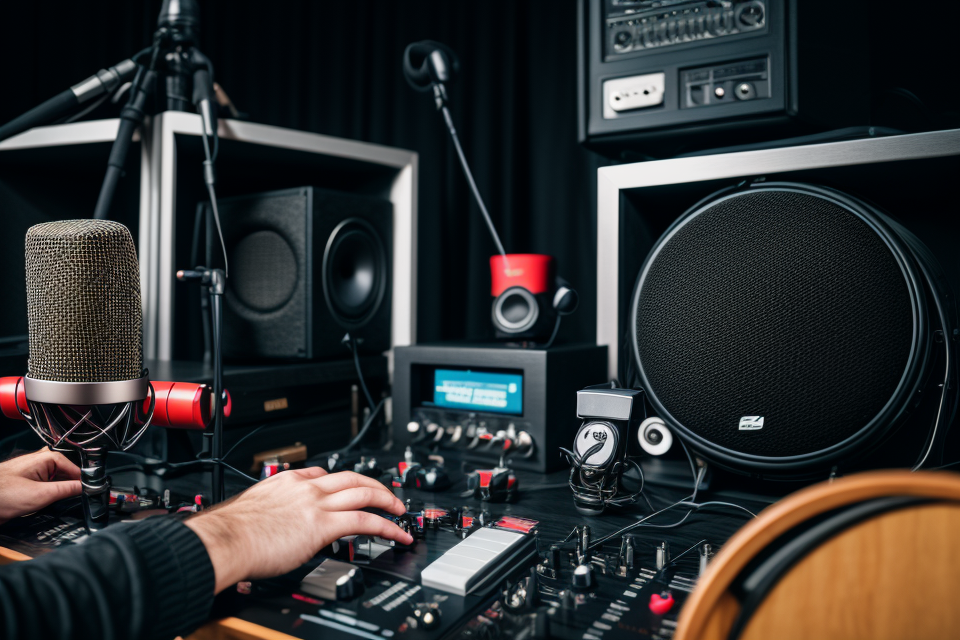
Checking your equipment
When it comes to recording, having the right equipment is crucial to achieving high-quality sound. In this section, we will discuss the importance of checking your equipment before starting a recording session.
Ensuring Proper Microphone Technique
Microphones are a vital part of any recording setup, and proper microphone technique can make a significant difference in the quality of your recordings. Here are some tips to ensure proper microphone technique:
- Position the microphone correctly: Make sure the microphone is positioned correctly in relation to the sound source. The rule of thumb is to place the microphone at a distance from the sound source that is three times the diagonal length of the microphone.
- Use the right type of microphone: Different types of microphones are designed for different types of sound sources. For example, condenser microphones are better for capturing vocal performances, while dynamic microphones are better for capturing loud instruments like electric guitars.
- Use a pop filter: A pop filter is a small screen that is placed in front of the microphone to prevent popping sounds from being recorded. This is especially important when recording vocals.
Testing Your Headphones and Monitors
Headphones and monitors are essential for monitoring your recordings during a session. Here are some tips for testing your headphones and monitors:
- Check for proper volume levels: Make sure that the volume levels on your headphones and monitors are set correctly. This will help you avoid any potential feedback issues during the recording process.
- Listen for clarity and accuracy: Make sure that the sound you are hearing through your headphones and monitors is clear and accurate. If there is any distortion or muddiness in the sound, it may be a sign that your equipment needs to be adjusted.
Familiarizing Yourself with Your Recording Software
Finally, it’s important to familiarize yourself with your recording software before starting a session. Here are some tips for getting acquainted with your recording software:
- Familiarize yourself with the user interface: Take some time to explore the different features and options available in your recording software. This will help you get a feel for how the software works and how to use it effectively.
- Learn about the different settings and options: Make sure you understand the different settings and options available in your recording software. This will help you make informed decisions about how to set up your recording environment.
By following these tips, you can ensure that your equipment is properly set up and ready to go before starting a recording session. This will help you achieve high-quality sound and make the most out of your recording experience.
Recording Techniques
Proper microphone technique
Microphone positioning is a crucial aspect of achieving high-quality recordings. The microphone should be placed at the right distance from the sound source to capture the desired sound. Placing the microphone too close or too far away can result in unwanted sounds and distortion. Experiment with different distances to find the optimal position for your microphone.
Adjusting the gain and volume levels is also important for achieving a good recording quality. Too high gain can cause distortion, while too low gain can result in a weak and quiet recording. Adjust the gain and volume levels according to the sound source’s volume and the desired recording level.
Using a pop filter and wind screen is essential for preventing unwanted sounds such as popping and wind noise. Pop filters are designed to reduce plosive sounds that can occur when speaking, while wind screens are used to reduce wind noise when recording outdoors or in noisy environments. These accessories can significantly improve the quality of your recordings.
Recording techniques for different types of audio
Recording vocals:
- Use a good quality microphone: A high-quality microphone will capture your voice more accurately and produce a better overall sound.
- Position the microphone correctly: Place the microphone at a distance from your mouth that is about three times the diagonal length of the microphone. This will help to eliminate popping sounds and create a more natural sound.
- Use a pop filter: A pop filter is a small screen that fits over the microphone to help reduce popping sounds that can occur when pronouncing certain letters.
- Use a microphone shield: A microphone shield is a screen that fits around the microphone to help reduce unwanted background noise.
Recording instruments:
- Choose the right microphone: Different types of instruments require different types of microphones. For example, a dynamic microphone is best for recording drums, while a condenser microphone is better for recording acoustic guitars.
- Position the microphone correctly: Position the microphone at the correct distance from the instrument to capture the best sound. For example, position the microphone close to the drum to capture the full impact of the drum hit.
- Use a DI box: A DI box is a device that helps to isolate the instrument’s sound and reduce unwanted background noise.
Recording field recordings:
- Use a high-quality recorder: A high-quality recorder will capture more detail and produce a better overall sound.
- Use a good quality microphone: A high-quality microphone will capture the sounds more accurately and produce a better overall sound.
- Use a windscreen: A windscreen is a small screen that fits over the microphone to help reduce unwanted wind noise.
- Use a tripod: A tripod will help to keep the microphone steady and reduce unwanted noise caused by movement.
Best practices for recording
One of the most important aspects of recording is to establish best practices that will help you achieve the highest quality sound possible. Here are some tips to keep in mind:
- Keeping track of takes: It’s important to keep track of the different takes you record, especially if you’re working on a multi-track project. One way to do this is to use take numbers or annotations in your recording software. This will help you keep track of which take is which, and make it easier to choose the best one for the final mix.
- Using markers and notes: Markers and notes can be helpful for keeping track of specific points in a recording, such as the start of a verse or the beginning of a chorus. You can use a pencil and paper, or a digital audio workstation (DAW) to add markers and notes to your recordings. This will help you navigate your recordings more easily, and make it easier to edit and arrange your tracks.
- Reviewing and editing your recordings: It’s important to review and edit your recordings to ensure that they sound their best. This may involve listening to your recordings and making notes on areas that need improvement, such as the balance between different instruments or the overall volume level. You may also need to edit out mistakes or unwanted noise, such as coughs or pops. It’s important to be critical and objective when reviewing your recordings, and to take the time to make any necessary adjustments to achieve the best possible sound.
Enhancing Your Recordings
Basic audio editing techniques
Cutting and pasting audio clips
One of the most basic audio editing techniques is cutting and pasting audio clips. This involves selecting a section of audio and moving it to a different location within the same file or to a different file altogether. To cut and paste audio clips, use the “cut” and “paste” commands in your audio editing software. This technique is useful for removing unwanted parts of a recording or for combining multiple recordings into one seamless track.
Fading in and out audio
Another common audio editing technique is fading in and out audio. This is useful for creating smooth transitions between different parts of a recording or for gradually bringing a recording up to full volume. To fade in or out audio, use the “fade in” and “fade out” commands in your audio editing software. The amount of time for the fade can be adjusted to create the desired effect.
Adjusting volume levels
Adjusting volume levels is another basic audio editing technique that can greatly improve the quality of your recordings. This involves increasing or decreasing the volume of a particular section of audio to ensure that it is consistent with the rest of the recording. To adjust volume levels, use the “volume” or “amplitude” controls in your audio editing software. Be careful not to over-adjust the volume, as this can result in distortion or clipping.
Effects and processing
Effects and processing are essential tools to enhance your recordings and give them a professional touch. These tools can help you control and manipulate various aspects of your audio, such as EQ, compression, reverb, and delay. Here are some tips and techniques to improve your recording quality through effects and processing:
EQ and Compression
EQ (Equalization) and compression are two of the most commonly used effects in audio processing. EQ is used to adjust the frequency response of your audio, while compression is used to control the dynamic range.
EQ:
- Use EQ to correct imbalances in your audio, such as removing unwanted frequencies or boosting certain frequencies.
- Use a spectrum analyzer to identify problem frequencies in your audio.
- Use a parametric EQ to target specific frequency ranges and adjust them accordingly.
Compression:
- Use compression to control the dynamic range of your audio, making it sound more consistent and balanced.
- Use a compressor with a ratio of 4:1 or higher to avoid squashing your audio too much.
- Use a sidechain compression to create ducking effects and make your audio sound more natural.
Reverb and Delay
Reverb and delay are effects that can add depth and dimension to your recordings.
Reverb:
- Use reverb to simulate the natural reflections of sound in a room or space.
- Experiment with different reverb types, such as plate, hall, and room reverb, to find the best fit for your recording.
- Use a high-quality reverb plugin to avoid a cheap or artificial sound.
Delay:
- Use delay to create echo effects and add depth to your recordings.
- Experiment with different delay settings, such as time, feedback, and wet/dry mix, to find the best sound for your recording.
- Use a delay plugin with a high-quality sound to avoid a cheap or artificial sound.
Noise Reduction and Restoration
Noise reduction and restoration are essential tools to improve the quality of your recordings.
Noise Reduction:
- Use noise reduction to remove unwanted background noise, such as hiss or hum, from your recordings.
- Use a noise reduction plugin with a high-quality sound to avoid a cheap or artificial sound.
- Experiment with different noise reduction settings, such as threshold, ratio, and attack/release, to find the best sound for your recording.
Restoration:
- Use restoration tools to repair damaged or poor-quality recordings.
- Use a restoration plugin to remove clicks, pops, and other artifacts from your recordings.
- Experiment with different restoration settings, such as filter and de-noise, to find the best sound for your recording.
Overall, using effects and processing can greatly improve the quality of your recordings and give them a professional touch. Experiment with different settings and plugins to find the best sound for your recording.
Mixing and mastering
Mixing and mastering are two critical stages in the process of enhancing your recordings. These stages involve making adjustments to the levels, panning, and effects of the various tracks in your recording to create a balanced and polished final product.
Balancing levels and panning
One of the first steps in mixing and mastering is to balance the levels and panning of the different tracks in your recording. This involves adjusting the volume of each track so that they are all at the same level, and positioning them in the stereo field using panning.
Panning is the process of placing a track in one channel or the other of a stereo mix. For example, if you have a piano track, you might pan it to the center of the mix to create a more balanced sound. On the other hand, if you have a guitar track, you might pan it hard to one side to create a more dramatic effect.
Adding and removing effects
Another important aspect of mixing and mastering is adding and removing effects. Effects can be used to enhance the sound of individual tracks or the overall mix. For example, you might add reverb to a vocal track to create a sense of space, or use compression to even out the levels of a drum track.
However, it’s important to use effects sparingly and with purpose. Overuse of effects can lead to a cluttered and unbalanced mix. It’s also important to remove any unwanted effects, such as noise or artifacts, that may have been introduced during the recording process.
Finalizing your mix
Once you have balanced the levels and panning, added and removed effects, and made any other necessary adjustments, it’s time to finalize your mix. This involves listening to the mix on a variety of different playback systems, making any necessary tweaks, and preparing the final master file.
The final master file is the version of your recording that will be distributed to the public. It’s important to take the time to properly master your recording, as this will help ensure that it sounds its best on a wide range of playback systems.
In summary, mixing and mastering are critical stages in the process of enhancing your recordings. By balancing levels and panning, adding and removing effects, and finalizing your mix, you can create a polished and balanced final product that sounds its best on a wide range of playback systems.
Sharing Your Recordings
Choosing the right format and bit rate
When it comes to sharing your recordings, choosing the right format and bit rate is crucial to ensure that your audio is of high quality and can be easily shared. Here are some important factors to consider when selecting the format and bit rate for your recordings:
MP3, AAC, FLAC, and WAV
MP3, AAC, FLAC, and WAV are four common audio formats used for sharing recordings. Each format has its own strengths and weaknesses, and the best format for your recordings will depend on your specific needs and preferences.
MP3 is a widely used format that offers good sound quality while keeping file sizes relatively small. It uses lossy compression, which means that some audio data is removed to reduce the file size. This can result in some loss of audio quality, but the difference is usually minimal for most listeners.
AAC is another widely used format that offers good sound quality and is compatible with a wide range of devices. It also uses lossy compression, but it is more efficient than MP3, which means that it can produce smaller file sizes while maintaining good audio quality.
FLAC is a lossless format that offers high-quality audio without any loss of data. This means that the audio is compressed without any loss of quality, and the file size is smaller than WAV.
WAV is an uncompressed format that offers the highest quality audio. It does not use any compression, which means that the file size is larger than other formats. However, it is the preferred format for professional audio work and is often used for mastering and mixing.
Bit rates and their impact on file size and audio quality
Bit rate refers to the amount of data that is used to represent each second of audio. The higher the bit rate, the more data is used, which results in a higher file size and better audio quality. Conversely, the lower the bit rate, the less data is used, which results in a smaller file size but lower audio quality.
When choosing a bit rate, it is important to balance file size and audio quality. A higher bit rate will result in a larger file size, but it will also result in better audio quality. A lower bit rate will result in a smaller file size, but it will also result in lower audio quality.
The optimal bit rate for your recordings will depend on the intended use and the desired level of audio quality. For example, if you are sharing recordings online, you may want to use a higher bit rate to ensure that the audio quality is high. However, if you are sharing recordings on a low-bandwidth connection, you may need to use a lower bit rate to avoid slow download times.
In general, a bit rate of 128-192 kbps is a good starting point for most recordings. This will provide a good balance between file size and audio quality, and it is compatible with most devices and platforms. However, if you are using lossless formats like FLAC, you can use a higher bit rate to achieve even better audio quality.
Uploading and sharing your recordings
Cloud storage options
Once you have recorded your audio, you may want to share it with others. One way to do this is by uploading your recordings to cloud storage platforms. Cloud storage allows you to store your files online, making them accessible from any device with an internet connection. Some popular cloud storage options include:
- Google Drive
- Dropbox
- OneDrive
- iCloud
When uploading your recordings to cloud storage, it’s important to consider the file size and format. Larger files may take longer to upload and may consume more storage space. Common audio file formats include WAV, MP3, and FLAC. WAV files are uncompressed and offer high-quality sound, but they can be large. MP3 files are compressed and offer a smaller file size, but they may not sound as good as WAV files. FLAC files are also compressed, but they offer lossless audio quality.
Sharing on social media and music platforms
Another way to share your recordings is by uploading them to social media platforms or music platforms. Social media platforms like Facebook, Twitter, and Instagram allow you to share audio recordings as part of your posts. Music platforms like SoundCloud and Bandcamp are specifically designed for sharing music and audio recordings.
When uploading your recordings to these platforms, it’s important to consider your audience and the platform’s policies. Some platforms may have specific guidelines for audio quality or content. It’s also important to consider copyright and licensing considerations, as we will discuss in the next section.
Copyright and licensing considerations
When sharing your recordings, it’s important to consider copyright and licensing issues. If you are recording original music, you own the copyright to your recordings. However, if you are recording cover songs or using samples, you may need to obtain permission from the copyright holder.
In addition, when uploading your recordings to social media or music platforms, you may need to agree to their terms of service and licensing agreements. These agreements may impact your ownership and control of your recordings. It’s important to carefully review these agreements before uploading your recordings.
Final thoughts
The Importance of Practice and Experimentation
As with any skill, improving your recording quality requires practice and experimentation. Set aside time each day or week to focus on improving your techniques and experimenting with new equipment or software. Remember that not every recording will be perfect, but each one can serve as a learning opportunity.
Keeping a Recording Journal
One effective way to track your progress and identify areas for improvement is by keeping a recording journal. This journal can include notes on your recording sessions, reflections on what worked well and what didn’t, and ideas for future improvements. Over time, you’ll be able to see how your skills and techniques have evolved, and you’ll have a record of your progress to refer back to.
Staying Inspired and Motivated
Finally, it’s important to stay inspired and motivated as you work to improve your recording quality. This can mean listening to and studying the work of other musicians and producers, seeking out feedback and advice from others in your field, and finding ways to stay engaged and excited about your own music. Whether you’re recording for your own enjoyment or for a larger audience, maintaining a strong sense of passion and purpose will help you to continue improving and growing as a musician.
FAQs
1. What are some tips for improving my recording quality?
There are several tips that can help you improve your recording quality. First, make sure you are using a good quality microphone and recording in a quiet, low-reverb space. It’s also important to use a pop filter to reduce plosives and sibilance. Experiment with different microphone placements to find the best sound for your voice. Additionally, invest in a good pair of headphones to monitor your recordings and catch any mistakes. Finally, use software like a digital audio workstation (DAW) to edit and refine your recordings.
2. How can I reduce background noise in my recordings?
There are several ways to reduce background noise in your recordings. First, make sure you are recording in a quiet room with minimal outside noise. Use acoustic panels or soundproofing materials to reduce echo and reverberation. Consider using a noise-cancelling microphone or a foam windscreen to block out ambient noise. Finally, use a DAW to remove background noise during the editing process.
3. What are some techniques for improving my vocal recording?
There are several techniques you can use to improve your vocal recording. First, make sure you are using a good quality microphone and recording in a quiet, low-reverb space. It’s also important to use a pop filter to reduce plosives and sibilance. Experiment with different microphone placements to find the best sound for your voice. Additionally, invest in a good pair of headphones to monitor your recordings and catch any mistakes. Finally, use software like a DAW to edit and refine your recordings.
4. How can I avoid sounding nasal or thin on my recordings?
To avoid sounding nasal or thin on your recordings, try the following techniques. First, use a high-quality microphone and position it properly to capture the best sound from your voice. Avoid singing or speaking too closely to the microphone, as this can create a nasal sound. Use a pop filter to reduce plosives and sibilance, and consider using a microphone with a built-in high-pass filter to reduce any low-frequency rumble. Finally, use a DAW to edit and refine your recordings, adjusting the EQ and compression settings to create a richer, fuller sound.
5. What are some common mistakes to avoid when recording?
There are several common mistakes to avoid when recording. First, make sure you are recording in a quiet, low-reverb space. Avoid recording in rooms with excessive echo or reverberation, as this can create a muddy, unprofessional sound. Avoid speaking or singing too closely to the microphone, as this can create distortion and other unwanted sounds. Finally, avoid rushing or talking too quickly, as this can make it difficult to understand your words and create a choppy, disjointed sound.


