Recording music is an art form that has been around for over a century. It’s a way of capturing the creativity and passion of musicians and making it available for generations to come. In this article, we will explore the various techniques used to record music, from the earliest days of mechanical devices to the latest digital technology. We will look at the different approaches to recording, including live performances, overdubbing, and mixing, and how they affect the final sound of the music. Whether you’re a musician, producer, or simply a music lover, this article will give you a behind-the-scenes look at the magic of music recording.
The Importance of Recording Techniques in Music Production
The Evolution of Recording Technology
Recording technology has come a long way since the early days of mechanical devices that etched sound waves onto cylinders or discs. Over the years, advancements in technology have made it possible to capture, manipulate, and reproduce sound with greater accuracy and clarity than ever before. In this section, we will explore the evolution of recording technology and how it has shaped the music industry.
The Early Years: Mechanical Devices and Analog Recording
The earliest known recording device was the mechanical device called the “phonautograph,” invented by Thomas Edison in 1877. This device used a needle to etch a groove onto a tube covered in tinfoil, creating a crude recording of sound. This technology was improved upon in the following years, leading to the development of the first practical disc recorders in the late 1800s.
These early analog recordings were made using mechanical devices that converted sound waves into electrical signals, which were then etched onto a physical medium such as a cylinder or disc. The quality of these recordings was limited by the technology of the time, and they suffered from a lack of fidelity and dynamic range.
The Magnetic Tape Era: A Revolution in Recording
The advent of magnetic tape in the 1930s revolutionized the recording industry. Magnetic tape offered several advantages over mechanical devices, including greater flexibility, higher fidelity, and the ability to record and playback sound with no loss of quality. This led to the development of the first tape recorders, which were used for recording and broadcasting music, as well as for industrial and scientific applications.
The use of magnetic tape enabled engineers to experiment with new techniques for capturing and manipulating sound, such as multitrack recording and tape echo. These techniques allowed for greater creative control and enabled musicians to create more complex and sophisticated recordings.
Digital Recording: A New Era in Music Production
The digital revolution of the 1970s and 1980s brought about another major change in the recording industry. Digital recording technology offered several advantages over analog, including greater accuracy, clarity, and dynamic range. It also enabled engineers to edit and manipulate sound with greater precision and control.
The first digital recorders were developed in the 1970s, and they quickly became popular among recording professionals. In the 1980s, digital technology began to be used in the mainstream music industry, leading to a shift away from analog recording methods.
The Dawn of the Digital Age: Computer-Based Recording and Music Production
The rise of personal computers in the 1990s and 2000s led to a new era in music production, enabling musicians and producers to create and record music on their own computers. This shift towards computer-based recording has led to a democratization of the music industry, enabling anyone with a computer and a few basic tools to create and release their own music.
In conclusion, the evolution of recording technology has had a profound impact on the music industry, enabling musicians and producers to create and record music with greater accuracy, clarity, and creative control than ever before. As technology continues to advance, it is likely that recording techniques will continue to evolve, opening up new possibilities for music creation and production.
The Impact of Recording Techniques on Music Quality
Proper recording techniques play a crucial role in enhancing the quality of music. It is important to understand how different techniques can affect the final product. Some of the key areas where recording techniques have a significant impact on music quality include:
- Sound Capture: The method used to capture the sound of an instrument or voice can greatly affect the final product. Different techniques such as using condenser microphones or ribbon microphones can result in different tonal qualities.
- Mic Placement: The placement of microphones can greatly affect the sound captured. The distance and angle of the microphone from the source can also have a significant impact on the final product.
- Signal Processing: The use of equalization, compression, and other signal processing techniques can greatly affect the sound of a recording. These techniques can be used to enhance certain frequencies or to compensate for deficiencies in the original sound.
- Recording Environment: The environment in which a recording is made can also have a significant impact on the final product. Factors such as room acoustics, noise levels, and ambient temperature can all affect the quality of a recording.
- Editing and Mixing: The process of editing and mixing is crucial in shaping the final product. This process involves combining different tracks, adjusting levels, and adding effects to create a cohesive and polished final product.
In conclusion, recording techniques play a crucial role in determining the quality of music. Understanding the impact of different techniques and how to use them effectively can greatly enhance the final product.
The Role of Recording Techniques in Music Creation
Recording techniques play a crucial role in music creation as they enable musicians and producers to capture, manipulate, and enhance the sound of their instruments and voices. The quality of the recorded sound directly affects the final output of the music and can greatly impact the listener’s experience.
Some of the key functions of recording techniques in music creation include:
- Capturing the sound of musical instruments and voices with high accuracy and fidelity.
- Enhancing the sound of instruments and voices through equalization, compression, and other processing techniques.
- Creating and manipulating sounds using various electronic and digital tools.
- Recording and layering multiple tracks to build complex arrangements.
- Balancing and adjusting the levels of different tracks to create a cohesive mix.
Overall, recording techniques are essential tools for music creators, allowing them to shape and refine their musical ideas and bring them to life in a high-quality, polished form.
Common Recording Techniques Used in Music Production
Microphone Techniques
When it comes to recording music, microphone techniques play a crucial role in capturing the sound of different instruments and vocals. There are various microphone techniques that are commonly used in music production, each with its own advantages and disadvantages.
Types of Microphones
Before diving into microphone techniques, it is important to understand the different types of microphones that are commonly used in music production. There are three main types of microphones: dynamic, condenser, and ribbon.
Dynamic Microphones
Dynamic microphones are the most common type of microphone used in music production. They are known for their ability to handle high sound levels without distortion, making them ideal for live performances and recording loud instruments such as electric guitars and drums. Dynamic microphones also have a flat frequency response, which means they do not boost or cut any specific frequency range.
Condenser Microphones
Condenser microphones are more sensitive than dynamic microphones, making them ideal for recording vocals and acoustic instruments. They have a wider frequency range and can capture more detail and nuance in the sound. However, condenser microphones are more susceptible to distortion if the sound level is too high.
Ribbon Microphones
Ribbon microphones are similar to dynamic microphones in that they are less sensitive than condenser microphones. They are known for their warm and smooth sound, making them ideal for recording brass and woodwind instruments. Ribbon microphones are also less susceptible to distortion than condenser microphones.
Now that we have a basic understanding of the different types of microphones, let’s explore some microphone techniques that are commonly used in music production.
Spacing and Positioning
The distance between the microphone and the sound source can greatly affect the sound quality. Generally, it is recommended to place the microphone as close as possible to the sound source without causing distortion. The position of the microphone can also affect the sound. For example, placing a microphone above or below the sound source can create a different tone.
Directionality
Directionality refers to the way in which a microphone picks up sound from different directions. Some microphones are omnidirectional, meaning they pick up sound from all directions. Other microphones are unidirectional, meaning they pick up sound from only one direction. Directionality can be used to control the sound field and minimize background noise.
Phase
Phase is the relationship between two waves of the same sound. When two waves are in phase, they reinforce each other, creating a louder sound. When two waves are out of phase, they cancel each other out, creating a quieter sound. In recording, it is important to be aware of phase relationships between microphones to avoid phase cancellation.
Polarity
Polarity refers to the orientation of the microphone’s diaphragm. Most microphones have a “front” and a “back,” and the polarity of the microphone can affect the sound. Generally, it is recommended to use the “front” of the microphone to capture the sound source.
In conclusion, microphone techniques play a crucial role in capturing the sound of different instruments and vocals in music production. Understanding the different types of microphones and microphone techniques can help you achieve the desired sound for your recordings.
Digital Audio Workstations (DAWs)
A Digital Audio Workstation (DAW) is a software application that allows musicians and audio engineers to create, record, and edit music digitally. A DAW provides a virtual recording studio, enabling users to record, mix, and master audio tracks on a computer. The DAW also allows users to add effects, manipulate the audio waveform, and control various parameters such as volume, EQ, and compression.
There are several popular DAWs available, including Ableton Live, Pro Tools, Logic Pro, and FL Studio. Each DAW has its own unique features and workflow, and choosing the right one depends on the user’s preferences and requirements. Some DAWs are more suited for live performance, while others are better for recording and mixing in a studio environment.
DAWs have revolutionized the music production process, making it possible for musicians to create high-quality recordings with a wide range of instruments and effects. With a DAW, musicians can record multiple tracks and edit them with precision, making it easier to create complex arrangements and mixes. The ability to manipulate audio in the digital realm has also opened up new creative possibilities, enabling musicians to experiment with unconventional sounds and techniques.
Overall, DAWs are an essential tool for modern music production, providing a powerful platform for musicians and audio engineers to create, record, and edit music with precision and flexibility.
Audio Processing and Effects
In music production, audio processing and effects play a crucial role in shaping the final sound of a recording. These techniques can be used to enhance or manipulate the audio signal in various ways, allowing for a wide range of creative possibilities. Here are some common audio processing and effects techniques used in music production:
- Equalization (EQ): EQ is a process that allows you to adjust the balance of different frequency ranges in an audio signal. This can be used to correct imbalances in the mix, enhance certain instruments or vocals, or create space in the mix by cutting certain frequencies.
- Compression: Compression is a process that reduces the dynamic range of an audio signal, making all parts of the signal more consistent in volume. This can be used to enhance the sustain of a note or to glue different elements of a mix together.
- Reverb: Reverb is an effect that simulates the reflections of sound in a room or space. It can be used to create a sense of space and depth in a mix, or to enhance the natural ambience of a recording.
- Delay: Delay is an effect that creates a repetition of a sound, with a slight time lag between each repetition. It can be used to create a sense of space or depth, or to create rhythmic patterns and textures.
- Chorus: Chorus is an effect that creates multiple copies of a sound, with a slight time delay between each copy. This can be used to create a sense of thickness or fullness in a mix, or to add movement and interest to a sound.
- Flanging: Flanging is an effect that creates a swirling or whooshing sound by modulating the delay time of a sound. It can be used to create a sense of movement or depth in a mix, or to add interest to a sound.
- Phasing: Phasing is an effect that creates a subtle shift in the timing of a sound, creating a sense of movement or depth. It can be used to enhance the natural ambience of a recording, or to create a sense of space and depth in a mix.
These are just a few examples of the many audio processing and effects techniques used in music production. By understanding and mastering these techniques, you can enhance your recordings and create a wide range of creative sounds and textures.
Mixing and Mastering
Mixing and mastering are two critical stages in the music production process that can greatly impact the final sound of a recording. Mixing involves combining and balancing the different audio tracks that make up a song, while mastering is the process of optimizing the overall volume and tone of the final mix for playback on various platforms.
Mixing
Mixing is the process of combining and balancing the different audio tracks that make up a song. The goal of mixing is to create a balanced and cohesive final mix that brings out the best in each track while maintaining a cohesive overall sound. This is achieved by adjusting the levels, panning, and EQ of each track to create a mix that is balanced and free of sonic conflicts.
One of the most important aspects of mixing is creating a clear and defined mix that is easy to listen to. This involves using EQ to remove any unwanted frequencies and boosting the desired frequencies to create a more pleasing sound. It also involves using compression to control the dynamic range of the mix and ensure that all the tracks are playing at the same volume level.
Another key aspect of mixing is creating a sense of space and depth in the mix. This is achieved by using reverb and delay effects to create a sense of space and distance between the different tracks. It also involves using stereo imaging techniques to create a wider soundstage and make the mix more interesting to listen to.
Mastering
Mastering is the process of optimizing the overall volume and tone of the final mix for playback on various platforms. The goal of mastering is to ensure that the final mix sounds good on all playback systems, from small speakers to large venue sound systems.
One of the most important aspects of mastering is achieving a consistent volume level across all tracks. This is achieved by using compression and limiting to ensure that the overall volume of the mix is consistent across all tracks. It also involves using EQ to shape the overall tone of the mix and ensure that it sounds good on all playback systems.
Another key aspect of mastering is creating a sense of space and depth in the mix. This is achieved by using reverb and delay effects to create a sense of space and distance between the different tracks. It also involves using stereo imaging techniques to create a wider soundstage and make the mix more interesting to listen to.
Overall, mixing and mastering are crucial stages in the music production process that can greatly impact the final sound of a recording. By following best practices and using the right tools and techniques, you can create a balanced and cohesive mix that sounds great on all playback systems.
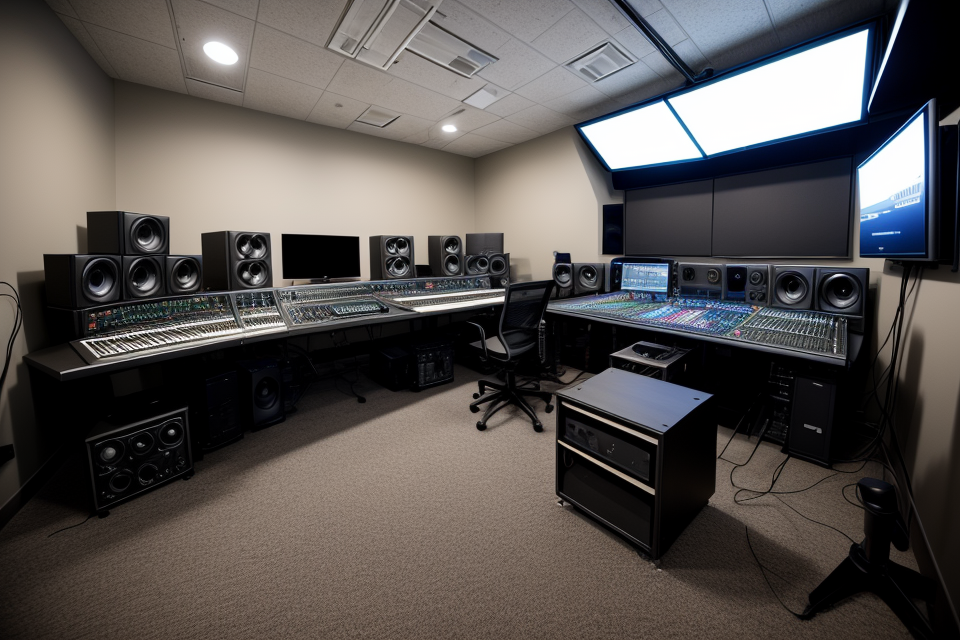
Recording Equipment and Software Used in Music Production
There are several types of microphones used in music production, each with its own unique characteristics and purposes. The following are some of the most common types of microphones used in recording:
Dynamic microphones are the most versatile type of microphone and are often used for vocals and instruments. They are known for their ability to handle high sound levels without distortion and have a frequency response that is flat and even. Dynamic microphones are also less expensive than other types of microphones, making them a popular choice for beginner musicians and recording enthusiasts.
Condenser microphones are known for their high sensitivity and ability to capture detailed and nuanced sounds. They are often used for recording vocals, acoustic instruments, and cymbals. Condenser microphones require phantom power to operate, which is a type of electrical current that is provided by the recording equipment.
Ribbon microphones are known for their warm and smooth sound and are often used for recording vocals, guitars, and other instruments. They are sensitive to humidity and temperature changes, so they require careful handling and storage. Ribbon microphones are also more fragile than other types of microphones and should be handled with care.
USB Microphones
USB microphones are designed to connect directly to a computer or laptop and are a popular choice for home recording and podcasting. They are known for their ease of use and affordability and are often used for recording vocals, guitar, and other instruments.
Each type of microphone has its own unique characteristics and is best suited for certain types of recording scenarios. Understanding the differences between these types of microphones can help you choose the right microphone for your recording needs.
Digital Audio Workstation Software
A Digital Audio Workstation (DAW) is a software application that allows musicians and audio engineers to record, edit, and mix music digitally. The DAW provides a virtual studio environment where musicians can record, arrange, and produce their music using a computer. The software provides various tools for recording, editing, and mixing audio tracks, such as MIDI sequencing, audio editing, and effects processing.
DAWs come in different forms, from simple and user-friendly software for beginners to complex and feature-rich applications for professional music production. Some popular DAWs include Ableton Live, Logic Pro, Pro Tools, and FL Studio. These software applications can be used with a variety of hardware interfaces, including MIDI controllers, audio interfaces, and external hardware synthesizers.
Using a DAW allows musicians to record multiple tracks simultaneously and edit them with precision. They can also use various effects and processors to enhance their recordings, such as equalization, compression, reverb, and delay. With the ability to manipulate and manipulate audio tracks, musicians can create complex arrangements and soundscapes that were previously impossible to achieve with analog equipment.
One of the benefits of using a DAW is the ability to export high-quality audio files in various formats, such as WAV, MP3, and AAC. This makes it easy to share and distribute music recordings, whether it’s for streaming platforms, radio play, or physical releases.
In summary, a Digital Audio Workstation (DAW) is an essential tool for music production in the digital age. It provides musicians with a virtual studio environment where they can record, edit, and mix their music with precision and creativity.
Audio Processing and Effects Plugins
In modern music production, audio processing and effects plugins play a crucial role in shaping the final sound of a recording. These software tools allow musicians and producers to manipulate and enhance various aspects of an audio signal, including tone, dynamics, and spatial characteristics. In this section, we will explore some of the most commonly used audio processing and effects plugins in music production.
Types of Audio Processing and Effects Plugins
There are numerous audio processing and effects plugins available, each designed to perform specific tasks or enhance certain aspects of a sound. Some of the most common types of plugins include:
- Equalization (EQ) plugins: These plugins allow users to adjust the frequency balance of an audio signal, either by boosting or cutting specific frequency bands. EQ plugins are essential for controlling the tonal balance of a mix and helping individual instruments or vocals sit better within the mix.
- Compression plugins: Compression plugins are used to control the dynamic range of an audio signal. They work by reducing the volume of louder sounds or boosting quieter ones, which helps to create a more consistent and balanced sound throughout a mix.
- Reverb plugins: Reverb plugins simulate the acoustics of different spaces, allowing users to add depth and ambiance to their recordings. They are often used to create a sense of space and atmosphere in a mix, as well as to enhance the clarity and presence of individual instruments or vocals.
- Delay plugins: Delay plugins create echo effects by repeating a sound after a certain period of time. They are often used to add depth and space to a mix, as well as to create rhythmic effects and specialized sounds.
- Chorus and Flanger plugins: These plugins create a thickening effect by duplicating a sound and slightly shifting it in time or pitch. They are often used to enhance the sense of space and movement in a mix, as well as to create specialized sounds and effects.
Popular Audio Processing and Effects Plugins
There are many popular audio processing and effects plugins available, each with its own unique features and capabilities. Some of the most widely used plugins in music production include:
- Waves SSL G-Master Buss Compressor: This compressor plugin emulates the famous optical compression circuit found in the Solid State Logic (SSL) consoles, providing a high-quality and versatile compression tool for mixing and mastering.
- FabFilter Pro-Q 3: This EQ plugin is known for its intuitive interface and high-quality sound. It offers a wide range of EQ bands, as well as advanced features like mid/side processing and a frequency analyzer.
- Valhalla Room: This reverb plugin is designed to create realistic and natural-sounding rooms and spaces. It is highly customizable and offers a wide range of presets, making it a versatile tool for adding ambiance and depth to a mix.
- TDR Kotelnikov: This compression plugin is known for its transparent and natural-sounding compression. It offers a unique blend of hard-knee and soft-knee compression, as well as advanced features like a sidechain filter and an envelope follower.
- Eventide H910 Harmonizer: This plugin emulates the classic Eventide H910 hardware effect, creating lush and spacious delays and echoes. It offers a wide range of presets and customization options, making it a versatile tool for creating specialized sounds and effects.
Overall, audio processing and effects plugins play a crucial role in modern music production, allowing musicians and producers to shape and enhance the final sound of a recording. With so many plugins available, it is important to choose the right tools for the job, taking into account the specific needs and goals of the project at hand.
Mixing and Mastering Software
Mixing and mastering software are essential tools for creating professional-sounding music recordings. These software programs allow music producers to edit, manipulate, and enhance individual tracks, as well as balance and balance the overall sound of a recording. Some popular mixing and mastering software include:
- Pro Tools: A digital audio workstation (DAW) used for recording, editing, and mixing music.
- Ableton Live: A DAW that is popular for live performances and electronic music production.
- Logic Pro: A DAW developed by Apple that is popular among Mac users.
- FL Studio: A DAW that is popular for producing electronic and hip-hop music.
- Waves: A suite of audio plugins that can be used for mixing and mastering.
Each of these software programs has its own unique features and capabilities, and producers often use a combination of different software programs to achieve the desired sound. Additionally, many software programs have built-in effects and processing tools that can be used to enhance the sound of individual tracks, such as equalization, compression, and reverb. By using these tools, music producers can fine-tune the sound of their recordings and create professional-sounding music.
Tips for Recording and Producing High-Quality Music
Choosing the Right Microphone and Placement
Selecting the right microphone is crucial in capturing the sound of your instruments or voice accurately. Different microphones are designed to capture specific frequencies, so choosing the right one depends on the sound you want to achieve. Here are some tips for selecting the right microphone and proper placement techniques:
- Know your microphone types: There are three main types of microphones: dynamic, condenser, and ribbon. Dynamic microphones are versatile and durable, making them ideal for live performances. Condenser microphones are more sensitive and provide a wider frequency range, making them ideal for recording studio vocals and instruments. Ribbon microphones have a warm and smooth sound and are perfect for capturing vocals and acoustic instruments.
- Consider the polar pattern: The polar pattern determines the directionality of the microphone. Omnidirectional microphones capture sound from all directions, while cardioid microphones are directional and reject sound from the rear. Figure-8 microphones are similar to cardioid microphones but have a more exaggerated response from the sides.
- Microphone placement: The placement of the microphone can greatly affect the sound quality. Here are some general guidelines for microphone placement:
- Dynamic microphones: Place the microphone close to the sound source and angled slightly towards the diaphragm. Experiment with different distances and angles to achieve the desired sound.
- Condenser microphones: Place the microphone at a distance from the sound source and angled slightly towards the diaphragm. Condenser microphones are more sensitive, so they require more careful placement to avoid feedback and other unwanted sounds.
- Ribbon microphones: Place the microphone close to the sound source and angled slightly towards the diaphragm. Ribbon microphones are fragile and require careful handling to avoid damage.
By choosing the right microphone and proper placement techniques, you can capture high-quality sound for your music recordings.
Utilizing DAW Features for Optimal Sound Quality
When it comes to recording and producing high-quality music, digital audio workstations (DAWs) play a crucial role. These software programs provide a range of features that can help you achieve optimal sound quality in your recordings. Here are some tips for utilizing DAW features to enhance the sound of your music:
Microphone Selection and Placement
One of the most important factors in achieving high-quality recordings is selecting the right microphone and placing it correctly. DAWs offer a variety of microphone models to choose from, each with its own unique characteristics and tonal qualities. It’s important to choose a microphone that will capture the sound of your instrument or voice accurately and without distortion.
In addition to selecting the right microphone, proper placement is crucial. The distance between the microphone and the sound source, as well as the angle and direction of the microphone, can all affect the sound quality of your recording. DAWs often include microphone modeling software that can simulate different microphone types and placements, making it easier to achieve the desired sound.
Tracking and Editing
Once you’ve recorded your tracks, it’s important to edit and fine-tune them to achieve the best possible sound quality. DAWs offer a range of editing tools, including EQ, compression, and reverb, that can help you shape the sound of your tracks.
Equalization (EQ) allows you to adjust the frequency response of your tracks, removing unwanted frequencies and boosting others to achieve a more balanced sound. Compression can help to even out the dynamics of your tracks, reducing the volume of loud parts and boosting the volume of quiet parts. Reverb can add depth and space to your tracks, simulating the sound of a live performance in a particular venue.
Mixing and Mastering
Finally, once you’ve recorded and edited your tracks, it’s time to mix and master them to create a cohesive and polished final product. DAWs offer a range of mixing and mastering tools that can help you achieve a professional-sounding mix.
Mixing involves balancing the levels and panning of each track to create a cohesive stereo image. Mastering involves fine-tuning the overall level and tone of your mix, optimizing it for playback on a variety of different systems. DAWs often include mastering plugins that can help you achieve a polished, professional-sounding master.
Overall, by utilizing the features of your DAW, you can achieve high-quality recordings that capture the sound of your music in the best possible way. Whether you’re a beginner or an experienced producer, it’s important to take advantage of the tools and features offered by your DAW to get the most out of your recordings.
Applying Audio Processing and Effects Effectively
Applying audio processing and effects effectively is crucial in creating high-quality music. It can help enhance the sound of individual instruments, add depth and character to the mix, and bring out the best in your recordings. Here are some tips to help you apply audio processing and effects effectively:
- Use EQ to shape the tone of your instruments: EQ (equalization) is a powerful tool for shaping the tone of individual instruments in your mix. You can use EQ to cut or boost specific frequencies to achieve the desired sound. For example, if you want to add more presence to a vocal, you can boost the high-mid frequencies. If you want to remove muddiness from a bass guitar, you can cut the low frequencies.
- Use compression to control dynamics: Compression is a process that controls the dynamic range of your recordings. It can help you even out the volume of your instruments, making your mix sound more consistent and polished. For example, you can use compression to tame a loud snare drum or to bring up the level of a soft vocal.
- Use reverb to create space: Reverb is an effect that adds ambiance and space to your recordings. It can help make your mix sound more natural and realistic. For example, you can use reverb to simulate the sound of a room or to add depth to a piano.
- Use delay to create echo: Delay is an effect that creates echoes of your sound. It can help add interest and movement to your recordings. For example, you can use delay to create a slapback effect on a vocal or to add depth to a guitar part.
- Use distortion to add grit: Distortion is an effect that adds grit and aggression to your recordings. It can help make your mix sound more raw and energetic. For example, you can use distortion to add bite to a guitar or to add grit to a vocal.
Overall, applying audio processing and effects effectively can help you create high-quality music. It can help you shape the tone of your instruments, control dynamics, create space, add echo, and add grit. By following these tips, you can make the most of these powerful tools and bring out the best in your recordings.
Mixing and Mastering Techniques for a Polished Sound
Mixing and mastering are two critical stages in the process of creating a polished, professional-sounding recording. Mixing involves balancing the levels and panning of different tracks to create a cohesive soundscape, while mastering involves finalizing the overall volume and sonic characteristics of the mix. Here are some key techniques to consider when mixing and mastering your music:
- EQ: Equalization is a technique used to adjust the frequency balance of a track. This can be used to remove unwanted frequencies or boost specific elements of the mix. It’s important to use EQ sparingly and thoughtfully, as over-equalization can lead to an unnatural or “pinched” sound.
- Compression: Compression is a process that reduces the dynamic range of a track, making all elements play at a consistent volume. This can help to create a more polished, professional sound, but should be used with care to avoid squashing the life out of the mix.
- Reverb: Reverb is an effect that adds ambiance and depth to a track by simulating the reflections of sound in a space. It can be used to create a sense of space and distance, or to add warmth and richness to a mix.
- Delay: Delay is an effect that creates a repeating echo of a sound, simulating the time it takes for sound to travel a distance. It can be used to add depth and dimension to a mix, or to create intricate, layered textures.
- Saturation: Saturation is a process that adds harmonic distortion to a track, adding warmth and character. It can be used to create a vintage or analog feel, or to add interest to a dull or lifeless mix.
- Mastering EQ: Mastering EQ involves making global adjustments to the frequency balance of the entire mix. This can include cutting low-frequency rumble, boosting high-frequency presence, or adding warmth and clarity to the mix.
- Mastering Compression: Mastering compression is similar to compression during mixing, but is applied to the entire mix rather than individual tracks. This can help to even out the volume of the mix and make it more consistent.
- Mastering Limiting: Mastering limiting is the process of reducing the dynamic range of the mix to ensure a consistent volume level. This can help to make the mix more competitive with other commercially released music.
Overall, the key to successful mixing and mastering is to approach the process with a critical ear and a deep understanding of the sonic characteristics of your music. With practice and experimentation, you can develop your own unique approach to creating a polished, professional-sounding recording.
Best Practices for Recording and Producing Music
Setting Up a Home Recording Studio
When it comes to setting up a home recording studio, there are a few key elements to consider. These include:
- Acoustic Treatment: The acoustics of your room can have a significant impact on the quality of your recordings. It’s important to address any issues with echo, reverberation, or other sound reflections that may negatively affect the sound of your recordings.
- Recording Equipment: In order to create high-quality recordings, you’ll need to invest in good recording equipment. This includes a digital audio workstation (DAW) software, a microphone, and an audio interface.
- Headphones: Good headphones are essential for monitoring your recordings and making critical decisions about the mix. Look for headphones that provide accurate sound reproduction and good isolation.
- Instruments and MIDI Controllers: Depending on the type of music you’re creating, you may need to invest in instruments or MIDI controllers to capture live performances or create electronic elements.
- Backup System: It’s important to have a backup system in place to protect your recordings in case of hardware failure or other unexpected events. Consider investing in an external hard drive or cloud storage solution.
By taking the time to set up a home recording studio that is optimized for your needs, you’ll be well on your way to creating high-quality recordings that are ready for distribution or further production.
Collaborating with Other Musicians and Producers
Collaborating with other musicians and producers can bring new ideas and perspectives to your music production. It can also help you to improve your skills and learn from experienced professionals. Here are some tips for collaborating effectively:
- Choose the right collaborators: Look for musicians and producers whose skills and style complement your own. It’s important to find people who share your vision and are committed to the project.
- Communicate clearly: Good communication is key to any successful collaboration. Be clear about your goals and expectations, and make sure everyone is on the same page.
- Be open to feedback: Collaboration is a two-way street. Be open to feedback and criticism, and be willing to make changes to your music based on the input of others.
- Manage your egos: Collaboration can be challenging, especially when it comes to balancing creative egos. It’s important to keep the focus on the music and to remember that the goal is to create something great together.
- Use technology to your advantage: Collaborating remotely is becoming increasingly common in the music industry. Take advantage of technology like cloud-based collaboration tools and online project management software to stay organized and connected with your collaborators.
Copyright and Legal Considerations for Music Production
As a music producer, it is essential to understand the legal implications of creating and distributing music. The following are some of the key considerations:
- Copyright: The moment a musical work is created, it is automatically protected by copyright law. This means that the creator of the work holds the exclusive rights to reproduce, distribute, and perform the work publicly. It is important to note that this protection extends to the lyrics, melody, and arrangement of the song.
- Written agreements: When working with other musicians, it is important to have written agreements in place to ensure that everyone’s rights are protected. This includes agreements for co-writing, co-producing, and split sheets that outline the ownership of the different elements of the song.
- Sample clearance: If you plan to use samples in your music, it is important to obtain clearance from the copyright holder. This can be a time-consuming process, but it is essential to avoid legal issues down the line.
- Distribution and publishing: When it comes to distributing and publishing your music, it is important to understand the different rights that you need to grant to different parties. This includes mechanical rights, synchronization rights, and performance rights.
- Legal representation: Finally, it is always a good idea to have legal representation when dealing with music contracts and agreements. A lawyer can help you navigate the complex legal landscape of the music industry and ensure that your rights are protected.
Continuously Learning and Improving Recording Techniques
Continuously learning and improving recording techniques is crucial for achieving high-quality recordings. There are several ways to stay up-to-date with the latest recording techniques and improve your skills as a music producer.
Attend Workshops and Conferences
Attending workshops and conferences is an excellent way to learn about new recording techniques and equipment. These events often feature industry experts who share their knowledge and experience with attendees. By attending these events, you can learn about the latest trends and technologies in music production and gain insights into the recording process.
Read Books and Online Resources
Reading books and online resources is another effective way to learn about recording techniques and improve your skills as a music producer. There are many books and online resources available that cover various aspects of music production, including recording, mixing, and mastering. By reading these resources, you can gain a deeper understanding of the recording process and learn new techniques to improve your recordings.
Collaborate with Other Musicians and Producers
Collaborating with other musicians and producers is an excellent way to learn from others and improve your skills. By working with other musicians and producers, you can learn new techniques, get feedback on your recordings, and gain inspiration for new ideas. Collaborating with others can also help you develop your ear and improve your ability to work with different genres and styles of music.
Experiment with Different Recording Techniques
Experimenting with different recording techniques is an essential part of the learning process. By trying out new techniques and equipment, you can discover new sounds and approaches to recording. Experimentation can also help you develop your ear and improve your ability to make informed decisions about your recordings.
Overall, continuously learning and improving recording techniques is crucial for achieving high-quality recordings. By attending workshops and conferences, reading books and online resources, collaborating with other musicians and producers, and experimenting with different recording techniques, you can improve your skills and create better recordings.
FAQs
1. What are the basic techniques used to record music?
There are several techniques used to record music, including:
* Microphone placement: This involves placing microphones in the right places to capture the sound of different instruments and vocals.
* Signal flow: This refers to the order in which signals are sent from the microphones to the recording device, and how they are processed along the way.
* Compression: This technique is used to control the dynamic range of a recording, making loud sounds softer and soft sounds louder.
* EQ: This stands for equalization, and involves adjusting the frequency response of a recording to make certain frequencies louder or quieter.
* Mixing: This involves combining multiple tracks into a single mix, adjusting levels and panning to create a balanced sound.
2. What equipment is needed to record music?
To record music, you will need:
* A digital audio workstation (DAW) software, such as Pro Tools, Ableton Live, or Logic Pro.
* A computer or laptop with enough processing power to run the DAW software.
* A microphone, such as a condenser microphone or dynamic microphone.
* A digital audio interface, which converts analog signals from the microphone into digital signals that can be recorded into the DAW.
* Headphones or monitors, to listen to the recording as you make it.
* Other peripherals, such as cables, microphone stands, and instruments.
3. How do I set up my microphone for recording?
To set up your microphone for recording, follow these steps:
1. Choose a microphone that is appropriate for your needs and budget.
2. Position the microphone in the right place to capture the sound you want. This will depend on the type of microphone and the sound source.
3. Adjust the gain on the microphone to ensure that the signal is strong enough to be recorded, but not so strong that it causes distortion.
4. Adjust the phase setting on the microphone if necessary.
5. Connect the microphone to the digital audio interface and connect the digital audio interface to the computer.
6. Open the DAW software and create a new project.
7. Create a new track and select the microphone as the input source.
8. Arm the track to indicate that it is ready to record.
9. Press the record button to start recording.
4. How do I edit my recordings?
To edit your recordings, follow these steps:
1. Open the DAW software and load the recording into a track.
2. Use the cursor to select the portion of the recording that you want to edit.
3. Cut, copy, or paste the selected portion to a new location in the timeline.
4. Use the tools in the DAW software to adjust the level, EQ, compression, and other parameters of the recording.
5. Add effects, such as reverb or delay, to enhance the sound of the recording.
6. Export the edited recording as a new file.
5. How do I mix my tracks together?
To mix your tracks together, follow these steps:
1. Open the DAW software and load all of the tracks into the mixing board.
2. Adjust the levels of each track to ensure that they are balanced and consistent.
3. Use EQ and compression to shape the tone of each track.
4. Add effects, such as reverb or delay, to enhance the sound of each track.
5. Use panning to create a sense of space and depth in the mix.
6. Listen critically to the mix and make adjustments as necessary.
7. Export the final mix as a single file.


