Are you tired of recording subpar audio that sounds muffled or lacks clarity? You’re not alone. Recording high-quality audio can be a challenge, but with the right techniques, you can capture clear and crisp audio that will enhance any project. Whether you’re a musician, podcaster, or video creator, understanding the best way to record something is essential for achieving professional-sounding results. In this article, we’ll explore the top recording techniques for capturing high-quality audio, including microphone selection, room acoustics, and software editing. So, get ready to elevate your audio game and learn how to record like a pro!
Choosing the Right Recording Equipment
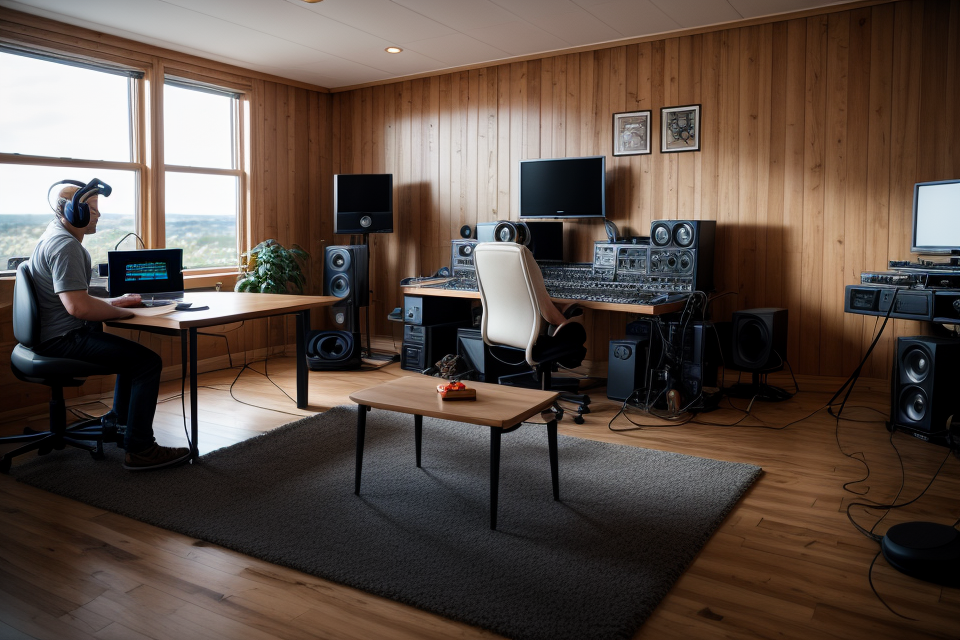
Essential Recording Gear
When it comes to recording high-quality audio, the right equipment is crucial. Here are some essential pieces of gear that every home recording studio should have:
- Microphones: Microphones are the heart of any recording setup. They capture the sound of your instruments or vocals and convert them into electrical signals that can be recorded. There are many types of microphones, including dynamic, condenser, and ribbon microphones. Each type has its own unique characteristics and is suited for different applications.
- Audio interfaces: An audio interface is a device that connects your microphones and other audio equipment to your computer. It allows you to record and playback audio with low latency and high fidelity. When choosing an audio interface, consider the number of inputs and outputs you need, as well as the quality of the preamps and converters.
- Headphones: Headphones are essential for monitoring your recordings in real-time. They allow you to hear what you’re recording and make adjustments as needed. There are many types of headphones, including closed-back and open-back models. Closed-back headphones are better for monitoring, as they isolate sound and reduce bleed.
- Acoustic treatment: The acoustics of your recording space can have a significant impact on the quality of your recordings. Different types of surfaces, such as hardwood floors, drywall, and carpeting, can reflect or absorb sound in different ways. By treating your room with acoustic panels, bass traps, and diffusers, you can control the reflections and create a more balanced and accurate sound.
Selecting the Right Microphone
When it comes to capturing high-quality audio, selecting the right microphone is crucial. Different types of microphones are designed to capture sound in various ways, and understanding the differences between them can help you choose the best one for your needs.
Condenser Microphones
Condenser microphones are known for their ability to capture a wide range of frequencies and provide clear, detailed sound. They are often used for recording vocals, acoustic instruments, and percussion. One of the advantages of condenser microphones is that they are very sensitive, which means they can pick up even the slightest sound. However, this also means they require phantom power to operate, which can be provided by a mixer or audio interface.
Dynamic Microphones
Dynamic microphones are designed to be more rugged and durable than condenser microphones, making them ideal for live performances and recording in noisy environments. They are less sensitive than condenser microphones, which means they can handle louder sounds without distortion. Dynamic microphones are often used for recording electric guitars, drums, and vocals in loud environments.
Ribbon Microphones
Ribbon microphones are known for their warm, natural sound and are often used for recording brass, woodwinds, and other orchestral instruments. They are designed with a thin ribbon of metal that vibrates in response to sound waves, which creates the electrical signal that is recorded. Ribbon microphones are sensitive to humidity and extreme temperatures, so they require careful handling and storage.
Lavalier Microphones
Lavalier microphones, also known as lapel microphones, are small and discreet, making them ideal for recording interviews, lectures, and presentations. They are often clipped to the subject’s clothing and can be worn by the interviewer or interviewee. Lavalier microphones are typically wireless and come with a transmitter that sends the audio signal to a receiver, which is then connected to the recording device.
In summary, choosing the right microphone depends on the type of sound you want to capture and the environment in which you will be recording. Consider the sensitivity, durability, and sound quality of each type of microphone before making a decision.
Understanding Audio Interfaces
An audio interface is a device that allows you to connect your microphone or instrument to your computer and record high-quality audio. There are many different audio interfaces available on the market, each with its own unique features and capabilities. Here are some key factors to consider when choosing an audio interface:
- Number of inputs: The number of inputs on an audio interface determines how many microphones or instruments you can connect to it at the same time. If you’re recording a solo performance, a basic audio interface with a single input may be sufficient. However, if you’re recording a band or an ensemble, you’ll need an audio interface with multiple inputs to accommodate all of your instruments.
- Sound quality: The sound quality of an audio interface is determined by its sample rate, bit depth, and analog-to-digital converter (ADC) specifications. The sample rate determines how many samples of audio are captured per second, while the bit depth determines the range of audio frequencies that can be captured. A higher sample rate and bit depth result in higher-quality audio. The ADC is responsible for converting the analog audio signal from your microphone or instrument into a digital signal that can be processed by your computer. Look for an audio interface with a high-quality ADC for the best possible sound quality.
- Compatibility with software: Make sure that the audio interface you choose is compatible with the software you plan to use for recording and editing your audio. Some audio interfaces may require drivers or software installations to function properly, so be sure to check the compatibility requirements before making a purchase.
Headphones for Recording and Mixing
When it comes to recording and mixing, choosing the right headphones is crucial to achieving high-quality audio. There are several factors to consider when selecting headphones for recording and mixing, including the type of headphones, the size of the headphones, and the features of the headphones.
Closed-back vs. open-back headphones
One of the most important factors to consider when choosing headphones for recording and mixing is whether to go with closed-back or open-back headphones. Closed-back headphones have a sealed design that isolates sound and blocks external noise, making them ideal for recording and mixing in noisy environments. On the other hand, open-back headphones have an open design that allows sound to escape, making them less ideal for recording and mixing in noisy environments.
Over-ear vs. on-ear headphones
Another factor to consider when choosing headphones for recording and mixing is the size of the headphones. Over-ear headphones are larger and typically provide better sound quality and more comfortable to wear for extended periods of time. On-ear headphones are smaller and lighter, making them more portable, but they may not provide the same level of sound quality as over-ear headphones.
Sound isolation and comfort
In addition to the type and size of the headphones, sound isolation and comfort are also important factors to consider. Headphones with good sound isolation will block out external noise, making them ideal for recording and mixing in noisy environments. Comfort is also important, as headphones that are comfortable to wear for extended periods of time will allow you to focus on your work without discomfort.
In conclusion, when choosing headphones for recording and mixing, it is important to consider the type of headphones, the size of the headphones, and the features of the headphones, including sound isolation and comfort. By taking these factors into account, you can choose the right headphones for your needs and achieve high-quality audio.
Recording Techniques for Different Scenarios
Home Recording
Choosing a Room for Recording
Choosing the right room for recording is crucial for achieving high-quality audio. Ideally, the room should be free from external noise and have minimal reverberation. Rooms with carpeted floors and upholstered furniture can absorb sound and reduce reflections, providing a more natural sound. On the other hand, rooms with hard surfaces such as tiles or concrete can produce a more echoey sound, so it’s important to consider the room’s acoustics before choosing it for recording.
Acoustic Treatment for Home Recording
Even if you choose the perfect room for recording, it’s likely that the room’s acoustics will still need some adjustments. Acoustic treatment can help control the sound reflections in the room, providing a more balanced and natural sound. Common acoustic treatments include hanging bass traps, installing absorption panels, and placing reflective surfaces strategically to enhance certain frequencies. These treatments can significantly improve the quality of your recordings, making them sound more professional.
Setting Up a Home Recording Studio
Setting up a home recording studio requires careful consideration of equipment and placement. It’s important to invest in quality microphones and audio interfaces, as these will greatly impact the quality of your recordings. Microphone placement is also crucial, as even a slight change in position can greatly affect the sound captured. It’s important to experiment with different microphone positions and types to find the best sound for your recording. Additionally, soundproofing the room and setting up proper insulation can help minimize external noise and ensure a clean recording.
Live Recording
When it comes to capturing high-quality audio during live performances, there are several key techniques to keep in mind. Here are some microphone placement tips, advice on using a digital audio workstation (DAW) for live recording, and other useful tips for capturing top-notch live audio.
Microphone Placement for Live Performances
The first step in capturing high-quality audio during live performances is selecting the right microphones and placing them in the right locations. Here are some microphone placement tips to keep in mind:
- Position microphones close to the sound source: To capture high-quality audio, it’s important to position microphones as close as possible to the sound source. This will help reduce background noise and capture clear, crisp audio.
- Use directional microphones: Directional microphones are designed to pick up sound from a specific direction. This makes them ideal for live performances, as they can help isolate the sound of a particular instrument or vocalist.
- Experiment with different microphone types: Different microphone types are designed for different types of sound sources. Experiment with different microphone types to find the best fit for your particular live performance setup.
Using a Digital Audio Workstation (DAW) for Live Recording
A digital audio workstation (DAW) is a powerful tool for live recording. Here are some tips for using a DAW to capture high-quality audio during live performances:
- Set up your DAW before the performance: To ensure a smooth live recording process, set up your DAW and all necessary equipment before the performance begins. This will give you time to make any necessary adjustments and ensure that everything is working properly.
- Monitor the audio as you record: As you record, monitor the audio to ensure that the levels are correct and that there are no issues with the sound quality. This will help you capture the best possible audio during the performance.
- Use software effects to enhance the audio: Many DAWs offer a variety of software effects that can be used to enhance the audio quality. Experiment with different effects to find the ones that work best for your particular live performance setup.
Tips for Capturing High-Quality Live Audio
In addition to microphone placement and using a DAW, there are several other tips to keep in mind when capturing high-quality live audio. Here are some additional tips to consider:
- Use high-quality cables: To ensure the best possible audio quality, use high-quality cables to connect your microphones and other equipment.
- Avoid background noise: To capture high-quality audio, try to avoid background noise as much as possible. This might mean positioning microphones away from noisy equipment or using noise-cancelling headphones.
- Consider using a mixer: A mixer can be a powerful tool for live recording, as it allows you to control the levels of each individual sound source. Consider using a mixer to help capture the best possible audio during live performances.
Field Recording
Field recording involves capturing audio in non-studio environments, such as outdoors or on location. To ensure high-quality audio in these scenarios, there are several techniques to consider.
- Portable recording equipment for field recording: Choose equipment that is lightweight, portable, and easy to use. Consider a digital audio recorder, a lavalier microphone, and a pair of high-quality headphones.
- Choosing the right microphone for field recording: A lavalier microphone is ideal for field recording as it is small, discreet, and easy to position. A shotgun microphone can also be useful for capturing ambient sound and sound effects.
- Tips for capturing ambient sound and sound effects: When capturing ambient sound, consider the distance between the microphone and the sound source, as well as the directionality of the microphone. To capture sound effects, experiment with different microphone techniques, such as the boom pole technique or the blind recording technique.
In addition to these techniques, it is important to be mindful of potential sources of noise and interference, such as traffic or wind. By following these tips, you can capture high-quality audio in any field recording scenario.
Post-Production Techniques
Editing and Mixing Audio
Editing and mixing audio are crucial post-production techniques that can greatly affect the final quality of your audio recordings. The following are some tips to keep in mind when editing and mixing your audio:
- Remove unwanted noise: One of the first steps in editing audio is to remove any unwanted noise, such as hiss, hum, or buzz. This can be done using a noise reduction tool or by manually editing out the noise using a waveform editor.
- Balance levels: When mixing audio, it’s important to balance the levels of each track so that they all sit comfortably within the mix. Use a meter to check the levels and adjust as needed.
- Add EQ: EQ (equalization) is a powerful tool for shaping the tone of your audio. Use it to cut or boost specific frequencies to make your audio sound its best.
Adding Effects and Processing
Adding effects and processing to your audio can help enhance its overall quality and create a more professional sound. Here are some popular effects and processing techniques to consider:
- Reverb: Reverb adds a sense of space and depth to your audio, making it sound like it was recorded in a larger environment. Use a subtle amount of reverb to enhance the ambiance of your recording.
- Compression: Compression is a technique used to even out the volume of your audio. It can help bring up quiet parts and tame loud parts, making your audio sound more consistent.
- Delay: Delay is an effect that repeats a short burst of audio, creating a rhythmic pattern. It can be used to add depth and dimension to your audio, or to create a cool, ethereal effect.
Mastering Audio for Different Platforms
Once you’ve edited, mixed, and added effects to your audio, it’s time to master it for different platforms. Mastering is the process of optimizing your audio for different playback systems, such as headphones, car stereos, and home theaters. Here are some tips for mastering your audio:
- Use a reference track: A reference track is a professionally mixed and mastered audio track that you can use as a benchmark for your own audio. Use it to compare your audio to and make adjustments as needed.
- Use a limiter: A limiter is a tool used to prevent your audio from becoming too loud. It can help protect your audio from distortion and ensure that it sounds good on all playback systems.
- Adjust for different playback systems: Each playback system has its own unique characteristics, such as frequency response and distortion. Adjust your audio accordingly to ensure that it sounds its best on each system.
Tips for Improving Your Recording Skills
As with any skill, improving your recording skills requires practice and experimentation. By dedicating time to honing your abilities, you can enhance the quality of your audio recordings and become more proficient in your work. Here are some tips to help you improve your recording skills:
- Practice and Experimentation: One of the most effective ways to improve your recording skills is to practice regularly. This involves setting aside time to experiment with different microphones, recording techniques, and software. By trying out different approaches, you can learn what works best for your specific needs and preferences.
- Familiarizing Yourself with Recording Software: In addition to practicing with hardware, it’s important to become familiar with the software you’ll be using to edit and manipulate your recordings. By understanding the features and functions of your software, you can make more informed decisions about how to capture and enhance your audio.
- Learning from Other Professionals: Another effective way to improve your recording skills is to learn from other professionals in the field. This can involve attending workshops or seminars, reading books or articles, or watching online tutorials. By studying the techniques and approaches used by others, you can gain valuable insights and ideas for improving your own work.
- Building a Portfolio of Recordings: Finally, it’s important to build a portfolio of your work to showcase your skills and expertise. This can involve creating a website or blog where you can share your recordings, or simply keeping a collection of your best work on hand to refer back to later. By building a strong portfolio, you can demonstrate your abilities to potential clients or employers, and continue to improve your skills over time.
FAQs
1. What is the best way to record high-quality audio?
The best way to record high-quality audio depends on the type of recording you want to achieve. For instance, if you want to record vocals, it’s recommended to use a large-diaphragm condenser microphone placed at a distance from the singer that’s at least three times the diagonal length of the microphone. On the other hand, if you’re recording an instrument, like an acoustic guitar, you can use a small-diaphragm condenser microphone or a ribbon microphone to capture the nuances of the instrument’s sound.
2. How can I improve the sound quality of my recordings?
To improve the sound quality of your recordings, you should focus on minimizing noise and capturing the best possible signal-to-noise ratio. This can be achieved by using high-quality microphones, positioning them correctly, and using a good preamp or audio interface. Additionally, making sure your recording environment is quiet and free from interference can help to improve the overall sound quality of your recordings.
3. What type of microphone should I use for recording?
The type of microphone you should use for recording depends on the type of recording you want to achieve. For example, large-diaphragm condenser microphones are great for recording vocals, while small-diaphragm condenser microphones or ribbon microphones are better suited for recording instruments like guitars or pianos. Additionally, shotgun microphones are great for capturing audio from a distance, making them ideal for recording interviews or lectures.
4. How do I properly position my microphone for recording?
Proper microphone positioning is crucial for capturing high-quality audio. For example, when recording vocals, you should place the microphone at a distance from the singer that’s at least three times the diagonal length of the microphone. When recording an instrument, like an acoustic guitar, you should place the microphone at the sound hole or near the f-holes of an electric guitar. Additionally, experimenting with different microphone positions can help you find the best sound for your recording.
5. How can I reduce noise in my recordings?
Reducing noise in your recordings can be achieved by using high-quality microphones, positioning them correctly, and using a good preamp or audio interface. Additionally, making sure your recording environment is quiet and free from interference can help to reduce noise in your recordings. You can also use noise-reduction software to remove unwanted background noise from your recordings.


