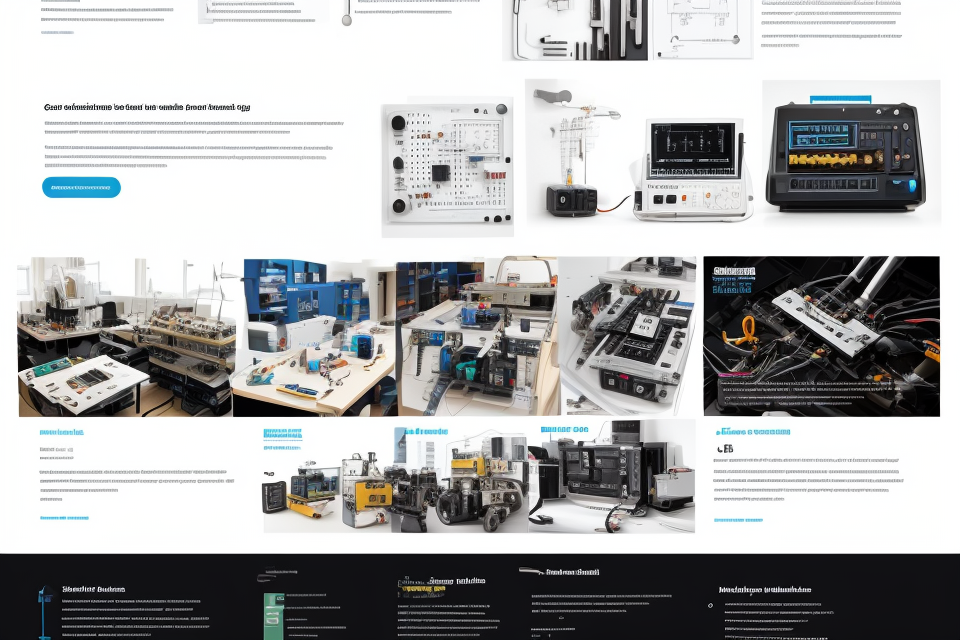
Unlock the secrets of DIY electronics and bring your ideas to life with our step-by-step guide to making your own electronic devices. Learn how to design, build, and test your own circuits, from simple projects like LED blinkers to more complex creations like robots and synthesizers. Whether you’re a beginner or an experienced tinkerer, this guide will walk you through the process of creating your own electronic devices, from start to finish. So grab your soldering iron and let’s get started!
Why DIY Electronics?
The Joys of Building Your Own Electronic Devices
There is nothing quite like the feeling of satisfaction that comes with building something with your own two hands. When it comes to DIY electronics, the joys of building your own electronic devices are even greater. Here are just a few reasons why:
Pride in Creation
When you build something yourself, you take pride in your creation. You know all the hard work and effort that went into making it, and you feel a sense of accomplishment when you hold it in your hands.
Customization
DIY electronics allow you to customize your creations to your exact specifications. You can choose the components you want to use, and you can design the circuitry to fit your needs. This level of customization allows you to create unique and personalized electronic devices that you can be proud of.
Cost-Effective
Building your own electronic devices can be cost-effective compared to buying pre-made ones. You can save money by choosing cheaper components and avoiding unnecessary features. Plus, you can reuse old or unneeded components, reducing waste and saving even more money.
Learning Experience
DIY electronics is a great way to learn about electronics and how they work. By building your own devices, you gain hands-on experience with circuitry, soldering, and other electronic techniques. This knowledge can be invaluable when it comes to troubleshooting problems or designing new electronic devices in the future.
Community
Finally, the DIY electronics community is a supportive and welcoming one. There are many online forums and communities where you can share your projects, ask for help, and connect with other like-minded individuals. This community can provide you with inspiration, advice, and support as you embark on your DIY electronics journey.
Saving Money and Reducing E-Waste
One of the main reasons why people turn to DIY electronics is to save money. By making your own electronic devices, you can avoid the high costs of store-bought electronics. Additionally, many DIY electronics projects involve repurposing old or broken electronics, which can further reduce costs.
Another benefit of DIY electronics is the potential to reduce e-waste. Electronic waste, or e-waste, is a growing problem around the world. By making your own electronic devices, you can reduce the amount of e-waste that ends up in landfills. Additionally, by repurposing old or broken electronics, you can give them a new lease on life and prevent them from ending up in landfills.
However, it’s important to note that not all DIY electronics projects are equally sustainable. Some projects may require specialized materials or tools that have a high environmental impact. Therefore, it’s important to carefully consider the environmental impact of your DIY electronics projects and choose materials and techniques that are as sustainable as possible.
Gathering the Tools and Materials
Essential Tools for DIY Electronics
When it comes to DIY electronics, having the right tools is crucial to the success of your project. Here are some essential tools that every aspiring electronics hobbyist should have in their toolkit:
Multimeter
A multimeter is an indispensable tool for any electronics project. It is used to measure electrical currents, voltages, and resistance. A multimeter is a must-have tool for troubleshooting and testing electronic circuits.
Soldering Iron/Station
Soldering is an essential skill for any electronics hobbyist. A soldering iron or station is used to join electronic components together by melting a soldering material. There are different types of soldering irons available, including temperature-controlled ones, which provide more precision and control over the soldering process.
Wire Stripper
Wire strippers are used to remove insulation from electronic wires. They come in different types, including manual and automatic ones. Manual wire strippers require more manual effort, while automatic wire strippers are faster and more efficient.
Breadboard
A breadboard is an essential tool for prototyping electronic circuits. It is a reusable board that allows you to build and test electronic circuits without the need for soldering. Breadboards come in different sizes and are ideal for testing out different circuit configurations.
Soldering Flux
Soldering flux is a liquid or paste substance that is used to clean and prepare metal surfaces for soldering. It helps to remove oxidation from metal surfaces and enhances the flow of solder. Soldering flux is essential for achieving strong and reliable solder joints.
Voltage/Current Source
A voltage or current source is a device that provides a stable voltage or current output. It is used to power electronic circuits and devices. Voltage or current sources are essential for testing and measuring the performance of electronic circuits.
These are just some of the essential tools that every electronics hobbyist should have in their toolkit. Having the right tools will make your DIY electronics projects easier, more efficient, and more enjoyable.
Materials for Different Electronic Projects
Creating your own electronic devices requires a range of materials that may vary depending on the specific project you are undertaking. In this section, we will discuss the common materials used in different electronic projects.
Common Materials Used in Electronic Projects
Some of the most common materials used in electronic projects include:
- Circuit boards: These are the foundation of any electronic project and provide a platform for connecting and mounting electronic components. Circuit boards come in various sizes and shapes, and can be purchased or fabricated using CAD software.
- Resistors: Resistors are passive electronic components that limit the flow of electrical current in a circuit. They come in various values and are used to regulate voltage, divide signals, and create filters.
- Capacitors: Capacitors are passive electronic components that store electrical energy in an electric field. They are used to filter, store, and stabilize electrical signals.
- Diodes: Diodes are electronic components that allow current to flow in one direction but not in the other. They are used to rectify alternating current (AC) to direct current (DC), protect circuits from reverse polarity, and act as indicators.
- Transistors: Transistors are active electronic components that can amplify or switch electronic signals. They are used in a wide range of applications, including audio amplifiers, power control circuits, and digital logic circuits.
- Integrated circuits (ICs): ICs are small electronic devices that contain multiple transistors, diodes, and other components on a single chip. They are used to perform a wide range of functions, including amplification, switching, and digital computation.
Materials for Specific Projects
The materials required for a specific electronic project will depend on the project’s complexity and the components used. For example, a simple project such as building a digital clock may require a clock module, a display, a few resistors, and a battery, while a more complex project such as building a radio may require a range of components, including transistors, capacitors, resistors, and ICs.
In addition to the above materials, some projects may require specialized components such as sensors, actuators, or microcontrollers. These components can be purchased from electronic component suppliers or online retailers.
In conclusion, the materials required for an electronic project will depend on the project’s complexity and the components used. It is essential to research the materials required for the specific project before beginning the project to ensure that all necessary materials are available.
Understanding Circuit Basics
The Fundamentals of Electricity and Circuits
To start with, it is important to understand the fundamentals of electricity and circuits. Electricity is the flow of electrons through a medium, such as a wire. It is measured in terms of voltage, current, and resistance. Voltage is the difference in electric potential between two points, current is the flow of electrons, and resistance is the opposition to the flow of electrons.
A circuit is a path through which electric current flows. It consists of various components such as resistors, capacitors, inductors, diodes, and transistors. These components are connected in a specific manner to form a closed loop, allowing the current to flow through the circuit.
Understanding the basics of electricity and circuits is crucial for building your own electronic devices. By learning how electricity flows through different components, you can design and build circuits that perform specific functions. This knowledge will also help you troubleshoot problems and diagnose faults in your electronic devices.
It is important to note that electricity can be dangerous if not handled properly. It is recommended to take appropriate safety precautions when working with electricity, such as wearing protective gear and avoiding touching metal objects while working with circuits.
In the next section, we will delve deeper into the components of a circuit and how they work together to form a functional electronic device.
Understanding Circuit Diagrams and Schematics
Understanding circuit diagrams and schematics is an essential aspect of DIY electronics. These diagrams and schematics provide a visual representation of the components and connections within a circuit.
Diagrams and schematics can be used to represent both analog and digital circuits. Analog circuits are those that deal with continuous signals, while digital circuits are those that deal with discrete signals.
A circuit diagram typically includes symbols for various components such as resistors, capacitors, inductors, transistors, and diodes. These symbols are used to represent the physical components in the circuit. The diagram also includes the connections between the components, which are represented by lines and arrows.
Schematics, on the other hand, are more detailed and provide a wiring diagram for the circuit. They include the same symbols as circuit diagrams but also show the connections between the components in more detail. Schematics may also include information about the value of resistors and capacitors, as well as the polarity of components.
Understanding circuit diagrams and schematics is essential for designing and building electronic circuits. By studying these diagrams, you can gain a better understanding of how different components work together and how to connect them properly.
In addition to understanding the symbols and connections in the diagrams, it is also important to understand the conventions used in the diagrams. These conventions include the use of different colors to represent different types of wires, the use of different line thicknesses to represent different wire sizes, and the use of different symbols to represent different types of components.
By understanding circuit diagrams and schematics, you can unlock the secrets of DIY electronics and build your own electronic devices. With practice and experience, you can become proficient in reading and interpreting these diagrams, allowing you to design and build more complex circuits.
Selecting Your Electronic Project
Choosing a Project Based on Your Skill Level
When it comes to selecting an electronic project, it’s important to consider your skill level. If you’re new to DIY electronics, it’s best to start with a simple project that won’t overwhelm you. Here are some tips for choosing a project based on your skill level:
- Start with a beginner project: Look for projects that are specifically designed for beginners. These projects typically use fewer components and are less complex than more advanced projects. Examples of beginner projects include building a simple LED circuit or a digital clock.
- Work your way up: Once you’ve mastered beginner projects, you can move on to more advanced projects. Look for projects that build on the skills you’ve learned and challenge you to learn new ones. As you become more comfortable with the basics, you can start experimenting with more complex circuits and devices.
- Take advantage of tutorials and resources: There are many resources available online to help you choose a project based on your skill level. Look for tutorials and guides that are geared towards your level of expertise. These resources can help you understand the basics of electronics and provide you with step-by-step instructions for building your own electronic devices.
- Practice, practice, practice: Building electronic devices requires practice. The more you build, the more comfortable you’ll become with the process. Start with simple projects and gradually work your way up to more complex ones. Don’t be afraid to make mistakes – they’re an inevitable part of the learning process.
By choosing a project based on your skill level, you can ensure that you’re building electronic devices that are within your abilities. With time and practice, you’ll become more confident and skilled in DIY electronics.
Project Ideas for Beginners, Intermediate, and Advanced Makers
When it comes to DIY electronics, selecting the right project is crucial to your success. Here are some project ideas for beginners, intermediate, and advanced makers to help you get started:
Beginner Projects
If you’re new to DIY electronics, start with a simple project that won’t overwhelm you. Here are some ideas to consider:
- LED Circuit: Learn how to connect an LED circuit to a breadboard and how to control it with a microcontroller.
- Simple Audio Amplifier: Build an audio amplifier using a transistor and a few other components.
- Digital Clock: Create a digital clock using a microcontroller and an LED display.
Intermediate Projects
Once you’ve gained some experience, you can move on to more complex projects. Here are some ideas to consider:
- Arduino Robot: Build a robot using an Arduino microcontroller and motors.
- Temperature Controller: Create a temperature controller using a microcontroller and a thermistor.
- RFID Door Lock: Build a door lock that uses RFID technology to control access.
Advanced Projects
For experienced makers, here are some challenging projects to consider:
- Home Automation System: Build a home automation system using microcontrollers and sensors.
- Digital Calipers: Create a digital caliper using a microcontroller and a touch screen display.
- Audio Spectrum Analyzer: Build an audio spectrum analyzer using a microcontroller and an audio input.
No matter what level you’re at, there are plenty of DIY electronics projects to choose from. Start with a simple project and work your way up to more complex ones as you gain experience and confidence.
Step-by-Step Guide to Making Your Own Electronic Device
Identifying the Components and Materials Needed
When it comes to making your own electronic devices, the first step is to identify the components and materials needed for the project. This involves researching the specific components required for the specific project, as well as gathering any necessary materials such as wires, solder, and a breadboard.
One of the most important aspects of this step is to ensure that all components are compatible with each other. For example, if you are building a circuit that requires a microcontroller, you will need to make sure that the microcontroller is compatible with the other components in the circuit. Additionally, it is important to consider the voltage and current requirements of each component to ensure that they will not damage each other or the overall circuit.
Another important consideration when identifying components and materials is cost. Some components can be expensive, so it is important to consider the budget for the project and find alternatives if necessary. It is also important to consider the availability of components, as some may be difficult to find or may require special ordering.
Once the components and materials have been identified, it is important to gather all necessary tools and equipment, such as a soldering iron, wire strippers, and a multimeter. It is also important to have access to any necessary software or programming tools required for the project.
In summary, identifying the components and materials needed for a DIY electronics project is a crucial first step. Researching the specific components required, ensuring compatibility, considering cost and availability, and gathering necessary tools and equipment are all important aspects of this step.
Assembling the Circuit Board
Assembling the circuit board is a crucial step in creating your own electronic device. It involves laying out and soldering components onto a board to create a functional circuit. Here are the steps involved in assembling the circuit board:
- Gather the necessary components: Before assembling the circuit board, you need to gather all the necessary components such as resistors, capacitors, diodes, transistors, and integrated circuits. It is important to ensure that you have the correct components for your specific circuit design.
- Design the circuit layout: Using a software program such as Eagle or KiCAD, you need to design the circuit layout. This involves drawing the schematic diagram of the circuit and placing the components on the board. It is important to ensure that the components are placed correctly and that the circuit is properly connected.
- Print the circuit board: Once you have designed the circuit layout, you need to print the circuit board. You can do this using a 3D printer or by sending the design to a manufacturer who will produce the board for you.
- Solder the components: After printing the circuit board, you need to solder the components onto the board. This involves heating the soldering iron and placing the component leads onto the pads on the board. The solder should be applied to the leads and the iron should be moved in a specific pattern to ensure that the solder flows evenly.
- Test the circuit: Once all the components have been soldered onto the board, you need to test the circuit to ensure that it is functioning correctly. This involves connecting the circuit to a power source and checking for any errors or malfunctions.
Assembling the circuit board can be a challenging task, but with patience and attention to detail, you can create a functional electronic device. It is important to follow the steps carefully and to double-check your work to ensure that the circuit is properly assembled.
Adding a Power Source
Adding a power source is a crucial step in making your own electronic device. The power source is what provides the necessary energy for the device to function. There are several types of power sources that can be used in DIY electronics, including batteries, solar panels, and wall adapters.
Batteries
Batteries are a popular choice for powering DIY electronics. They are portable and can be easily connected to the device. However, it is important to choose the right type of battery for the device. The voltage and amperage of the battery must match the requirements of the device.
Solar Panels
Solar panels are an eco-friendly option for powering DIY electronics. They convert sunlight into electricity, which can be used to power the device. Solar panels can be attached to the device or connected separately. It is important to choose a solar panel with the appropriate wattage to ensure that it can provide enough power for the device.
Wall Adapters
Wall adapters are a convenient option for powering DIY electronics. They can be plugged into a wall outlet and provide a steady stream of electricity to the device. It is important to choose a wall adapter with the appropriate voltage and amperage to match the requirements of the device.
When adding a power source to your DIY electronic device, it is important to consider the safety of the device and those around it. Always follow safety guidelines when working with electrical components.
Testing and Troubleshooting Your Device
Testing and troubleshooting your device is an essential step in the DIY electronics process. It ensures that your device is functioning correctly and helps you identify and fix any issues that may arise. Here are some tips for testing and troubleshooting your device:
- Test your device thoroughly: After you have assembled your device, it is crucial to test it thoroughly to ensure that it is functioning correctly. This involves checking the connections, verifying that the components are working correctly, and ensuring that the device is meeting the specifications you intended it to meet.
- Document your testing results: As you test your device, it is important to document your testing results. This will help you identify any issues that may arise and track your progress as you work through them. It is also helpful to keep a record of any modifications you make to your device, as this can help you troubleshoot issues in the future.
- Use a multimeter: A multimeter is an essential tool for testing and troubleshooting electronic devices. It can help you test the continuity of your connections, check the voltage of your components, and measure the current flowing through your device.
- Identify and fix issues: If your device is not functioning correctly, it is important to identify and fix the issue as soon as possible. This may involve going back to the schematic or circuit diagram and checking for any errors or mistakes. It may also involve retesting individual components or revising your design.
- Seek help from online communities: If you are having trouble troubleshooting your device, it may be helpful to seek help from online communities or forums. These communities can provide valuable insights and advice from experienced DIY electronics enthusiasts who may have encountered similar issues in the past.
By following these tips, you can ensure that your device is functioning correctly and identify and fix any issues that may arise. Testing and troubleshooting your device is an essential step in the DIY electronics process, and it is important to take the time to do it properly to ensure the success of your project.
Advanced DIY Electronics Techniques
Soldering and Desoldering Techniques
Soldering is the process of joining two or more electronic components together by melting a filler metal (solder) that flows into the joint. Desoldering, on the other hand, is the process of removing a previously soldered joint. Both techniques are essential in DIY electronics and require careful attention to detail to ensure a successful outcome.
Soldering Techniques
- Preparation: Before soldering, it is important to prepare the components and the workspace. This includes cleaning the components and the workspace, applying flux to the joint, and heating the soldering iron.
- Holding the component: To hold the component in place while soldering, use a soldering iron stand or a third hand tool. This allows the solder to flow evenly into the joint without the component moving.
- Applying the solder: Once the component is in place and the soldering iron is heated, apply the solder to the joint. The solder should be applied in a consistent, circular motion to ensure an even coating.
- Removing excess solder: After the solder has flowed into the joint, remove any excess solder using a solder sucker or a desoldering pump.
Desoldering Techniques
- Preparation: Before desoldering, it is important to prepare the components and the workspace. This includes cleaning the components and the workspace, applying flux to the joint, and heating the desoldering tool.
- Removing the component: To remove the component, use a desoldering tool to apply heat to the joint. The heat will cause the solder to melt and flow out of the joint, allowing the component to be removed.
- Removing excess solder: After the component has been removed, use a solder sucker or a desoldering pump to remove any excess solder from the workspace.
By mastering these soldering and desoldering techniques, you will be able to create a wide range of electronic devices and circuits.
Advanced Circuit Design and Prototyping
Advanced circuit design and prototyping are essential skills for experienced DIY electronics enthusiasts who want to take their projects to the next level. With these techniques, you can create complex electronic devices and circuits that perform a wide range of functions.
Designing Advanced Circuits
Designing advanced circuits requires a solid understanding of electronic theory and the ability to use specialized software tools to create schematics and simulate circuit behavior. There are many software tools available for circuit design, including:
- LTSpice
- Eagle
- KiCad
- Altium Designer
These tools allow you to create schematics, simulate circuit behavior, and generate board layouts for your projects. They also provide access to a wide range of components and devices, making it easy to design complex circuits.
Prototyping Advanced Devices
Once you have designed your advanced circuit, it’s time to build a prototype. Prototyping is an essential step in the DIY electronics process, as it allows you to test your design and make any necessary changes before moving on to production.
There are several ways to prototype advanced devices, including:
- Breadboarding: This is a quick and easy way to test your circuit on a small scale. You can build your circuit on a breadboard and test it with a small power supply or a computer.
- PCB prototyping: If you have more advanced design skills, you can create a prototype using a printed circuit board (PCB). This involves designing your circuit on a computer and sending it to a manufacturer to produce a PCB.
- 3D printing: In some cases, you may need to create custom enclosures or parts for your device. 3D printing can be used to create these parts, allowing you to create a prototype that looks and functions like a finished product.
Testing and Troubleshooting
Once you have built your prototype, it’s time to test it and troubleshoot any issues that arise. Testing and troubleshooting are essential skills for advanced DIY electronics enthusiasts, as they allow you to identify and fix problems with your design.
There are several ways to test and troubleshoot advanced devices, including:
- Multimeter: A multimeter is a tool that can be used to measure voltage, current, and resistance. It’s an essential tool for testing and troubleshooting electronic circuits.
- Oscilloscope: An oscilloscope is a tool that can be used to visualize and analyze electrical signals. It’s an essential tool for troubleshooting complex circuits and identifying problems with signal timing and shape.
- Soldering iron: In some cases, you may need to solder components onto your PCB to repair or modify your device. A soldering iron is a tool that can be used to melt solder and join components together.
By mastering advanced circuit design and prototyping techniques, you can create complex electronic devices and circuits that perform a wide range of functions. Whether you’re building a new project or troubleshooting an existing one, these skills will help you succeed in the world of DIY electronics.
Using 3D Printing and CNC Machining in Electronics
3D Printing in Electronics
3D printing is a relatively new technology that has revolutionized the way electronic devices are designed and manufactured. It involves the use of a 3D printer to create physical objects from digital designs. This technology has numerous applications in the field of electronics, including the creation of custom enclosures, mounts, and other components.
Benefits of 3D Printing in Electronics
One of the primary benefits of using 3D printing in electronics is the ability to create complex shapes and designs that would be difficult or impossible to produce using traditional manufacturing methods. Additionally, 3D printing allows for the creation of custom parts and components that can be tailored to specific needs, making it an ideal tool for prototyping and testing new electronic devices.
Challenges of 3D Printing in Electronics
Despite its many benefits, 3D printing in electronics also presents some challenges. One of the main challenges is the need for a high level of technical expertise to design and print complex electronic components. Additionally, the quality of the printed components can vary depending on the type of material used and the printer itself, which can impact the overall performance of the final device.
CNC Machining in Electronics
CNC machining is a subtractive manufacturing process that involves the use of computer-controlled machinery to remove material from a workpiece to create a desired shape or design. This technology has numerous applications in the field of electronics, including the creation of custom enclosures, mounts, and other components.
Benefits of CNC Machining in Electronics
One of the primary benefits of using CNC machining in electronics is the ability to create precise and accurate components with a high level of repeatability. Additionally, CNC machining allows for the creation of complex shapes and designs that would be difficult or impossible to produce using traditional manufacturing methods.
Challenges of CNC Machining in Electronics
Despite its many benefits, CNC machining in electronics also presents some challenges. One of the main challenges is the need for a high level of technical expertise to design and machine complex electronic components. Additionally, the quality of the machined components can vary depending on the type of material used and the machinery itself, which can impact the overall performance of the final device.
In conclusion, both 3D printing and CNC machining are powerful tools that can be used to create custom electronic components and devices. However, they also present their own unique challenges and require a high level of technical expertise to use effectively.
Safety Precautions and Best Practices
Staying Safe While Working with Electricity
Working with electricity can be dangerous if proper precautions are not taken. As a DIY electronics enthusiast, it is crucial to prioritize safety when working with electrical components. Here are some guidelines to keep you safe while working with electricity:
1. Familiarize Yourself with Electrical Components
Before starting any project, it is essential to familiarize yourself with the electrical components you will be working with. Research the components’ specifications, including voltage, current, and power ratings, to ensure that you use the correct components in your circuit.
2. Use a Multimeter
A multimeter is an essential tool for any DIY electronics enthusiast. It can measure voltage, current, and resistance, which can help you identify potential issues in your circuit. Always use a multimeter to test your circuit before powering it up.
3. Follow Circuit Diagrams
Circuit diagrams are essential when working with electronic components. They provide a visual representation of the circuit’s components and how they are connected. Always follow the circuit diagram when building your circuit to avoid short circuits and other safety hazards.
4. Use a Ground Fault Circuit Interrupter (GFCI)
A GFCI is a safety device that helps prevent electrical shocks by detecting ground faults in a circuit. It is essential to use a GFCI when working with electrical components, especially when working with power tools or near water sources.
5. Avoid Overloading Electrical Outlets
Overloading electrical outlets can cause electrical fires and other safety hazards. It is essential to avoid overloading electrical outlets by using extension cords and power strips wisely. Never plug multiple devices into one outlet, and avoid using damaged or frayed cords.
6. Keep Your Workspace Organized
A cluttered workspace can lead to safety hazards when working with electrical components. It is essential to keep your workspace organized and free from clutter to avoid accidents. Use labels to identify components and keep them in designated areas to prevent confusion.
By following these safety guidelines, you can minimize the risks associated with working with electricity and ensure a safe and enjoyable DIY electronics experience.
Proper Disposal of Electronic Waste
Proper disposal of electronic waste is a critical aspect of DIY electronics that should not be overlooked. Improper disposal of electronic waste can have severe environmental consequences, including soil and water pollution, and harm to wildlife. Here are some guidelines for proper disposal of electronic waste:
- Identify the Type of Electronic Waste: Before disposing of electronic waste, it is essential to identify the type of waste. Different types of electronic waste require different disposal methods.
- Recycle: Recycling is the best way to dispose of electronic waste. It helps to reduce the amount of waste sent to landfills and helps to recover valuable materials that can be used in the production of new electronics. Many electronic stores and recycling centers offer recycling programs for electronic waste.
- Donate: If your electronic device is still in good working condition, you can donate it to a charity or non-profit organization. This helps to ensure that the device gets put to good use and avoids ending up in a landfill.
- Contact Local Authorities: In many areas, there are specific regulations regarding the disposal of electronic waste. Contact your local authorities to find out what the regulations are in your area and how to properly dispose of electronic waste.
- Avoid Self-Repair: If you are not experienced in electronics repair, it is best to avoid attempting to repair electronic devices yourself. Improper repairs can result in electronic waste that is difficult to dispose of properly.
By following these guidelines, you can help to ensure that electronic waste is disposed of properly and minimize its impact on the environment.
Environmentally Friendly Electronics Design
As we delve deeper into the world of DIY electronics, it is essential to consider the environmental impact of our creations. Environmentally friendly electronics design involves the use of sustainable materials and energy-efficient components to reduce the carbon footprint of our devices.
One way to achieve this is by using recycled materials for the components of our electronic devices. Recycling not only reduces waste but also conserves natural resources. In addition, recycling helps to reduce the amount of electronic waste that ends up in landfills, where it can cause harm to the environment.
Another way to create environmentally friendly electronics is by using energy-efficient components. Energy-efficient components consume less power, which helps to reduce the overall energy consumption of our devices. This not only helps to save energy but also reduces the carbon footprint of our devices.
Moreover, we can design our electronic devices to be modular, which allows for easy repair and replacement of components. This reduces the need to dispose of entire devices, which can help to reduce electronic waste.
By incorporating these practices into our DIY electronics projects, we can help to create a more sustainable future for our planet.
Resources for Further Learning
Books, Websites, and Online Communities for DIY Electronics Enthusiasts
For those who are looking to deepen their knowledge of DIY electronics, there are a wealth of resources available in the form of books, websites, and online communities. These resources can provide valuable information on electronics design, component selection, circuit analysis, and much more.
Books
There are numerous books available on the subject of DIY electronics, ranging from beginner-friendly guides to advanced technical manuals. Some recommended titles include:
- “The Electronics-Self Assembly Manual” by Jeremy Blades
- “Practical Electronics for Inventors” by Paul Scherz and Simon Monk
- “Make: Electronics” by Charles Platt
- “Electronics: A Beginner’s Guide” by John S. Quinlan
Websites
In addition to books, there are a variety of websites that offer information and resources for DIY electronics enthusiasts. Some popular websites include:
- Instructables: A community-driven website that features a wide range of DIY projects, including electronics.
- Hackaday: A website that features news, project guides, and tutorials on a variety of topics, including electronics.
- Adafruit: A website that offers tutorials, product reviews, and other resources for DIY electronics enthusiasts.
- Sparkfun: A website that offers tutorials, product reviews, and other resources for DIY electronics enthusiasts.
Online Communities
Finally, there are a number of online communities that provide a platform for DIY electronics enthusiasts to share ideas, ask questions, and offer advice. Some popular online communities include:
- Reddit’s r/DIY: A subreddit dedicated to DIY projects and discussions.
- ElectroPeople: An online forum for electronics enthusiasts.
- The Techno Wizard: A YouTube channel that features tutorials and project guides on a variety of topics, including DIY electronics.
These resources can provide a wealth of information and inspiration for those interested in DIY electronics. Whether you’re just starting out or are an experienced electronics enthusiast, there is something for everyone in the world of DIY electronics.
Tips for Continuing Your Electronics Learning Journey
If you’re eager to continue your journey of learning about electronics, here are some tips to help you deepen your knowledge and skills:
- Experiment with different projects: As you progress in your electronics learning journey, try to tackle more complex projects. This will help you build on your existing knowledge and skills, and keep you engaged and motivated.
- Join online communities: Joining online communities, such as forums or social media groups, can provide you with access to a wealth of information and resources. You can also connect with other electronics enthusiasts, ask questions, and get feedback on your projects.
- Read electronics magazines and blogs: Keep up to date with the latest developments in the world of electronics by reading magazines and blogs. This will help you stay informed about new technologies and techniques, and give you ideas for your own projects.
- Take courses or attend workshops: If you want to deepen your knowledge of electronics, consider taking courses or attending workshops. This will give you structured learning opportunities, and allow you to learn from experts in the field.
- Get hands-on experience: Finally, the best way to learn electronics is to get hands-on experience. Build your own projects, experiment with different components and circuits, and learn from your mistakes. With practice, you’ll become more confident and proficient in your electronics skills.
FAQs
1. What are the basic tools and equipment required for making electronic devices?
The basic tools and equipment required for making electronic devices include a soldering iron, a solder, a breadboard, jumper wires, a multimeter, a power supply, and a computer with a software program for designing and simulating circuits.
2. How do I design and simulate a circuit before building it?
You can use a software program such as Eagle PCB or Fritzing to design and simulate a circuit before building it. These programs allow you to create schematics and layout the components on a virtual breadboard. This helps you to identify any errors or potential problems before physically building the circuit.
3. What types of electronic components do I need to make electronic devices?
The types of electronic components you need to make electronic devices depend on the specific project you are working on. Common components include resistors, capacitors, inductors, transistors, diodes, and integrated circuits.
4. How do I solder electronic components together?
To solder electronic components together, first apply a thin layer of solder flux to the points where the components will be connected. Then, heat the components using a soldering iron until the solder melts and flows into the joint. Finally, allow the solder to cool and solidify before continuing with the assembly.
5. How do I power my electronic device?
The method of powering your electronic device depends on the specific project. Some devices can be powered by batteries, while others may require an external power supply. It is important to choose a power source that is safe and appropriate for the specific components used in the device.
6. How do I test my electronic device?
To test your electronic device, first make sure it is powered off and disconnected from any power source. Then, use a multimeter to test the continuity of the circuit and check for any shorts or other issues. Once you have verified that the circuit is functioning properly, power on the device and test it to ensure it is working as intended.


