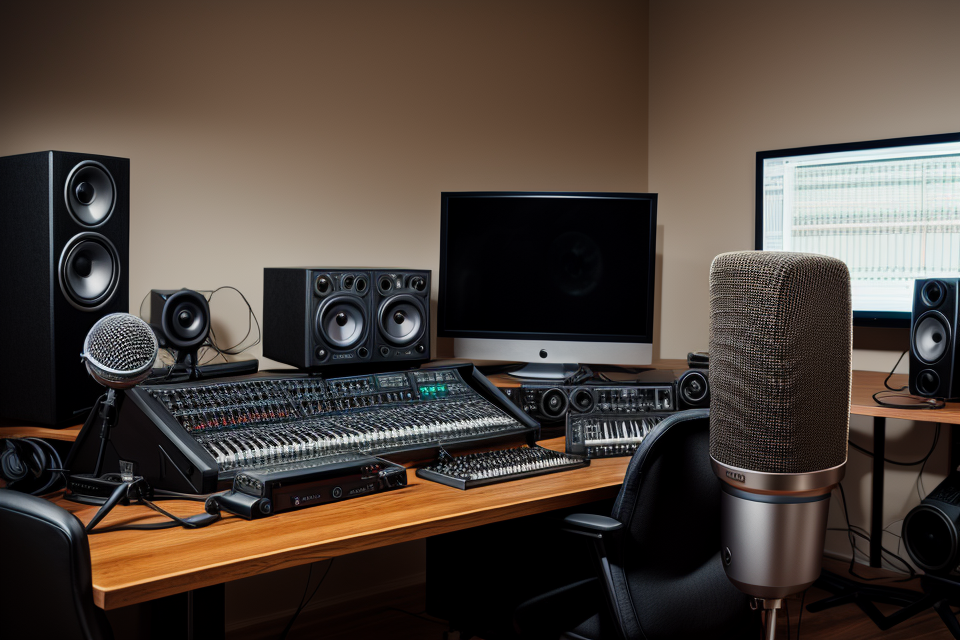
Starting a home recording studio can be an exciting and rewarding endeavor for music enthusiasts and professionals alike. With the right equipment, you can create high-quality recordings in the comfort of your own home. However, getting started can be overwhelming, especially for those who are new to the world of audio recording. This article will provide a comprehensive guide to the essential equipment needed to start your home recording studio. From microphones to audio interfaces, we’ll cover everything you need to know to get started on your musical journey.
To start a home recording studio, you will need a few essential pieces of equipment. First, you will need a computer or laptop with a fast processor and enough RAM to handle recording and editing software. You will also need a digital audio workstation (DAW) software, such as Pro Tools, Ableton Live, or Logic Pro X, to record, edit, and mix your tracks. Additionally, you will need a microphone or microphone set to capture your vocals or instruments, and a pair of studio monitors to play back your recordings. Finally, you may want to invest in a MIDI controller keyboard or other instruments to input notes and control parameters in your DAW. With these essential pieces of equipment, you can start recording and producing your own music in the comfort of your own home.
Essential Equipment for Your Home Recording Studio
Microphone
A microphone is a crucial component of any home recording studio. It is used to capture sound from instruments or vocals and transfer it into your computer for recording, mixing, and mastering. There are three main types of microphones to choose from: condenser microphones, dynamic microphones, and USB microphones.
Condenser Microphone
A condenser microphone is a type of microphone that uses a diaphragm to capture sound. It is highly sensitive and can pick up a wide range of frequencies, making it ideal for recording vocals, acoustic instruments, and other delicate sounds. Condenser microphones require phantom power to operate, which is a type of electrical current that is supplied by your recording software or interface.
Dynamic Microphone
A dynamic microphone is a type of microphone that uses a coil and magnet to capture sound. It is less sensitive than a condenser microphone but can handle louder volumes without distortion. Dynamic microphones are ideal for recording loud instruments such as electric guitars and drums. They do not require phantom power to operate.
USB Microphone
A USB microphone is a type of microphone that connects directly to your computer via a USB port. It is a convenient option for those who want to start recording quickly and easily without the need for additional equipment. USB microphones come in a variety of styles and quality levels, from basic models that are perfect for voice recordings to high-end models that can capture professional-quality sound.
When choosing a microphone for your home recording studio, it is important to consider your budget, the type of sounds you want to record, and the quality of sound you are aiming for. A good quality microphone can make a significant difference in the final sound of your recordings, so it is worth investing in a good one.
Audio Interface
When it comes to setting up a home recording studio, one of the most essential pieces of equipment you’ll need is an audio interface. An audio interface is a device that allows you to connect your instruments and microphones to your computer, enabling you to record and produce music.
There are several types of audio interfaces available on the market, each with its own unique features and benefits. Here are some of the most common types of audio interfaces:
- USB Audio Interfaces: These are the most basic type of audio interface, and they connect to your computer via a USB port. They’re great for beginners because they’re easy to set up and use, and they’re usually affordable.
- Firewire Audio Interfaces: These audio interfaces connect to your computer via a Firewire port, which provides faster data transfer rates than USB. They’re ideal for those who need higher-quality audio and more channels of recording.
- Thunderbolt Audio Interfaces: These are the most advanced type of audio interface, and they connect to your computer via a Thunderbolt port. They offer the fastest data transfer rates of all the audio interfaces, making them ideal for professional recording studios.
When choosing an audio interface, there are several factors to consider. Here are some things to keep in mind:
- Number of Inputs: You’ll need to consider how many instruments and microphones you plan to connect to your audio interface. Make sure you choose an interface that has enough inputs to accommodate all of your equipment.
- Analog to Digital Conversion: This refers to the process of converting analog signals from your instruments and microphones into digital signals that can be recorded by your computer. Look for an audio interface with high-quality analog to digital conversion for the best possible sound quality.
- Digital Signal Processing: Many audio interfaces come with built-in digital signal processing (DSP) effects, such as compression and reverb. These can be useful for enhancing your recordings, but they’re not essential.
- Price: Audio interfaces can range from a few hundred dollars to several thousand dollars. Set a budget and choose an interface that fits your needs and your budget.
Overall, an audio interface is a crucial piece of equipment for any home recording studio. By considering the factors listed above, you can choose an interface that will meet your needs and help you create high-quality recordings.
Headphones
Headphones are a crucial component of any home recording studio setup. They allow you to listen to your recordings in detail, and make adjustments to your mix without disturbing others. Here are some of the most essential headphones for your home recording studio:
Closed-back headphones
Closed-back headphones are designed to isolate sound, which makes them ideal for recording and mixing. They are often used by professional musicians and audio engineers because they provide accurate sound reproduction and have minimal leakage of sound. Some popular closed-back headphones include the Sennheiser HD 280 Pro, the Audio-Technica ATH-M40x, and the Beyerdynamic DT 770 Pro.
Open-back headphones
Open-back headphones are designed to allow sound to escape from the earcup, which makes them less isolating than closed-back headphones. They are ideal for listening to music, but not ideal for recording or mixing. Open-back headphones are known for their natural sound reproduction and spaciousness. Some popular open-back headphones include the Sennheiser HD 559, the Audio-Technica ATH-A700x, and the Beyerdynamic DT 1770.
Semi-open headphones
Semi-open headphones are designed to provide a balance between closed-back and open-back headphones. They have a perforated earcup that allows sound to escape while still providing some isolation. They are ideal for musicians who want to monitor their recordings while still being aware of their surroundings. Some popular semi-open headphones include the Sennheiser HD 559, the Audio-Technica ATH-A700x, and the Beyerdynamic DT 1770.
When choosing headphones for your home recording studio, it’s important to consider your budget, the type of music you produce, and the isolation you need. Closed-back headphones are ideal for recording and mixing, while open-back headphones are ideal for listening to music. Semi-open headphones provide a balance between the two. Regardless of which type of headphones you choose, make sure they are comfortable to wear for extended periods of time.
Computer
A computer is a vital component of any home recording studio. It serves as the central hub for all recording and production activities. To ensure smooth operation, it is crucial to invest in a computer that meets the necessary requirements. Here are some essential factors to consider when selecting a computer for your home recording studio:
Processor
The processor, also known as the central processing unit (CPU), is responsible for executing instructions and managing the overall performance of the computer. For home recording studios, it is recommended to choose a processor with a high single-core performance and multiple cores for multitasking. Processors such as Intel Core i7 or i9 and AMD Ryzen 7 or 9 are suitable options.
RAM
Random Access Memory (RAM) is responsible for storing temporary data during the execution of programs. Adequate RAM is crucial for efficient performance in home recording studios, as it ensures smooth operation of digital audio workstations (DAWs) and other software. A minimum of 16 GB of RAM is recommended, with 32 GB or more being ideal for more demanding projects.
Storage
Storage refers to the permanent storage space available on the computer’s hard drive or solid-state drive (SSD). It is essential to have ample storage to accommodate audio files, samples, and virtual instruments. A minimum of 500 GB of storage is recommended, with 1 TB or more being ideal for larger projects and extensive libraries.
In addition to these factors, it is also important to consider the computer’s operating system, as some DAWs may have compatibility issues with certain operating systems. Windows and macOS are the most popular operating systems for home recording studios, but it is essential to choose one that best suits your needs and preferences.
In summary, selecting a computer with a powerful processor, ample RAM, and sufficient storage is crucial for the efficient operation of a home recording studio. It is also important to consider the computer’s operating system and any specific software requirements.
DAW (Digital Audio Workstation)
A Digital Audio Workstation (DAW) is an essential piece of equipment for any home recording studio. It is a software application that allows you to record, edit, and mix audio tracks. With a DAW, you can create professional-sounding recordings right from the comfort of your own home.
Free DAW options
There are several free DAW options available that can help you get started with your home recording studio without breaking the bank. Some popular free DAW options include:
- Audacity
- LMMS
- Ardour
These DAWs offer a range of features and tools that can help you record, edit, and mix your audio tracks. While they may not have all the features of paid DAWs, they can still be a great option for beginners or those on a tight budget.
Paid DAW options
If you’re looking for more advanced features and tools, there are also several paid DAW options available. Some popular paid DAW options include:
- Pro Tools
- Logic Pro
- Ableton Live
These DAWs offer a wide range of features and tools that can help you create professional-sounding recordings. They also offer advanced editing and mixing capabilities, as well as support for a wide range of hardware and software.
When choosing a paid DAW, it’s important to consider your budget and your needs. Some DAWs are better suited for specific types of music or recording projects, so it’s important to do your research and choose the right one for you.
Overall, a DAW is an essential piece of equipment for any home recording studio. Whether you choose a free or paid option, it will provide you with the tools you need to create professional-sounding recordings from the comfort of your own home.
Cables and Connectors
XLR Cables
XLR cables are essential for connecting microphones to your recording equipment. They are known for their high quality sound transmission and durability. XLR cables have a circular connector on one end and a three-pin connector on the other end. It is important to note that XLR cables come in different lengths, so it is important to choose the right length for your specific needs.
TRS Cables
TRS cables, also known as balanced cables, are used to connect equipment with balanced outputs, such as mixers and audio interfaces. They have a tip, ring, and sleeve connector on one end and a three-pin connector on the other end. TRS cables are commonly used to connect microphones, instruments, and other audio equipment to your recording setup.
USB Cables
USB cables are commonly used to connect audio interfaces and other recording equipment to your computer. They are a convenient and cost-effective option for transferring audio signals between devices. It is important to choose a high-quality USB cable to ensure reliable and consistent sound quality.
Acoustic Treatment
Acoustic treatment is a crucial aspect of setting up a home recording studio. It involves the use of various techniques and equipment to control and improve the acoustics of your recording space. Poor acoustics can lead to unwanted reflections, echoes, and reverberation, which can negatively impact the quality of your recordings. Here are some key elements of acoustic treatment that you should consider:
- Room treatment basics:
- Damping materials: These are materials that absorb sound waves and reduce reflections. Examples include acoustic foam, egg cartons, and blankets.
- Sound-absorbing panels: These are panels made of materials such as melamine or fiberglass that are designed to absorb sound waves.
- Bass traps: These are devices that are placed in the corners of a room to reduce low-frequency reflections.
- Diffusers: These are objects that scatter sound waves evenly throughout the room, reducing reflections and echoes.
- Soundproofing tips:
- Seal all cracks and crevices: Cracks and crevices in walls, floors, and ceilings can allow sound to escape and create unwanted reflections.
- Use mass-loaded vinyl: This is a heavy vinyl material that can be used to cover windows, doors, and other openings to reduce sound transmission.
- Add a door gasket: A door gasket can be added to the bottom of a door to reduce sound leakage.
- Consider soundproofing materials: These can include drywall, mass-loaded vinyl, and acoustic caulk.
By incorporating these acoustic treatment techniques into your home recording studio, you can create a more controlled and optimal acoustic environment for recording high-quality audio.
Other Essential Accessories
In addition to the essential equipment listed previously, there are several other accessories that can enhance your home recording studio setup. These accessories can help improve the quality of your recordings and make your recording experience more comfortable and efficient.
Pop Filters
Pop filters are a crucial accessory for any home recording studio. They are designed to reduce popping sounds that can occur when recording vocals or other audio sources. Pop filters work by positioning a mesh screen between the microphone and the source of the sound. The mesh screen helps to minimize the impact of plosive sounds, which can result in unwanted pops and hisses in your recordings.
There are several types of pop filters available, including desk-mounted models and stand-alone designs. When choosing a pop filter, consider the size and type of microphone you will be using, as well as your personal preferences for placement and positioning.
Microphone Stands
Microphone stands are essential for positioning your microphones at the optimal height and angle for recording. They allow you to adjust the height and tilt of your microphone to ensure that it is pointing directly at your voice or instrument.
There are several types of microphone stands available, including boom stands, tripod stands, and desktop stands. When choosing a microphone stand, consider the size and weight of your microphone, as well as the space available in your recording area.
Headphone Stands
Headphone stands are designed to hold your headphones in a convenient and organized manner. They can help to reduce clutter and make it easier to access your headphones when you need them.
There are several types of headphone stands available, including desktop stands and wall-mounted designs. When choosing a headphone stand, consider the size and type of headphones you will be using, as well as your personal preferences for organization and space-saving.
Studio Monitors
Studio monitors are speakers designed specifically for recording and mixing audio. They are designed to provide accurate and uncolored sound reproduction, making them an essential tool for recording and mixing music.
When choosing studio monitors, consider the size of your recording area, the type of music you will be recording, and your personal preferences for sound quality. It is also important to consider the placement of your studio monitors in your recording area, as they should be positioned at the appropriate distance from your listening position to provide accurate sound reproduction.
Budgeting for Your Home Recording Studio
Factors to consider
When budgeting for your home recording studio, there are several factors to consider. Here are some key considerations to keep in mind:
- Quality vs. cost: It’s important to strike a balance between quality and cost when building your home recording studio. While it’s tempting to invest in the most expensive equipment, it’s essential to prioritize the gear that will have the most significant impact on the quality of your recordings. Consider your needs and the type of music you want to record, and then allocate your budget accordingly.
- Upgrading options: As you gain more experience and your skills improve, you may find that you need to upgrade your equipment to achieve the sound you’re looking for. It’s important to plan for future upgrades and factor this into your budget. You may also want to consider purchasing equipment that is upgradeable or modular, so you can easily add new components as needed.
- Financing options: If you don’t have the cash to purchase all the equipment upfront, there are financing options available. Some music stores offer financing plans, or you can apply for a personal loan or credit card to cover the cost of your equipment. Just be sure to carefully consider the terms and interest rates before taking on any debt.
By considering these factors, you can create a budget that will allow you to build a home recording studio that meets your needs and fits your budget.
Building your studio over time
One of the best ways to start a home recording studio is by building it over time. This approach allows you to purchase equipment as you go, which can help you stay within your budget. Here are some steps to follow when building your studio over time:
Starting with the Basics
When starting with the basics, there are a few essential pieces of equipment that you’ll need. These include:
- A computer or laptop with a good processor and enough RAM to handle recording software
- A digital audio workstation (DAW) software, such as Ableton Live, Logic Pro, or Pro Tools
- A basic microphone, such as a dynamic microphone or a USB microphone
- Headphones for monitoring your recordings
These basics will allow you to start recording and producing music, but you may want to consider upgrading your equipment as you go.
Adding Equipment as Needed
As you continue to build your home recording studio, you may want to add more equipment to improve the quality of your recordings. Some additional equipment you may want to consider includes:
- A midi controller for more precise control over your recordings
- An audio interface to improve the quality of your recordings
- Additional microphones, such as condenser microphones or a multi-pattern microphone
- A mixer to control the levels of your recordings
- Monitors to hear your recordings in a more accurate way
Adding equipment as needed allows you to tailor your home recording studio to your specific needs and budget. By building your studio over time, you can ensure that you have the necessary equipment to create high-quality recordings without breaking the bank.
Tips for Setting Up Your Home Recording Studio
Planning and preparation
Setting up a home recording studio requires careful planning and preparation to ensure that you have all the necessary equipment and a conducive environment for recording. Here are some tips to help you get started:
Measuring your room
Before you start setting up your equipment, it’s important to measure the dimensions of your room. This will help you determine the optimal placement of your equipment and avoid any unwanted reflections or echoes that can negatively affect the quality of your recordings.
To measure your room, you can use a tape measure or a laser measurer to take measurements of the length, width, and height of the room. It’s important to measure the distance from the walls to the equipment, as well as the distance between the equipment and any reflective surfaces, such as mirrors or windows.
Choosing the right equipment location
Once you have measured your room, you can start thinking about where to place your equipment. The ideal location will depend on the layout of your room and the type of equipment you have.
For example, if you have a large room, you may want to place your equipment in the corner to avoid any unwanted reflections off the walls. If you have a smaller room, you may want to place your equipment against a wall to maximize the available space.
Creating a clean and organized workspace
In addition to choosing the right equipment location, it’s important to create a clean and organized workspace. This will not only help you stay organized, but it will also help you avoid any unwanted noise or distractions that can affect the quality of your recordings.
To create a clean and organized workspace, you can start by decluttering your room and removing any unnecessary items. You can then arrange your equipment in a logical and organized manner, using cable management and other tools to keep everything in its place.
It’s also a good idea to invest in some acoustic panels or foam to help absorb any unwanted reflections or echoes. These can be placed on the walls, ceiling, or floor, depending on the layout of your room and the type of equipment you have.
By following these tips for planning and preparation, you can set up your home recording studio with the right equipment and environment to achieve high-quality recordings.
Equipment placement and positioning
Microphone Placement
Microphone placement is a crucial aspect of setting up your home recording studio. The quality of your recordings will be heavily influenced by how you position your microphones. Here are some tips to keep in mind:
- Cardioid microphones: These microphones are the most common type and are ideal for recording vocals and instruments. They pick up sound from the front and sides, but not from the back. So, place the microphone in front of the source of the sound, about 6 to 12 inches away.
- Omnidirectional microphones: These microphones pick up sound from all directions. They are ideal for recording acoustic instruments or in situations where you want to capture the sound of a whole room. Place the microphone in the center of the room or close to the source of the sound.
- Condenser microphones: These microphones are sensitive to sound and are great for recording vocals and high-frequency instruments. They require phantom power, which is provided by an audio interface. Place the microphone about 6 to 12 inches away from the source of the sound.
Studio Monitor Placement
Studio monitor placement is crucial for getting an accurate representation of your mix. Here are some tips to keep in mind:
- Equipment placement: Place your studio monitors at least 6 feet away from walls and corners. This will help reduce bass buildup and reflections.
- Listener position: Sit in the position where you will be doing most of your mixing. Place your monitors at ear level and at a distance from your ears that is at least three times the diagonal length of the speaker. For example, if you have 8-inch monitors, place them at least 3 feet away from your ears.
- Angle and distance: Position your monitors at a 45-degree angle from your ears. This will give you a more accurate representation of how your mix will sound on other systems.
Computer and Audio Interface Placement
The placement of your computer and audio interface can affect the quality of your recordings. Here are some tips to keep in mind:
- Isolation: Place your computer and audio interface in a separate room or in a closed cabinet to isolate them from external noise.
- Cable management: Keep cables organized and out of the way to prevent noise and interference.
- Cooling: Ensure that your computer and audio interface have adequate cooling to prevent overheating.
Overall, proper equipment placement and positioning can greatly affect the quality of your recordings. By following these tips, you can set up your home recording studio for optimal performance.
Soundproofing and isolation
Creating a soundproof and isolated environment is crucial when setting up a home recording studio. It will allow you to record high-quality audio without any unwanted background noise or interference. Here are some tips for soundproofing and isolation:
- DIY soundproofing options:
- Applying acoustic foam panels: Acoustic foam panels are affordable and easy to install. They can be attached to walls, ceilings, and even equipment to help absorb sound waves and reduce reflections.
- Sealing and insulating gaps and cracks: Filling gaps and cracks in walls, windows, and doors with weatherstripping, caulk, or insulation can help to prevent sound from escaping or entering the room.
- Installing a door sweep: A door sweep is a strip of material that fits along the bottom of a door to fill gaps and cracks, providing an additional layer of soundproofing.
- Commercial soundproofing options:
- Mass-loaded vinyl (MLV) barriers: MLV barriers are heavy vinyl sheets that can be attached to walls, ceilings, and floors to provide an additional layer of soundproofing. They are particularly effective at blocking low-frequency sounds.
- Acoustic drywall: Acoustic drywall is designed specifically for soundproofing and provides better sound isolation than regular drywall. It can be used to build new walls or replace existing ones.
- Tips for minimizing noise:
- Minimize equipment noise: Choose equipment with low noise emissions, and place it on vibration-dampening pads or racks to reduce vibrations and noise.
- Avoid using hard surfaces: Hard surfaces such as concrete, wood, and metal can reflect sound and increase reverberation, making it more difficult to achieve a high-quality recording. Opt for carpeting, rugs, or other soft surfaces to absorb sound waves.
- Close windows and doors: Keep windows and doors closed to prevent outside noise from entering the recording space.
- Schedule recording sessions during quiet times: Try to schedule recording sessions during times when there is minimal noise, such as early mornings or late at night.
Basic recording setup
When setting up your home recording studio, it’s important to start with the basics. This includes connecting your equipment, configuring your DAW, and mastering some basic recording techniques.
Connecting Your Equipment
Before you can start recording, you need to make sure all of your equipment is properly connected. This includes connecting your microphone to your audio interface, connecting your audio interface to your computer, and connecting your speakers or headphones.
Configuring Your DAW
Once you have all of your equipment connected, it’s time to configure your DAW (digital audio workstation). This includes setting up your recording software, creating a new project, and configuring your recording settings.
Basic Recording Techniques
Finally, it’s important to master some basic recording techniques. This includes learning how to properly position your microphone, adjusting your gain levels, and monitoring your recordings. It’s also important to practice proper technique when it comes to playing or singing into the microphone.
By focusing on these basic elements of recording, you’ll be well on your way to setting up a successful home recording studio.
Advanced recording techniques
When it comes to advanced recording techniques, there are several key elements to consider. These include:
- Recording multiple instruments: One of the most important aspects of advanced recording techniques is the ability to record multiple instruments simultaneously. This can be achieved using a mixer or audio interface, which allows you to connect multiple microphones or instruments to your computer.
- Using effects and plugins: Another important aspect of advanced recording techniques is the use of effects and plugins. These can be used to enhance the sound of your recordings, add special effects, and adjust the levels of different instruments. Some common effects and plugins include reverb, delay, compression, and EQ.
- Mixing and mastering your recordings: Finally, advanced recording techniques also involve the process of mixing and mastering your recordings. This involves adjusting the levels and panning of different instruments, removing any unwanted noise or feedback, and ensuring that the overall sound of your recording is balanced and clear. A good digital audio workstation (DAW) can be invaluable for this process, as it allows you to easily edit and manipulate your recordings.
Maintaining and upgrading your home recording studio
Regular equipment maintenance
As with any equipment, regular maintenance is key to ensuring that your home recording studio remains in good working order. This means keeping all of your equipment clean and free from dust, as well as checking for any signs of wear and tear.
For example, if you have a mixing console, it’s important to regularly check the faders and knobs for any signs of sticking or damage. If you have microphones, make sure to clean them regularly to prevent buildup of dust and dirt, which can affect their performance.
Keeping up with software updates
In addition to regular equipment maintenance, it’s also important to keep up with software updates. This includes updating your digital audio workstation (DAW) software, as well as any other software you use in your home recording studio.
Updating your software ensures that you have access to the latest features and bug fixes, which can help improve the overall performance of your home recording studio.
Upgrading your equipment as needed
As you become more experienced with your home recording studio, you may find that you need to upgrade your equipment in order to achieve the sound you’re looking for. This could mean investing in new microphones, preamps, or other equipment that can help improve the quality of your recordings.
It’s important to remember that upgrading your equipment is not always necessary, and should only be done when it’s necessary to achieve the sound you’re looking for. It’s also important to do your research and make informed decisions when it comes to upgrading your equipment, as not all upgrades are created equal.
Resources for Building Your Home Recording Studio
Online communities and forums
If you’re serious about building your home recording studio, then online communities and forums are an excellent resource to tap into. Here are some of the most popular ones:
Recording.org
Recording.org is one of the oldest and most respected online communities for recording engineers and producers. The site has a wealth of information on all aspects of recording, from beginner to advanced levels. You can ask questions, share tips and tricks, and get advice from experienced professionals. The site also has a section dedicated to gear reviews, where you can find out about the latest equipment and technology.
Gearslutz
Gearslutz is another popular online community for audio professionals. The site has a strong focus on gear reviews and discussions, and is a great place to research equipment and get advice from other users. You can also find tutorials, interviews with industry professionals, and a wide range of other resources.
Reddit /r/home_recording
Reddit is a huge online community with a wide range of subreddits dedicated to different topics. The /r/home_recording subreddit is a great resource for anyone building a home recording studio. The community is active and helpful, and you can find answers to just about any question you might have. You can also find reviews of equipment, share your own experiences, and get advice from other users.
Overall, online communities and forums are an excellent resource for anyone building a home recording studio. They provide a wealth of information and advice, and can help you make informed decisions about the equipment you need to get started.
YouTube channels and tutorials
There are numerous YouTube channels and tutorials available online that provide valuable information on building a home recording studio. Some of the most popular and highly-rated channels include:
The DIY Musician
The DIY Musician is a YouTube channel created by engineer and producer Graham Cochrane. The channel provides in-depth tutorials on a variety of topics related to home recording, including how to set up a home recording studio on a budget, how to mic various instruments, and how to use software such as Ableton Live and Pro Tools. The channel also features interviews with industry professionals and gear reviews.
The Recording Revolution
The Recording Revolution is a YouTube channel created by engineer and producer Ryan West. The channel provides a wide range of tutorials on topics such as mixing, mastering, and recording techniques. The channel also features interviews with industry professionals and gear reviews.
HB Audio
HB Audio is a YouTube channel created by producer and engineer Hugh Beller. The channel provides tutorials on a variety of topics related to home recording, including how to set up a home recording studio, how to use various software and hardware, and how to record and mix different instruments. The channel also features gear reviews and interviews with industry professionals.
These YouTube channels and tutorials can be incredibly helpful for those looking to build a home recording studio. They provide valuable information on equipment, techniques, and software, and can help you avoid common mistakes and pitfalls when setting up your studio. Additionally, they can help you stay up-to-date on the latest trends and technologies in the world of home recording.
Books and courses
The Home Recording Handbook by Craig Anderton
The Home Recording Handbook by Craig Anderton is a comprehensive guide that covers everything you need to know about setting up and operating a home recording studio. The book is packed with practical advice, tips, and techniques for recording, mixing, and mastering your music. It also includes information on the latest technology and software, making it a valuable resource for anyone looking to start a home recording studio.
Recording Unchained by Mike Senior
Recording Unchained by Mike Senior is another excellent resource for those looking to start a home recording studio. The book is focused on helping readers understand the principles of recording and mixing, and how to apply them in a home studio setting. It covers topics such as microphone techniques, signal flow, and mixing concepts, and is written in an easy-to-understand style that is accessible to readers of all skill levels.
Udemy courses on home recording and music production
Udemy offers a wide range of courses on home recording and music production, covering topics such as audio recording, mixing, and mastering. These courses are taught by industry professionals and offer practical advice and techniques for setting up and operating a home recording studio. Some popular courses include “The Complete Home Recording Studio Course” and “Music Production in the Home Studio.” These courses are a great way to learn from experts and get hands-on experience with the latest software and technology.
FAQs
1. What are the essential pieces of equipment needed to start a home recording studio?
To start a home recording studio, you will need a few essential pieces of equipment. These include a computer or laptop with recording software, a digital audio workstation (DAW), a microphone, and a set of headphones. You may also need additional equipment such as an audio interface, a mixer, and studio monitors, depending on your needs and budget.
2. What type of computer or laptop do I need for a home recording studio?
Any computer or laptop with sufficient processing power and storage capacity can be used for a home recording studio. A desktop computer with a fast processor and ample RAM is often preferred, as it can provide more power and stability for recording and editing audio. A laptop with a powerful processor and enough storage space can also be a good option, especially if you need to record on the go.
3. What type of microphone do I need for a home recording studio?
The type of microphone you need for a home recording studio will depend on your specific needs and budget. A large-diaphragm condenser microphone is a popular choice for home recording studios, as it can capture a wide range of frequencies and produce high-quality recordings. Other types of microphones, such as dynamic microphones or ribbon microphones, may also be suitable for certain applications.
4. What type of headphones do I need for a home recording studio?
When choosing headphones for a home recording studio, it is important to select a pair that provides accurate sound reproduction and comfortable fit. Over-ear, closed-back headphones are often preferred for recording and mixing, as they can provide good isolation and minimize outside noise. Noise-cancelling headphones can also be useful for reducing distractions and improving focus.
5. Do I need an audio interface for a home recording studio?
An audio interface is not strictly necessary for a home recording studio, but it can be a useful addition. An audio interface can provide additional inputs and outputs for connecting microphones, instruments, and other equipment, as well as improve the overall sound quality of your recordings. If you plan to record multiple instruments or performers at once, an audio interface can be especially helpful.
6. Do I need studio monitors for a home recording studio?
Studio monitors are not strictly necessary for a home recording studio, but they can be a valuable addition. Studio monitors are designed to provide accurate sound reproduction, making it easier to hear the details of your recordings and make adjustments as needed. If you are serious about producing high-quality recordings, investing in a good pair of studio monitors can be a worthwhile investment.
7. What are some additional accessories that may be useful for a home recording studio?
There are many additional accessories that may be useful for a home recording studio, depending on your needs and budget. Some popular options include microphone stands, pop filters, cables and connectors, and acoustic treatment for your recording space. You may also want to consider investing in a portable recording setup, such as a handheld recorder or a smartphone app, for recording on the go.
