Are you looking to set up your own home studio but not sure where to start? Creating a professional and functional studio setup can be a daunting task, but with the right knowledge and tools, it can be a breeze. In this comprehensive guide, we will take a look at everything you need to consider when setting up your own home studio, from essential equipment to acoustic treatment and beyond. Whether you’re a musician, producer, or audio engineer, this guide will provide you with a step-by-step process to help you create a space that is tailored to your needs and budget. So, let’s get started and discover what you need for a studio setup that will take your production skills to the next level!
Essential Equipment for a Studio Setup
Microphone
A microphone is a crucial piece of equipment for any studio setup. It is used to capture sound and convert it into an electrical signal that can be recorded or amplified. There are several types of microphones available, each with its own unique characteristics and features. In this section, we will discuss the three main types of microphones commonly used in studio setups: condenser microphones, dynamic microphones, and USB microphones.
Condenser Microphone
A condenser microphone, also known as a capacitor microphone, is a type of microphone that uses a capacitor to convert sound waves into electrical signals. Condenser microphones are known for their ability to capture high-frequency sounds and details, making them ideal for recording vocals, acoustic instruments, and percussion. They are also versatile and can be used for a wide range of applications, from recording music to film production.
Dynamic Microphone
A dynamic microphone, on the other hand, uses a coil and magnet to convert sound waves into electrical signals. Dynamic microphones are known for their ability to handle high sound pressure levels and are often used for live performances and recording loud instruments such as electric guitars and drums. They are also less sensitive to sound coming from the side or rear of the microphone, making them ideal for use in noisy environments.
USB Microphone
A USB microphone is a type of microphone that connects directly to a computer or laptop via a USB port. USB microphones are becoming increasingly popular due to their ease of use and affordability. They are ideal for recording podcasts, voiceovers, and online meetings. They are also portable and can be used on the go, making them a great option for musicians and podcasters who need to record on the move.
When choosing a microphone for your studio setup, it is important to consider your specific needs and budget. Condenser microphones are generally more expensive but offer higher quality sound, while dynamic microphones are more affordable and durable. USB microphones are the most affordable option but may not offer the same quality of sound as other types of microphones. It is also important to consider the type of sound you want to capture and the environment in which you will be recording.
Headphones
Headphones are an essential piece of equipment for any studio setup. They allow you to monitor your audio output without disturbing others and can help you to hear details in your mix that may be difficult to discern through speakers.
Closed-back headphones
Closed-back headphones are designed to block out external noise and prevent sound from leaking out. They are ideal for studio use because they provide a high level of isolation, which allows you to focus on your mix without distractions. Closed-back headphones also tend to have a more accurate frequency response, which means that you can hear your mix more accurately.
Open-back headphones
Open-back headphones have a design that allows sound to escape from the earcups, which makes them less isolating than closed-back headphones. They are ideal for casual listening or for musicians who need to hear their environment while they work. Open-back headphones tend to have a more natural sound and can provide a more spacious and immersive listening experience.
In-ear monitors
In-ear monitors (IEMs) are small speakers that fit inside your ear canal. They are designed to provide a high level of isolation and are often used by musicians and audio professionals who need to hear their mix accurately. IEMs are ideal for situations where you need to listen to your mix in noisy environments or when you need to monitor your mix on stage. They are also often used by musicians who want to hear their performance in real-time without the need for headphones.
Audio Interface
An audio interface is an essential piece of equipment for any studio setup. It serves as the bridge between your recording equipment and your computer, allowing you to capture and record high-quality audio. There are several types of audio interfaces available, each with its own unique features and benefits.
External Sound Card
An external sound card is a type of audio interface that is designed to be connected to your computer via a USB or Firewire port. This type of audio interface is a popular choice for musicians and recording enthusiasts who are looking for a simple and easy-to-use solution. External sound cards are often compact and portable, making them a great option for those who are always on the go.
PCIe Sound Card
A PCIe sound card is a type of audio interface that is designed to be installed inside your computer. This type of audio interface is a popular choice for professionals and serious recording enthusiasts who require high-quality audio recording and playback. PCIe sound cards are typically more powerful and feature-rich than external sound cards, and they can be easily integrated into your existing computer setup.
USB Audio Interface
A USB audio interface is a type of audio interface that is designed to be connected to your computer via a USB port. This type of audio interface is a popular choice for musicians and recording enthusiasts who are looking for a simple and easy-to-use solution. USB audio interfaces are often compact and portable, making them a great option for those who are always on the go. They are also a great option for those who are just starting out with recording and are looking for an affordable and easy-to-use solution.
Preamplifier
A preamplifier, commonly referred to as a preamp, is an essential component in any recording studio setup. It is responsible for amplifying and shaping the signal from the microphone or instrument before it is sent to the recording device. There are three main types of preamplifiers: tube, solid-state, and portable.
Tube Preamplifier
Tube preamplifiers are known for their warm and rich sound. They use vacuum tubes to amplify the signal, which can add a certain character to the sound. Tube preamps are often preferred by musicians and engineers who want to achieve a specific tonal quality in their recordings. They are also known for their high gain, which can be useful for driving the signal into the next stage of the recording chain.
Solid-State Preamplifier
Solid-state preamplifiers use transistors or integrated circuits to amplify the signal. They are known for their high precision and low noise, making them a popular choice for studio applications. Solid-state preamps are often more affordable than tube preamps and are a good option for those who want a clean and transparent sound.
Portable Preamplifier
Portable preamplifiers are designed to be compact and easy to transport. They are often used for field recording or live performances, where a full-sized preamp would be impractical. Portable preamps typically have fewer features than their larger counterparts, but they can still provide a high-quality signal for recording.
When choosing a preamplifier for your studio setup, it’s important to consider your specific needs and the type of signal you will be amplifying. Tube preamps can add a certain warmth to the sound, while solid-state preamps can provide a clean and transparent signal. Portable preamps are a good option for those who need a compact and easy-to-use device for field recording or live performances.
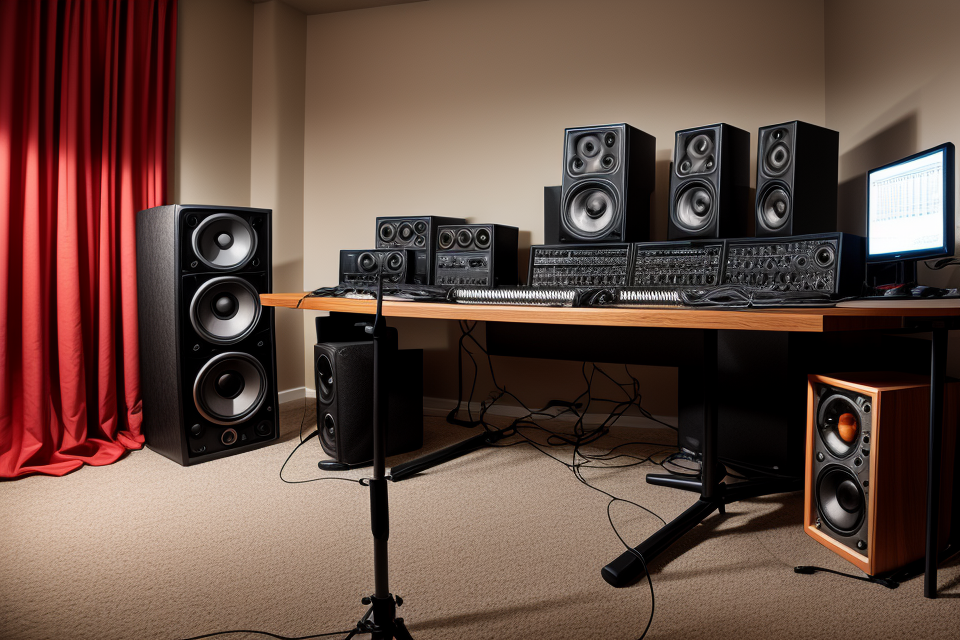
Studio Monitors
When it comes to setting up a recording studio, one of the most crucial pieces of equipment you’ll need is a set of studio monitors. Studio monitors are designed specifically for audio production and provide a flat, accurate response that helps you to hear your mix as accurately as possible. In this section, we’ll take a closer look at the different types of studio monitors available and what to consider when choosing the right ones for your setup.
Active Studio Monitors
Active studio monitors are self-powered, meaning they have their own built-in amplifiers and speakers. This makes them easy to set up and use, as you don’t need to worry about finding separate amplifiers or speakers. Active studio monitors are also generally more expensive than passive monitors, but they often offer better sound quality and more features.
Passive Studio Monitors
Passive studio monitors, on the other hand, do not have built-in amplifiers or speakers. Instead, they rely on external amplifiers and speakers to produce sound. This can make them more flexible in terms of setup, as you can choose the specific amplifiers and speakers that best suit your needs. However, it also means that you’ll need to invest in separate amplifiers and speakers, which can add to the overall cost of your setup.
Powered Studio Monitors
Powered studio monitors are similar to active studio monitors in that they have built-in amplifiers and speakers. However, they are not self-powered, meaning they require an external power source to function. This can make them less convenient to set up than active studio monitors, but they are generally more affordable and still offer high-quality sound.
When choosing studio monitors for your setup, there are several factors to consider. These include the size and layout of your studio, the type of music you’ll be producing, and your budget. It’s also important to listen to different types of studio monitors before making a purchase to ensure that you’re getting the best possible sound quality for your needs.
Acoustic Treatment
When setting up a studio, one of the most important considerations is the acoustic treatment. The sound quality in a studio can make or break a recording, and proper acoustic treatment is essential to ensuring that the recordings sound professional and clear. Here are some of the essential acoustic treatment equipment that you need for your studio setup:
Acoustic Panels
Acoustic panels are one of the most commonly used acoustic treatments in studios. They are designed to absorb sound waves and reduce echo and reverberation in the room. These panels come in different sizes, colors, and materials, and they can be mounted on walls, ceilings, or placed on stands. The type of panel you choose will depend on the size of your studio and the level of sound absorption you need.
Bass Traps
Bass traps are designed to reduce low-frequency sound waves that can cause resonance and echo in a studio. They are typically placed in the corners of the room, where the sound waves tend to collect and build up. Bass traps come in different sizes and shapes, and they can be made from a variety of materials, including foam, fiberglass, and rockwool. The type of bass trap you choose will depend on the size of your studio and the level of bass absorption you need.
Diffusers
Diffusers are designed to scatter sound waves and reduce echo and reverberation in a studio. They come in different shapes and sizes, and they can be placed on walls, ceilings, or placed on stands. The type of diffuser you choose will depend on the size of your studio and the level of sound diffusion you need.
In addition to these essential acoustic treatment equipment, you may also need other accessories such as acoustic doors, window treatments, and soundproofing materials. The type of equipment and accessories you choose will depend on the size of your studio, the level of sound quality you need, and your budget. It is essential to consult with a professional acoustician to ensure that you have the right equipment and accessories for your studio setup.
Computer and Software
A desktop or laptop computer is essential for a studio setup. A desktop computer can offer more processing power and storage, while a laptop can provide the flexibility to move around the studio. It is recommended to have a computer with at least 8GB of RAM and a dual-core processor.
In addition to the computer, a digital audio workstation (DAW) software is necessary for recording, editing, and mixing audio. Popular DAW software includes Ableton Live, Logic Pro, and Pro Tools. These software programs allow you to record audio, add effects, and manipulate sound in various ways.
When choosing a DAW, consider your budget, the type of music you produce, and the compatibility with other software and hardware. It is also important to have a stable internet connection to download updates and access online resources.
An external hard drive or cloud storage is recommended to store large amounts of audio files and protect against data loss. It is also essential to have a reliable backup system to ensure that your work is not lost due to technical issues or accidents.
Overall, a computer and software are essential components of a studio setup. With the right equipment, you can produce high-quality audio and take your music production to the next level.
Lighting and Environment
Lighting Equipment
When it comes to setting up a studio, lighting is one of the most crucial elements to consider. Whether you’re shooting photography, videography, or simply need adequate lighting for your workspace, there are a variety of lighting equipment options available to suit your needs.
- Softbox lighting: Softboxes are a popular choice for photographers and videographers alike. They are essentially rectangular boxes with a layer of white material on the inside, which diffuses the light and creates a soft, even spread. Softboxes come in a range of sizes, from small to large, and can be adjusted to provide either a soft, diffused light or a more directional, focused beam.
- Fluorescent lighting: Fluorescent lights are another popular option for studio lighting. They come in a variety of sizes and shapes, and can be either cool or warm in tone. Fluorescent lights are known for their energy efficiency and long lifespan, making them a cost-effective choice for studios that require a lot of lighting.
- LED lighting: LED lights are becoming increasingly popular in the studio setting due to their energy efficiency, long lifespan, and ability to produce a high quality of light. LED lights come in a range of colors, from warm white to cool white, and can be adjusted to provide either a soft, diffused light or a more directional, focused beam. They are also known for their low heat output, which makes them a safer choice for use around delicate equipment or materials.
Overall, the type of lighting equipment you choose will depend on your specific needs and preferences. Softboxes are a great option for providing a soft, even spread of light, while fluorescent lights are a cost-effective choice for those who need a lot of lighting. LED lights are a versatile option that offer energy efficiency and a high quality of light. No matter which type of lighting equipment you choose, it’s important to ensure that you have adequate lighting to suit your needs and create the desired effect in your images or videos.
Environment
Proper ventilation is essential for a studio setup. It is crucial to maintain a clean and healthy environment for you and your equipment. Poor ventilation can lead to the buildup of harmful pollutants, which can damage your equipment and affect your health.
Temperature control is also vital in a studio setup. Extreme temperatures can cause your equipment to malfunction or become damaged. It is important to maintain a comfortable temperature in your studio to ensure that your equipment is functioning correctly and to prevent any damage.
Humidity control is also essential in a studio setup. High humidity levels can cause damage to your equipment and affect the quality of your recordings. It is important to maintain a comfortable humidity level in your studio to ensure that your equipment is functioning correctly and to prevent any damage.
Safety Measures
When setting up a studio, it is important to prioritize safety measures to prevent accidents and ensure a safe working environment. Here are some essential safety measures to consider:
Fire Safety
- Ensure that your studio has proper fire safety equipment, such as smoke detectors, fire extinguishers, and a fire escape plan.
- Regularly inspect and test fire safety equipment to ensure it is in good working condition.
- Keep flammable materials away from heat sources and avoid smoking in the studio.
Electrical Safety
- Ensure that your studio has proper electrical wiring and outlets installed by a licensed electrician.
- Avoid overloading electrical outlets and using extension cords for extended periods.
- Regularly inspect electrical equipment and cords for signs of wear and tear, and replace them if necessary.
Fall Protection
- If your studio is located in a multi-story building or has high ceilings, ensure that proper fall protection measures are in place, such as guardrails or safety nets.
- Wear appropriate footwear with good traction to prevent slips and falls.
- Be aware of your surroundings and take caution when working at heights.
Furniture and Accessories
Workspace
A workspace is an essential component of a studio setup. It is where you will spend most of your time, so it is crucial to ensure that it is comfortable, functional, and well-organized. Here are some key elements to consider when setting up your workspace:
- Desk: A sturdy desk is necessary for a studio setup. It should be large enough to accommodate your computer, keyboard, mouse, and other essentials. You may also want to consider a desk with drawers or shelves to keep your cables and other accessories organized.
- Chair: A comfortable chair is crucial for long hours of work. It should have good back support and be adjustable in height to ensure proper posture. Rolling chairs are a popular choice for studios because they can be easily moved around.
- Computer monitor stand: A monitor stand is necessary to ensure that your computer monitor is at the right height and angle for comfortable viewing. You may also want to consider a mount that allows you to adjust the angle and height of your monitor.
Storage
When setting up a studio, storage is an essential aspect to consider. There are several options available for storing equipment, tools, and other items that are necessary for a successful studio setup. Some popular options include:
- Bookshelf: A bookshelf is a great way to store books, CDs, and other materials that are essential for your studio setup. You can choose from a variety of styles, including open shelving, closed cabinets, and modular systems.
- Storage cabinet: A storage cabinet is an excellent option for storing larger items, such as speakers, cables, and microphones. These cabinets come in various sizes and styles, and you can choose one that fits your needs and budget.
- Desk drawer: A desk drawer is a convenient way to store small items, such as pens, notepads, and USB drives. You can choose from a variety of drawer styles, including pull-out, slide-out, and pull-down.
Choosing the right storage solution for your studio setup depends on your specific needs and preferences. It is important to consider the size, style, and functionality of the storage solution to ensure that it meets your needs and fits your budget.
Miscellaneous
In addition to the essentials, there are several miscellaneous items that can enhance your studio setup. These items may not be directly related to recording or producing music, but they can make a significant difference in the overall quality of your experience. Here are some examples of miscellaneous items you may want to consider:
- Cables and connectors: High-quality cables and connectors are essential for ensuring clean and reliable signal flow throughout your studio. Depending on your equipment, you may need different types of cables, such as XLR, TRS, or USB. It’s important to choose cables that are durable and well-constructed, as cheap or flimsy cables can introduce noise and interference into your signal chain.
- Microphone stands: A sturdy microphone stand is crucial for positioning your microphone in the optimal location for recording. There are many different types of microphone stands available, ranging from simple desktop stands to large, adjustable boom stands. When choosing a microphone stand, consider the type of microphone you’ll be using, as well as the layout of your studio.
- Headphone stands: If you plan on using headphones for monitoring, a dedicated headphone stand can help keep your studio organized and reduce cable clutter. There are many different types of headphone stands available, ranging from simple desktop stands to more elaborate models with multiple hooks and storage compartments.
- Power strips and surge protectors: Power strips and surge protectors are essential for protecting your equipment from power surges and voltage fluctuations. It’s important to choose a high-quality surge protector with a high joule rating to ensure that your equipment is well-protected. Additionally, consider using power strips with multiple outlets and switches to make it easier to manage your equipment.
Planning and Budgeting
Assessing Your Needs
Determine your recording needs
When assessing your needs for a studio setup, the first step is to determine your recording needs. This includes considering the type of music you want to record, the instruments you will be using, and the desired sound quality.
- What type of music do you want to record? Different genres require different equipment and sound quality.
- What instruments will you be using? You may need specific microphones or preamps for certain instruments.
- What is your desired sound quality? Higher quality equipment will result in better sound quality.
Evaluate your budget
Next, evaluate your budget for the studio setup. This will help you determine what equipment you can afford and what sacrifices you may need to make.
- Make a list of all the equipment you need.
- Research the prices of each piece of equipment.
- Consider used or refurbished equipment as an alternative to new equipment.
- Determine if you can afford to purchase all the equipment at once or if you need to make a plan to purchase it over time.
Research and compare equipment
Once you have determined your recording needs and evaluated your budget, it’s time to research and compare equipment. This will help you find the best equipment for your needs and budget.
- Research different brands and models of equipment.
- Read reviews and ratings from other musicians and producers.
- Compare prices and features of each piece of equipment.
- Consider the long-term investment of the equipment and if it will meet your future needs.
By following these steps, you can assess your needs and find the best equipment for your studio setup.
Creating a Budget
Creating a budget is an essential step in setting up a studio. It is crucial to have a clear understanding of how much you can afford to spend on equipment and other necessities. Here are some tips for creating a budget for your studio setup:
- Calculate your expenses: The first step in creating a budget is to calculate all the expenses you will incur. This includes the cost of equipment, software, and other necessities. You should also factor in the cost of rent or a mortgage, utilities, and any other expenses related to your studio.
- Consider used equipment: One way to save money on equipment is to purchase used items. Used equipment can be significantly cheaper than new items, and it can still be of high quality. However, it is important to ensure that the used equipment you purchase is in good condition and has been well-maintained.
- Look for deals and discounts: Another way to save money on equipment is to look for deals and discounts. Keep an eye out for sales and discounts on equipment, and consider purchasing items during the off-season when prices may be lower. You can also consider purchasing items from online marketplaces or auction sites, where you may be able to find good deals on equipment.
By following these tips, you can create a budget that will help you get the equipment and necessities you need for your studio setup without breaking the bank.
Staying Within Your Budget
When it comes to setting up a studio, it’s important to stay within your budget. Here are some tips to help you do just that:
- Prioritize equipment needs: It’s easy to get caught up in the excitement of setting up a studio and want to buy all the latest and greatest equipment. However, it’s important to prioritize your equipment needs based on the type of studio you’re setting up and the services you plan to offer. For example, if you’re setting up a home studio for recording music, you may not need as much expensive equipment as a professional recording studio.
- Shop around for the best deals: Don’t just buy the first piece of equipment you see. Take the time to shop around and compare prices from different suppliers. You may be able to find great deals on equipment online or at local music stores.
- Consider financing options: If you’re short on cash, consider financing options such as a personal loan or a credit card with a low interest rate. Just make sure you can afford the payments and that you’re not overspending.
By following these tips, you can stay within your budget and still set up a high-quality studio.
FAQs
1. What are the essential elements of a studio setup?
Answer:
The essential elements of a studio setup include a quiet and comfortable workspace, reliable and fast computer or laptop, high-quality headphones or speakers, microphone, and webcam. Depending on the type of work, additional equipment such as a graphics tablet, external hard drive, and specialized software may also be necessary.
2. What type of computer or laptop is recommended for a studio setup?
A computer or laptop with a fast processor, ample memory, and a large storage capacity is recommended for a studio setup. A Mac or a PC can be used, depending on the user’s preference and the specific software they plan to use. It is also recommended to have an external hard drive for backup and storage purposes.
3. What kind of microphone is suitable for a studio setup?
A high-quality microphone that is designed for recording and voice-over work is suitable for a studio setup. Some popular options include USB microphones, condenser microphones, and dynamic microphones. It is important to choose a microphone that fits the user’s budget and specific needs.
4. Are high-quality headphones or speakers necessary for a studio setup?
Yes, high-quality headphones or speakers are necessary for a studio setup. They help to ensure clear audio quality and prevent feedback and echo. Closed-back headphones are recommended as they minimize sound leakage and provide better isolation. High-quality speakers can also provide a more accurate representation of the audio.
5. What software is necessary for a studio setup?
The software necessary for a studio setup depends on the type of work being done. Some common software for audio recording and editing include Audacity, Adobe Audition, and Pro Tools. For graphic design and video editing, software such as Adobe Photoshop, Illustrator, and Premiere Pro are commonly used. It is important to choose software that fits the user’s needs and budget.
